
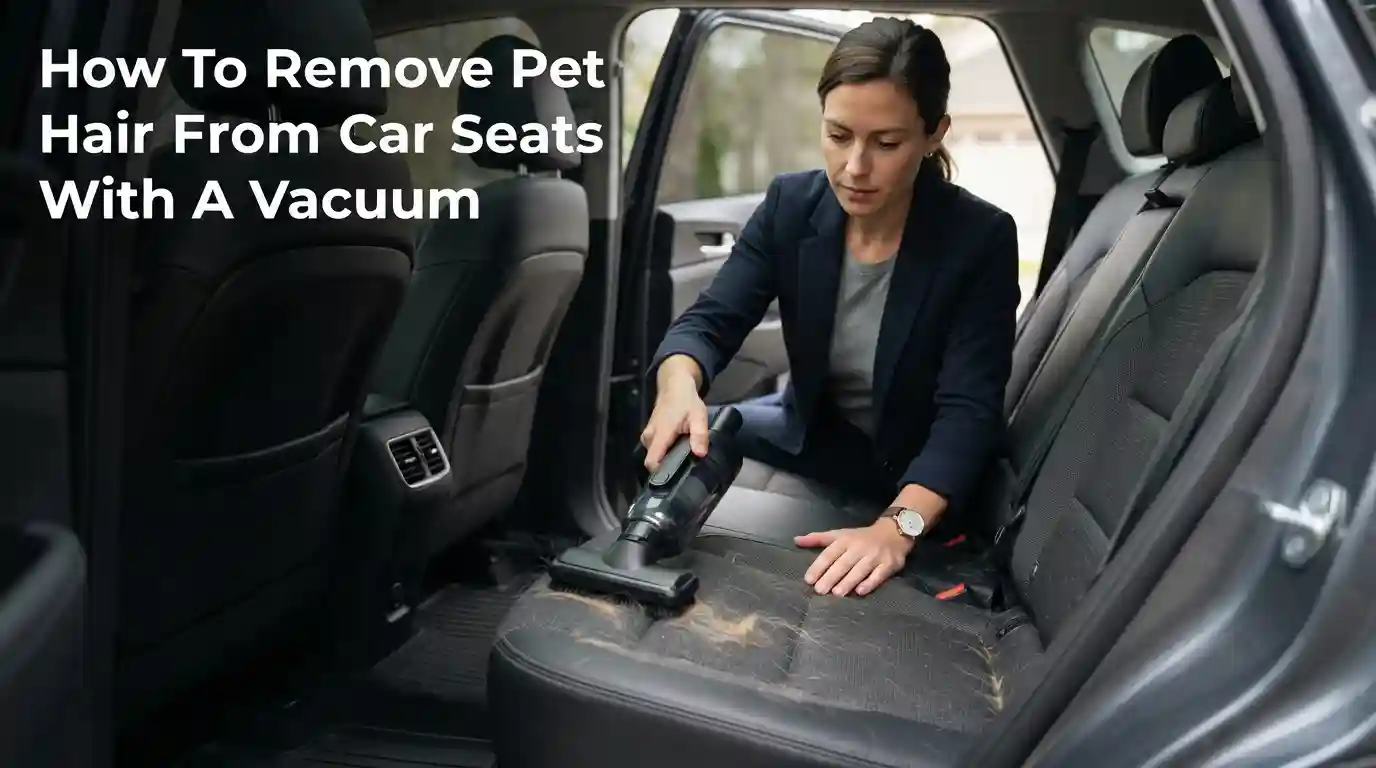
Pet hair on car seats is one of the most stubborn cleaning challenges a vehicle owner faces. Those fine strands weave deep into upholstery fibers, cling through static electricity, and seem to multiply no matter how often you vacuum. The good news? With the right equipment and a systematic technique, you can get your seats genuinely hair-free in a single session — not just “mostly clean.”
This guide covers everything you need to know about removing pet hair from car seats with a vacuum in 2026, including tool selection, material-specific techniques, and the mistakes that keep people stuck in an endless cycle of re-vacuuming.
First, Assess Your Seat Material
Before you pick up a vacuum, look closely at what you’re working with. The approach that works beautifully on cloth upholstery can damage leather, and vice versa.
Fabric seats are woven, which means hair physically lodges between the threads. They also generate more static electricity, making the hair cling harder. Expect to spend more time on these.
Leather and vinyl seats have smooth, non-porous surfaces. Hair sits on top rather than embedding itself, but it still finds its way into stitching, perforations, and the crevices where the seat meets the frame.
Mixed materials — like leather bolsters with fabric centers — require switching techniques mid-cleaning. Take note of these zones before you start so you’re not using the wrong attachment on the wrong surface.
Choose the Right Vacuum for the Job
Not every vacuum is suitable for car seat cleaning. In 2026, the market offers more purpose-built car vacuums than ever, and knowing what separates an effective one from a frustrating one will save you time and money.
Suction Power and Airflow
Suction is measured in two common ways: Air Watts (AW) and Pascals (Pa). For lifting embedded pet hair, look for a vacuum that delivers at least 100 AW or 12,000 Pa — this is the practical threshold where hair starts coming out rather than just getting pushed around. Anything weaker will skim the surface and leave the deep stuff behind.
Corded vs. Cordless: Honest Trade-Offs
| Feature | Corded | Cordless |
|---|---|---|
| Suction consistency | Steady, no drop-off | Declines as battery drains |
| Runtime | Unlimited | Usually 15–40 minutes |
| Portability | Limited by cord length | Fully portable |
| Power ceiling | Higher maximum suction | Improving, but lower in budget models |
For a thorough seat cleaning, a corded vacuum gives you consistent power from start to finish. Cordless models are excellent for quick touch-ups between washes, but if you’re doing a deep clean with pre-treatment and multiple passes, battery life can become a limiting factor.
HEPA Filtration Matters More Than You Think
Pet hair carries dander, saliva proteins, and allergens. A HEPA filter traps these fine particles instead of blowing them back into your car’s cabin. If you or your passengers have allergies, a HEPA filter can be especially useful. Many quality car vacuums in 2026 include washable HEPA filters, which can also save money over time.
If you’re still deciding which vacuum features matter most, see our guide on choosing a car vacuum cleaner for more help.
The Essential Attachments for Pet Hair Removal
Your vacuum’s attachments determine whether the job takes ten minutes or an hour. Here’s what you need and why:
- Crevice tool — This long, narrow nozzle reaches between seats, along seams, and into the gaps where hair accumulates. It’s non-negotiable for car interiors.
- Upholstery brush — Soft bristles agitate fabric fibers, loosening hair so suction can lift it. Use this on cloth seats only.
- Pet hair turbo brush — A rotating brush head specifically designed for embedded fur. Extremely effective on fabric, but keep it away from leather.
- Wide nozzle — Useful for covering large flat surfaces quickly, like the rear bench seat.
If your vacuum didn’t come with these, check whether the manufacturer sells them separately. Alternatively, consider a dedicated handheld unit, which often arrives with better attachments out of the box. We cover the strengths and limits of this approach in our breakdown of whether handheld vacuums are good for cars.
Prepare the Seats Before You Vacuum
This is the step most people skip, and it’s the reason they end up vacuuming the same seat week after week. Pre-treating loosens the hair’s grip so your vacuum can actually extract it.
The Rubber Glove Method
Put on a dry rubber glove and rub your hand firmly across the seat in circular motions. The friction creates static that causes hair to ball up and release from the fabric. You’ll see clumps form — collect these by hand or vacuum them up afterward.
The Squeegee Trick
A clean window squeegee works surprisingly well on fabric seats. Pull it across the upholstery in long, sweeping strokes. The rubber edge drags hair to the surface and gathers it into ridges you can then vacuum away.
Dryer Sheet Shortcut
Running a dryer sheet over the seat before vacuuming does two things: it reduces static cling and leaves a light fragrance. This isn’t a replacement for rubber gloves or brushes, but it’s a useful addition — especially on dry winter days when static is at its worst.
Step-by-Step Vacuuming Process for Fabric Seats
Fabric upholstery requires agitation combined with suction. Here’s the sequence that works:
1. Start with the Brush Attachment
Attach the upholstery brush and work in small sections — roughly the size of your hand. Use firm pressure and short, overlapping strokes. Move back and forth in one direction first, then repeat perpendicular to that direction. This cross-hatching catches hair that lies in different orientations.
2. Angle the Brush
As you vacuum, tilt the brush slightly so the bristles “comb” the fabric rather than just pressing flat against it. This lifts the fibers and exposes embedded hair to the suction opening.
3. Slow Down Over Problem Areas
If you see a concentrated patch of hair, don’t speed through it. Slow strokes give the suction more time to extract deeply embedded strands. Keep the vacuum moving, but deliberately.
4. Finish with the Crevice Tool
Run the crevice tool along every seam, edge, and stitch line. Hair collects in these spaces disproportionately, and you’ll be surprised how much comes out of a single seam. Take a look at our detailed method for vacuuming under car seats effectively to extend this thoroughness to the floor area.
Step-by-Step Vacuuming Process for Leather and Vinyl Seats
Leather is forgiving in some ways and fragile in others. The approach is simpler, but precision matters.
1. Use a Standard Nozzle
A wide nozzle with moderate suction is sufficient for the flat surfaces of leather seats. Move it in overlapping straight lines, letting the suction do the work. There’s no need for the agitation you’d use on fabric — pressing hard accomplishes nothing and risks scratching the surface.
2. Handle Stitching and Grain Carefully
Hair loves the perforations and stitch lines in leather seats. Use the crevice tool along these areas, moving slowly. For perforated leather — common in ventilated seats — give each perforated panel extra time, as hair can work its way into the tiny holes.
3. Skip Abrasive Brushes on Leather
Never use a stiff-bristled brush on leather or vinyl. Even soft-bristled brushes can dull the finish over time. If you need to loosen hair, use a damp microfiber cloth to wipe the surface first — the moisture helps release the hair, and then suction lifts it away.
4. Check the Side Bolsters
The raised side bolsters on most car seats collect heavy hair because that’s where your pet sits or leans. Run the crevice tool along the inner and outer edges of these bolsters, then use the wide nozzle for the top surface.
The “Dry Rubber First” Technique for Pet Hair Tools
If you’re using a purpose-made pet hair removal tool (like a silicone brush or a rubber broom), there’s a specific order of operations that works better than alternating randomly.
First, use the tool dry to loosen and clump the hair. Then vacuum the clumps. Then, if needed, slightly dampen the tool and make a second pass — the moisture breaks down remaining static and picks up finer hairs that the dry pass missed. Finally, vacuum once more to remove the loosened residue.
This three-part sequence — dry, damp, vacuum — is the closest thing to a guarantee you’ll get against stubborn pet hair on fabric.
Common Mistakes That Undermine Your Efforts
Vacuuming on the Wrong Suction Setting
Many car vacuums have multiple power levels. Using a low setting for embedded hair wastes time. For fabric seats, use the highest setting your vacuum offers. The exception is leather, where high suction can be unnecessary and slightly riskier around seams.
Emptying the Dustbin Too Late
A full dustbin or clogged filter reduces suction dramatically — sometimes by 50 percent or more. Empty the bin halfway through a thorough seat cleaning, and check the filter before you start. There’s more detail in our article on what features a good car vacuum should have, but the short version is: a clean filter is the difference between a productive session and a frustrating one.
Skipping the Crevice Tool Entirely
The big flat areas look cleaner, so it’s natural to focus there. But the seams and gaps harbor the majority of fine hair. Skipping them means you’ll see hair resurface the moment you shift in the seat.
Using a Regular Household Vacuum in a Car
Full-size home vacuums are powerful, but they’re awkward in a car. The hoses are too short to reach rear seats comfortably, and their bulk makes maneuvering difficult. It’s possible — we discuss the logistics of using a regular vacuum for your car — but a purpose-built car vacuum or a shop vac with a long hose is more practical.
Maintaining Your Vacuum for Long-Term Performance
A vacuum is only as good as its maintenance. This is especially true for car vacuums, which accumulate fine dust and pet dander more aggressively than household units.
Clean the filter monthly if you vacuum your car weekly. Most washable filters can be rinsed under running water and air-dried. Do not dry them with heat — this can warp the filter media.
Check the hose for clogs if suction seems weak. Pet hair compacts into clumps that can block the hose entirely.
Empty the dustbin after every use, not before the next one. Leaving dust sitting in the bin lets it compact and makes emptying messier later.
Inspect the brush attachments for hair wrapped around their rollers. This is especially common with turbo brushes, and wrapped hair seriously reduces their effectiveness. It takes thirty seconds to check and clear them.
When to Consider Professional Cleaning
If your seats haven’t been properly cleaned in years, or if your pet has a heavy shedding coat, a DIY vacuum session might not be enough. Professional interior detailers use industrial extraction machines that combine heated cleaning solution with powerful suction — a process that removes hair, stains, and odors simultaneously.
Consider professional cleaning in these situations:
- The fabric is heavily matted with hair and dander
- There’s a visible odor coming from the seats
- You’ve tried vacuuming multiple times with limited results
- You’re preparing to sell the car and want the interior to look its best
After a professional clean, you’ll be starting from a much better baseline for ongoing maintenance.
Preventing Pet Hair Accumulation in the Future
An ounce of prevention genuinely is worth a pound of cure — or at least a significant reduction in vacuuming time.
Use a Seat Protector
A washable seat cover or protector catches the hair before it reaches your upholstery. This is the single most effective prevention method. When choosing one, consider how it affects seat safety features — our article on car seat covers and airbag safety covers the important considerations.
Brush Your Pet Before Car Trips
A quick five-minute brushing before your pet gets in the car removes loose hair before it ever reaches the seat. This is the cheapest prevention method available, and it reduces the amount of hair in your car by a significant amount.
Use a Travel Blanket
A dedicated car blanket for your pet gives them a comfortable place to sit and catches most of the shed hair. Wash the blanket weekly, and your seats stay comparatively clean.
Regular Maintenance
Vacuum your car seats weekly, even if they don’t look dirty. Fine hair accumulates invisibly, and waiting until you can see it means it’s already embedded deeper than a quick pass can reach.
Frequently Asked Questions
Does a regular home vacuum work for pet hair on car seats?
Yes, a home vacuum can work, but it depends on reach and attachments. Most household vacuums have hoses too short to comfortably reach car seats, and few come with the narrow tools needed for seat crevices. A shop vac with a long hose or a purpose-built car vacuum is more practical. For a detailed comparison, see our guide on using a regular vacuum in your car.
Why does pet hair stick so stubbornly to fabric car seats?
Pet hair has microscopic barbs that hook into woven fabric loops, and friction against the seat creates static electricity that further binds the hair. Overcoming both requires agitation to release the hair and strong suction to extract it. Pre-treating with a rubber glove or brush handles the physical grip, while consistent suction handles the rest.
Should I use a brush attachment on leather car seats?
No. Brush attachments — even soft-bristled ones — can dull leather finish over time. Use a standard nozzle for flat areas and a crevice tool for seams, stitching, and perforations. For particularly stubborn hair, a damp microfiber cloth helps release hairs for suction pickup.
How often should I clean my vacuum filter when removing pet hair?
Inspect the filter visually every few uses and clean it monthly if you vacuum weekly. Pet dander and fine dust clog filters faster than regular household dirt. A clogged filter significantly reduces suction power, making your pet hair removal much less effective. Rinse washable filters with water and air-dry completely.
Is it better to use a corded or cordless vacuum for car seats?
Corded vacuums provide consistent suction throughout the entire cleaning session, which matters for embedded pet hair. Cordless models offer convenience but can lose power as the battery drains — usually mid-cleaning. If you’re doing quick touch-ups, cordless is fine. For thorough deep cleaning, a corded option is more reliable.
How long does a thorough pet hair vacuuming session take?
Expect 15 to 30 minutes for two front seats, and up to an hour for a full car including the rear bench. This includes pre-treating with a rubber glove or brush, vacuuming with the correct attachments, and doing a final pass with a crevice tool. Rushing the process typically means redoing it the following week.
Conclusion
Removing pet hair from car seats with a vacuum in 2026 is entirely achievable with the right preparation, tools, and technique. Start by identifying your seat material. Pre-treat fabric seats with a rubber glove, squeegee, or pet hair brush to loosen embedded strands. Match your vacuum attachments to the surface — upholstery brushes for fabric, crevice tools for seams and leather, and standard nozzles for wide areas. Take your time, work in overlapping passes, and keep your vacuum’s filter clean throughout.
Your next step is simple: check the filter on your car vacuum, empty the dustbin, and give your front seats a focused 15-minute session using the technique above. Once you see how much hair a proper method extracts, you’ll never go back to the old way.

Leave a Reply