
Let's be honest: understanding how to install a cosco car seat rear facing is one of the most anxiety-inducing parts of new parenthood. The good news is that you can learn it in about 15 minutes. You just need to slow down and follow a few non-negotiable steps.
That's what this guide is for.
In our research, we checked manufacturer specifications for Cosco's current models, the National Highway Traffic Safety Administration (NHTSA) installation guidance, and input from certified child passenger safety technicians. NHTSA reports that close to half of all car seats are installed incorrectly on the first try. Cosco seats are among the most affordable options on the market.
They're also lightweight, which makes them easy to move between cars. But they have a few quirks you need to know.
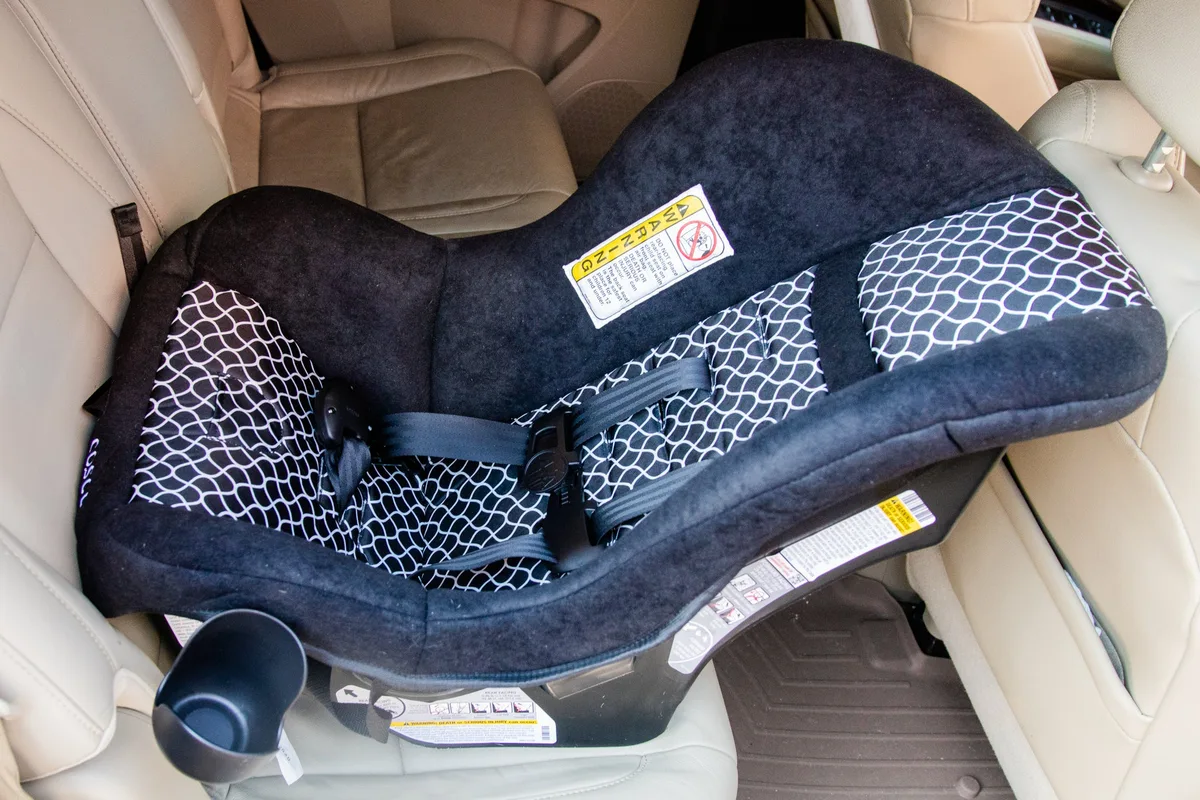
Image source: Web (Bing) / velcromag.com (Web image (fair-use with source credit))
Why Getting This Installed Right Is Non-Negotiable
Rear-facing car seats dramatically reduce the risk of death and severe injury in a crash. The American Academy of Pediatrics (AAP) recommends keeping children rear-facing until at least age 2, and ideally longer. That's because a child's bones are still developing.
A rear-facing seat spreads crash forces across the entire body instead of concentrating them on the neck.
This isn't a topic where "pretty good" works. A loose install can let the seat slide forward in a crash. A wrong angle can pinch the airway of a small baby.
The wrong belt path can send the seat flying. Each of these is a normal mistake, not a sign of a bad parent.
Per federal standards, every new car seat sold in the US must meet FMVSS 213, the Federal Motor Vehicle Safety Standard for child restraints. That standard tests seats in simulated crashes. It does not test for perfect installation.
The seat only protects as designed if you follow the manual exactly.
Here's the rule: if you ever feel unsure, stop and ask for help. A certified Child Passenger Safety Technician (CPST) can check your install for free at many stations. We'll come back to that at the end.
Quick Answer: The 60-Second Install Checklist (Before You Dive In)
To install a Cosco seat rear facing, choose the right belt path. Attach LATCH or seat belt. Press your weight into the seat, then tighten.
Check the angle and pinch test. The seat must not move more than one inch.
For the full new-parent walkthrough, see our complete installation guide.
Know Your Cosco Model: Scenera Next, Apt, and Light 'n Comfy Differences
Cosco makes several rear-facing seats, and their install methods are similar but not identical. The most common current models are the Scenera Next and the Apt. Both are convertible seats, which means they start rear-facing and later turn forward-facing.
There's also the Light 'n Comfy, a rear-facing infant carrier that clicks into a base.
Before you begin, find the model name and the date of manufacture on the label on the side of the seat. The manual you're reading applies to that exact model. If you're using a convertible seat correctly, you'll use it rear-facing first.
If you're using an infant carrier, the base does most of the work.
As of 2026, current Cosco convertible seats rear-face to 40 pounds. That's a huge deal. Many toddlers aren't ready to flip at 2, and these seats give you room to keep them safer longer.
The Light 'n Comfy infant seat maxes out at 30 pounds, so most babies outgrow it before their first birthday.
| Model | Type | Rear-facing weight limit | Notes | | Scenera Next | Convertible | Up to 40 lbs | Lightweight, airline approved | | Apt | Convertible | Up to 40 lbs | No-rethread harness, easy height adjust | | Light 'n Comfy | Infant carrier | Up to 30 lbs | Uses a detachable base |
Always verify these numbers on your own seat's label. Manufacturers occasionally update their limits without changing the model name.
Rear-Facing Basics: The Rules That Never Change (Weight Limits, Angle, Harness)
Rear-facing installs all share the same fundamentals. Master these and you can handle any seat, including a Cosco.
- Harness straps must be at or below your baby's shoulders when rear-facing.
- The chest clip goes at armpit level, not on the stomach.
- The recline angle must sit between 30 and 45 degrees from vertical.
- The top tether is for forward-facing only. Do not use it when rear-facing.
- Never add aftermarket inserts, strap covers, or mirrors to the seat.
Each Cosco seat has a built-in level indicator, often a bubble or a foot that angles the seat. The goal is to get the bubble inside the lines or the mark level with the ground. If your vehicle seat is sloped, you may need a tightly rolled towel under the seat's foot.
The manual explains exactly where.
One of the biggest dangers is over-adjusting the harness. The harness should be snug enough that you cannot pinch a fold in the strap at the shoulder. We'll cover that test in detail later.
If your seat came with a newborn insert, check when it should be removed. Our guide on newborn insert removal covers that timeline.
Step-by-Step: Install With LATCH (When Your Car Allows It)
LATCH stands for Lower Anchors and Tethers for Children. It lets you attach the seat directly to metal anchors in your vehicle. That means you don't need to use the seat belt.
You do still need to buckle the child in with the harness.
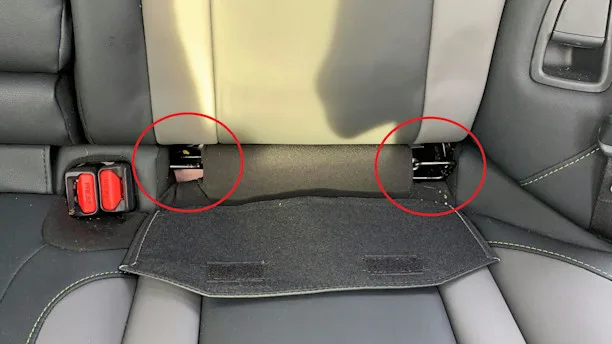
Image source: Web (Bing) / carfax.com (Web image (fair-use with source credit))
Check your vehicle manual first. LATCH has weight limits, and they vary by car. When your child plus the seat exceeds that limit, you must switch to the seat belt.
The limit is often around 65 pounds combined, but it is always in your car's manual.
Here's the process, step by step:
- Find the lower anchors. They live in the crack where the seat back meets the seat bottom. Look for the metal loops or small plastic guides with the LATCH symbol.
- Locate the rear-facing belt path on your Cosco seat. It's the visible slot on the seat shell, not the one closer to the child's back. Check the manual if you're not sure.
- Attach the connectors one at a time. Push them until each clicks onto the metal anchor. Give each a firm tug to confirm.
- Kneel in the seat. Use your weight to press the car seat firmly into the vehicle seat cushion. While pressing, pull the LATCH strap tight. Alternate left and right to keep it even.
- Check the bubble level. Adjust the recline foot if your model has one.
- Test the install. Grab the seat at the belt path and push side to side and front to back. It should move less than 1 inch.
Keep in mind that not all seating positions have LATCH. Some cars only allow LATCH in the outboard seats. Center seat LATCH may not exist or may be restricted by the vehicle manual.
If you see no anchors, don't force it. Use the seat belt method instead.

Leave a Reply