
Installing a car seat correctly is one of the most important skills any parent or caregiver can master. A properly installed child restraint reduces the risk of injury in a crash by as much as 71% for infants and 54% for toddlers, according to the National Highway Traffic Safety Administration (NHTSA). Yet the same agency has found that nearly half of all car seats are installed incorrectly—meaning countless children are riding without the full protection their seats were designed to provide.
The good news? You don’t need to be a mechanic or a safety engineer to get it right. You just need to follow a clear process, read the right manuals, and know what common mistakes to avoid. This guide walks you through every step, from choosing the right installation method to performing the critical safety checks that confirm your seat is secure. For more on this, see our guide on what is a convertible car seat.
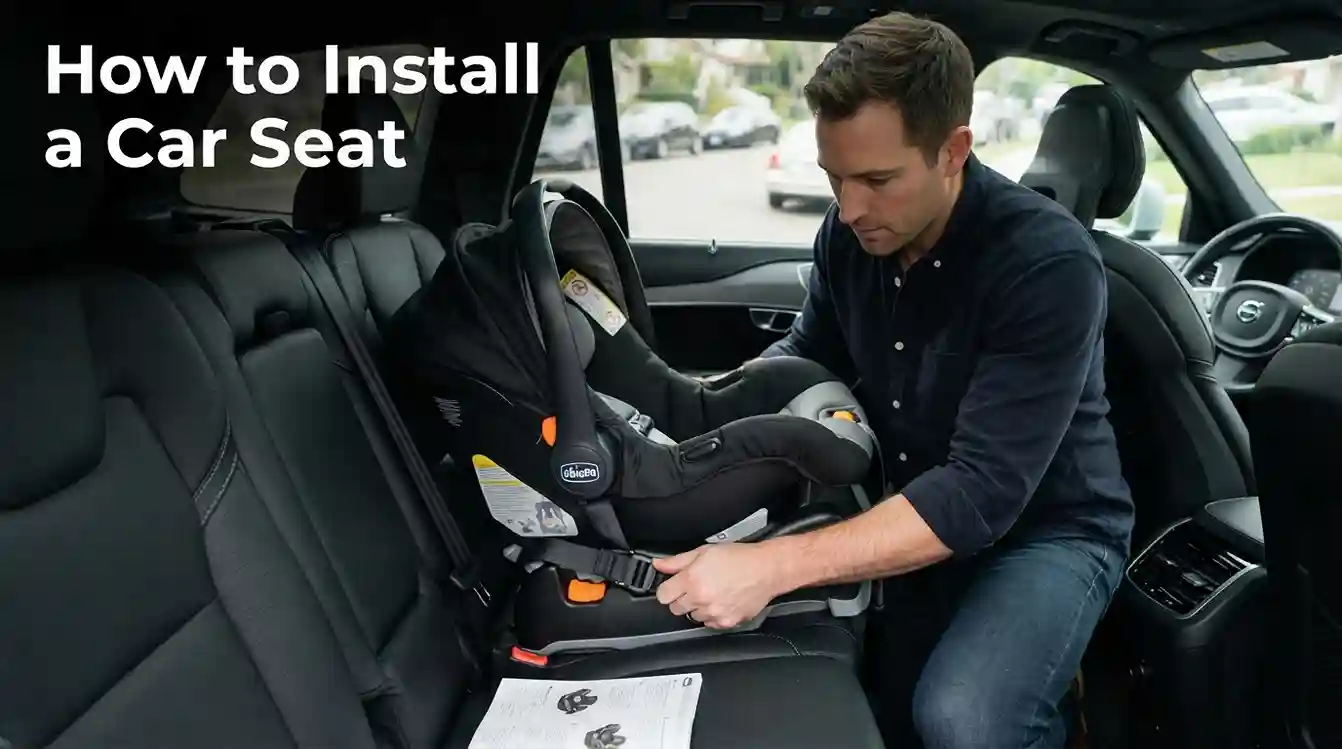
Quick Answer: The 30-Second Version
Before we dive into the details, here’s the essential summary:
- Read both manuals—your car seat instruction book and your vehicle’s owner’s manual.
- Choose your method—either the seat belt or the LATCH system.
- Secure the seat tightly—no more than one inch of movement at the belt path.
- Adjust the harness—snug enough that you can’t pinch any slack at the collarbone.
- Verify the recline angle—correct for your child’s age and seat orientation.
- Test everything—perform the wiggle test and check all connections.
This process applies whether you’re installing an infant carrier, a convertible seat, or a booster. The specifics vary by model, but the principles remain the same.
Why Correct Installation Matters More Than You Think
A car seat is only as effective as its installation. When properly secured, the seat distributes crash forces across the strongest parts of your child’s body—the hips, shoulders, and chest. When installed incorrectly, those forces can shift to vulnerable areas like the head, neck, and abdomen, dramatically increasing the risk of serious injury. For more on this, see our guide on when to remove newborn insert from car seat.
Crash force math is unforgiving: at just 30 mph, a crash generates forces equivalent to a fall from a three-story building. The car seat’s job is to manage those forces, and it can only do that if it stays firmly in place.
There’s also a practical reality every parent faces: car seats get installed and reinstalled constantly. They move between vehicles, get cleaned, get adjusted as children grow. Each time, there’s an opportunity for error. That’s why learning the correct procedure once—and checking it regularly—is so valuable. For more on this, see our guide on how do you put car seat in shopping.
Seat Belt vs. LATCH: Which Installation Method Should You Use?
Your vehicle offers two ways to secure a car seat: the seat belt system or the LATCH system (Lower Anchors and Tethers for Children). Both are safe when used correctly, but they work differently and have different considerations.
| Feature | Seat Belt Installation | LATCH Installation |
|---|---|---|
| Availability | Works in every vehicle and every seating position | Only works where lower anchors are present |
| Weight limit | No combined weight restriction | Must check manufacturer limits (typically 65 lbs combined) |
| Difficulty | Slightly more complex; requires locking the belt | Often simpler; direct connection to vehicle frame |
| Common errors | Belt not locked, wrong belt path | Exceeding weight limits, forgetting the tether |
Seat Belt Installation
The seat belt method uses your vehicle’s lap and shoulder belt to hold the car seat in place. It’s the most universal option—it works in every vehicle, and you don’t need to check weight limits. For more on this, see our guide on can you rent a car seat with a.
The key to seat belt installation is locking the belt. Most modern vehicles have a locking mechanism that activates when you pull the belt all the way out and let it retract slowly. Some vehicles have an automatic locking retractor, while others require a locking clip that comes with your car seat. Your vehicle’s owner’s manual will tell you which system you have.
LATCH System Installation
LATCH was designed to make installation easier and more consistent. Instead of threading a seat belt through the car seat, you connect the seat’s lower anchors directly to metal bars built into your vehicle’s seat. For more on this, see our guide on do car seat covers damage leather seats.
The critical caveat with LATCH is weight limits. Each vehicle and car seat pair has a maximum combined weight of the child plus the car seat (usually around 65 pounds, but check your manuals). Once your child exceeds this limit, you must switch to seat belt installation.
For forward-facing seats, the LATCH system also includes a top tether—a strap that connects the top of the car seat to an anchor point behind the vehicle seat. This tether significantly reduces forward head movement in a crash and should always be used when available.
Critical Mistakes That Compromise Safety
Even experienced parents make installation errors. Here are the most dangerous mistakes we see, and how to avoid them:
Loose Installation
The car seat should not move more than one inch side-to-side or front-to-back at the belt path. If it does, it’s too loose. A loose seat can shift dangerously during a crash, reducing the harness’s ability to restrain your child properly.
Harness Too Loose
You should not be able to pinch any slack in the harness straps at your child’s collarbone. A loose harness can allow your child to slide forward during a crash—a phenomenon called “submarining”—which can cause serious abdominal injuries.
Incorrect Harness Position
The harness straps must be at or below your child’s shoulders in rear-facing mode, and at or above the shoulders in forward-facing mode. Wrong positioning can cause the straps to slip off the shoulders during impact.
Wrong Recline Angle
For infants, the seat must be reclined at the angle specified in the manual (typically 30-45 degrees) to keep their airways open. For older children in forward-facing seats, a more upright angle is correct. Many seats have built-in level indicators to help with this.
Forward-Facing Seat Without Tether
If your forward-facing seat has a top tether, use it. Always. The tether can reduce forward head movement by up to 4 inches in a crash—a significant difference when it comes to preventing head injuries.
Using the Wrong Belt Path
Car seats have different belt paths for rear-facing and forward-facing installation. Using the wrong path compromises stability and can make the seat unsafe.
Expired or Recalled Seats
Car seats expire. Most last six to ten years from the date of manufacture. The plastic degrades over time, and the seat may not perform as designed in a crash. Check the expiration date on your seat’s label, and check for recalls before installation.
Step-by-Step Guide: Installing a Rear-Facing Car Seat
Rear-facing is the safest orientation for infants and young toddlers. Here’s how to install one correctly:
Step 1: Read Both Manuals
This is non-negotiable. Your car seat manual explains the specific belt paths, weight limits, and harness adjustments for your model. Your vehicle manual shows you where the LATCH anchors are located and how to lock the seat belt. Skipping this step is the single most common cause of installation errors.
Lost your manuals? Most manufacturers offer digital copies on their websites. Visit the NHTSA’s car seat resource page for links to manufacturer manuals and recall information.
Step 2: Position the Seat
Place the car seat in the back seat of your vehicle. The center position is generally safest because it’s farthest from any potential side impact, but only use it if you can get a tight installation there. Many vehicles have LATCH anchors only in the window positions.

Image source: Pexels / Lee Salem (Pexels License)
Step 3: Route the Belt or Connect LATCH
For seat belt installation, thread the belt through the rear-facing belt path marked on the car seat. Buckle it, then pull the belt all the way out to activate the locking mechanism.
For LATCH installation, connect the car seat’s lower anchors to the vehicle’s anchor points. You should hear a click when they’re properly engaged.
Step 4: Tighten Securely
Apply firm pressure downward on the car seat—using your knee or hand—while pulling the seat belt or LATCH strap tight. This removes any slack from the system.
Step 5: Perform the Wiggle Test
Grasp the car seat at the belt path and try to move it side-to-side and front-to-back. If it moves more than one inch, tighten again. A rock-solid seat is a safe seat.
Step 6: Check the Recline Angle
Most infant seats have a built-in level indicator. Adjust the angle until the indicator is within the correct range. Many seats allow you to use a rolled towel or pool noodle under the base to achieve the right angle.
Step-by-Step Guide: Installing a Forward-Facing Car Seat
Once your child outgrows the rear-facing limits of their seat, they’ll transition to forward-facing with a harness. The process is similar, but there are important differences:
Step 1: Route the Belt Through the Forward-Facing Path
The belt path is different for forward-facing installation. Consult your manual to make sure you’re using the correct one.
Step 2: Use the Top Tether
This is the most commonly skipped step. The top tether connects the top of the car seat to an anchor point in your vehicle, usually located on the back of the rear seat or the floor of the trunk. Attach it and tighten it fully.
Step 3: Tighten and Test
Just like rear-facing, tighten the seat belt or LATCH straps firmly, then perform the wiggle test. The seat should not move more than one inch in any direction.
Adjusting the Harness for a Perfect Fit
The harness is your child’s primary protection in a crash. A properly fitted harness keeps them securely in the seat and distributes crash forces across their strongest body parts.
The Pinch Test
After buckling your child in, try to pinch the harness strap at their collarbone. If you can pinch any fabric, the harness is too loose. Tighten until you can’t pinch any slack.
Harness Position by Orientation
- Rear-facing: Straps should be at or below your child’s shoulders.
- Forward-facing: Straps should be at or above your child’s shoulders.
Chest Clip Position
The chest clip should sit at armpit level—not at the stomach, not at the neck. This keeps the harness straps positioned correctly over the shoulders.
Common Fitting Mistakes
- Leaving the harness loose to keep a sleeping baby comfortable—never do this.
- Adding bulky clothing under the harness—this creates slack that reduces protection.
- Forgetting to re-adjust the harness as your child grows. Check the fit every ride.
Many modern car seats feature no-rethread harness systems that make height adjustments easier. If you’re shopping for a new seat, this is a valuable feature to consider.
The Wiggle Test: How to Verify Your Installation
The wiggle test is your final verification that the car seat is properly secured. Here’s how to do it correctly:
- Grasp the seat at the belt path—where the seat belt or LATCH strap passes through the car seat.
- Push side-to-side with firm pressure.
- Pull front-to-back with firm pressure.
- Measure the movement—anything less than one inch is acceptable.
If the seat moves more than one inch, loosen the system, press down harder, and re-tighten. Repeat until it’s rock solid.
Why the Wiggle Test Matters
A car seat that shifts during a crash can’t effectively manage crash forces. The seat needs to stay in position so the harness can do its job—keeping your child from moving too far forward and striking the vehicle interior.
Think of it like this: a wobbly table can’t hold a hot cup of coffee safely. A wobbly car seat can’t protect your child safely. The physics are simple—stability equals safety.
When to Bring in a Professional: CPST Inspections
Even if you’ve followed every step perfectly, there’s value in having a second set of trained eyes on your installation. Certified Child Passenger Safety Technicians (CPSTs) are trained to identify subtle installation errors that are easy to miss.
What a CPST Check Involves
A technician will walk through your installation with you and your child present. They’ll check:
- Belt routing and locking
- LATCH connection and weight limits
- Harness fit and positioning
- Recline angle
- Tether usage
- Seat placement in the vehicle
They’ll also answer any questions and offer personalized advice for your specific vehicle and seat combination.
How to Find a CPST
Many police departments, fire stations, hospitals, and children’s organizations offer free car seat inspection events. You can also find technicians through the NHTSA’s car seat inspection locator or by asking your pediatrician.
The inspection takes about 30-45 minutes and is well worth the time, especially for first-time parents or when transitioning between seat types.
Legal Requirements and Best Practices for 2026
Child passenger safety laws vary by state and province, but some general principles apply across the board:
Rear-Facing Requirements
Most states now require children to remain rear-facing until at least age 2, and many experts recommend keeping children rear-facing until they reach the maximum height or weight limit of their convertible seat—often around age 3-4. The American Academy of Pediatrics recommends rear-facing as long as possible.
Forward-Facing Requirements
Once children outgrow rear-facing limits, they should use a forward-facing seat with a harness—typically until age 4-7 or until they reach the seat’s weight limit.
Booster Seat Requirements
Children should use a booster seat until the vehicle’s seat belt fits properly on its own. This typically happens when they’re between 8 and 12 years old and about 4’9″ tall. The lap belt should rest across the upper thighs, and the shoulder belt should cross the chest and shoulder—not the neck or face.
Current Recommendations
For the most up-to-date guidance on child passenger safety, check the American Academy of Pediatrics recommendations and your local traffic safety authority.
Car Seat Expiration and Replacement Guidelines
Car seats have expiration dates for a reason. Over time, the plastic shell and other materials degrade due to temperature fluctuations, UV exposure, and normal wear. This degradation can compromise the seat’s ability to protect your child in a crash.
How to Find the Expiration Date
Look for a sticker on the bottom or side of the car seat. Most seats expire six to ten years from the manufacture date. If you can’t find the date, check the manufacturer’s website.
When to Replace Immediately
- The seat is past its expiration date—even if it looks fine.
- The seat was involved in a moderate or severe crash—most manufacturers recommend replacement after any crash.
- The seat has visible cracks, wear, or missing parts—structural integrity is compromised.
- The seat has been recalled—check the NHTSA recall database.
What About Minor Crashes?
The NHTSA defines a minor crash as one where the vehicle was drivable, the door nearest the seat was undamaged, no one was injured, and the airbags didn’t deploy. In these cases, check your car seat manual for specific guidance. When in doubt, replace the seat.
Extra Tips for a Comfortable and Safe Ride
Beyond the installation itself, a few additional considerations can improve both safety and comfort:
Car Seat Covers and Accessories
Many parents wonder about adding aftermarket covers or accessories to their car seats. The safest approach is to avoid anything that didn’t come with the seat from the manufacturer. Aftermarket products can interfere with the harness system or affect the seat’s performance in a crash.
A note on car seat covers: If you’re using a seat cover for your vehicle’s upholstery, ensure it doesn’t interfere with the car seat’s installation. Covers that are too thick can prevent a tight fit. If you’re concerned about leather seat damage, consider a thinner protective layer that won’t compromise safety.
Vacuuming and Cleaning
Regularly vacuuming under and around car seats keeps the vehicle clean and prevents debris from interfering with the installation. Use a handheld vacuum with adequate suction to reach tight spaces. If you’re shopping for a car vacuum, consider one with enough power for weekly maintenance.
Travel and Rental Cars
If you’re renting a car, you can usually bring your own car seat or rent one from the rental company. However, if you rent a seat, verify that it’s not expired and that you can install it correctly in your rental vehicle. A poorly fitted rental seat is worse than no seat at all.
Frequently Asked Questions
How tight should a car seat be installed?
A car seat should be tight enough that it doesn’t move more than one inch side-to-side or front-to-back at the belt path. Grasp the seat at the belt path and push firmly—if it moves more than an inch, tighten the belt or LATCH straps further.
Can I use both LATCH and the seat belt at the same time?
Generally, no. Use one method or the other, unless both your car seat and vehicle manuals explicitly allow for both. Using both can create uneven tension and may not provide the intended protection.
How do I know when my child has outgrown their rear-facing seat?
Your child has outgrown the rear-facing seat when their head is less than one inch from the top of the seat shell, or when they exceed the weight or height limit stated in the manual. At that point, they can transition to a forward-facing seat with a harness.
Is the middle seat the safest place for a car seat?
The center seat is generally considered the safest because it’s farthest from any potential side impact. However, only use it if you can achieve a tight installation. Many vehicles have LATCH anchors only in the window positions, so you may need to use the seat belt method in the center.
How long can a child stay in a rear-facing car seat?
The American Academy of Pediatrics recommends keeping children rear-facing until they reach the maximum height or weight limit of their convertible seat—often around age 3-4. Rear-facing provides the best protection for the head, neck, and spine.
What should I do if my car seat was in a crash?
Most manufacturers recommend replacing the car seat after any moderate or severe crash, even if it looks fine. For minor crashes, check your car seat manual for guidance. When in doubt, replace the seat—it’s not worth the risk.
Conclusion
Installing a car seat correctly is a skill every parent needs, and it’s simpler than it seems when you break it down. Read your manuals, choose the right installation method, tighten everything until it’s rock solid, and always use the top tether for forward-facing seats. Check the harness fit every ride, watch for expiration dates, and don’t hesitate to have a professional double-check your work.
The effort you put into getting it right today is the best protection you can give your child tomorrow. If you’re ever in doubt, reach out to a Certified Child Passenger Safety Technician—they’re there to help you get it right.
Your next step: Before your next drive, take five minutes to check your car seat. Perform the wiggle test, check the harness fit, and verify the expiration date. A quick check now can make all the difference.

Leave a Reply