
The average garage swap takes about 30 to 45 minutes for someone who has done it before. But that number hides a wild swing between a 10-minute job and a two-hour project, depending on your car’s layout, your tools, and how much post-install work your vehicle demands.
Understanding how long does it take to replace a car battery comes down to three variables: battery location, terminal access, and whether your car needs electronic registration. As of 2026, most modern vehicles have moved to AGM batteries and smart charging systems that require coding after a swap. That single step can turn a quick driveway task into a service bay appointment.
Quick Answer
Most battery replacements take 15 to 45 minutes for a DIY mechanic. Simple engine bay mounts with top-post terminals run under 20 minutes. Trunk-mounted or under-seat batteries add 20 to 30 minutes.
European luxury vehicles requiring battery registration push the job past one hour. Professional shops typically quote 30 to 60 minutes of labor.
Core Decision Variables: What Actually Determines the Time
The clock starts ticking the moment you open the hood. Your total time breaks down into four areas: access, hardware removal, battery extraction, and reconnection. Each one changes with your specific car.
Battery Location
This is the biggest single factor. A battery sitting front and center under the hood takes minutes to reach. A battery buried in the trunk, under the rear seat, or behind a wheel well liner demands disassembly first.
- Engine bay, top-mounted: Fastest access. You’re looking at 2 to 5 minutes to reach the terminals.
- Engine bay, tucked against firewall: Slower. You may need to remove a cowl cover or air intake box (10 to 15 extra minutes).
- Trunk-mounted: Common on BMW, Mercedes, Audi, and some luxury SUVs. You’ll need to remove trim panels and carpet clips, then lift the battery over the trunk lip. Budget 15 to 20 minutes just for access.
- Under the rear seat: Found in some Japanese hybrids and European wagons. You’re dealing with seat removal, which means finding hidden clips and fasteners.
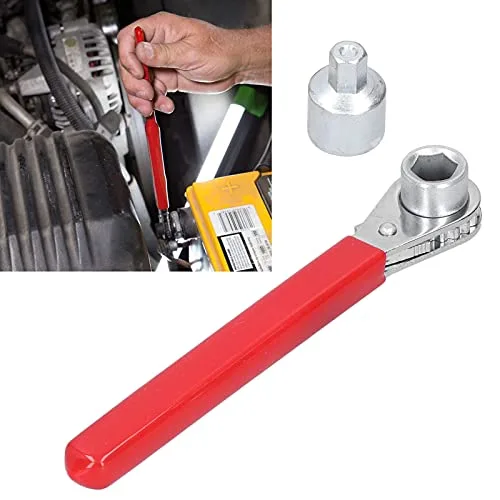
Image source: Web (Bing) / bestcleaningtools.com (Web image (fair-use with source credit))
If you drive a BMW with the battery in the trunk, you’re already at a 45-minute baseline before touching a single terminal.
Terminal Type
Top-post terminals are the classic design. Two 10mm or 13mm bolts, a socket wrench, and you’re in business. Side-post terminals, common on older GM vehicles, need a specialized wrench because the bolt sits recessed in the terminal block.
European clamps use a pinch-bolt design that squeezes the terminal onto the post. These can seize and take extra persuasion, especially if the battery has been in place for years.
Hold-Down Hardware
The battery sits in a tray with a clamp that keeps it from bouncing around. The simplest design uses a J-hook with a single nut. Others use a top bar spanning the battery with two or four bolts.
The trickier designs tuck the hold-down underneath the battery, forcing you to reach blind.
Some vehicles, particularly Japanese models from the 2010s, use a side bracket that requires removing the battery tray entirely. That turns a simple swap into a parts removal job.
Vehicle Brand Quirks
Certain manufacturers add steps that inflate your timeline:
- BMW, Mercedes, Audi, VW: Require battery registration using a scan tool so the car’s charging system knows about the new battery’s capacity and age. This takes 5 to 10 minutes on top of the mechanical work.
- Ford, GM, Chrysler: Some models need a BMS (battery management system) reset. You can often do this through the dash menu, but it adds a step.
- Honda, Toyota, Nissan: Straightforward swaps. No registration needed. Just disconnect, replace, and reconnect.
Per Battery Council International (BCI) standards, group size directly affects fit and terminal orientation. Checking your owner’s manual for the correct BCI group might seem like a wasted minute, but buying the wrong physical size at the parts counter costs you a return trip.
Step-by-Step Process: A Typical Battery Replacement Timeline
Let’s walk through a standard top-post, engine bay replacement. This is the baseline scenario. If your car matches this description, you should finish in under 20 minutes.
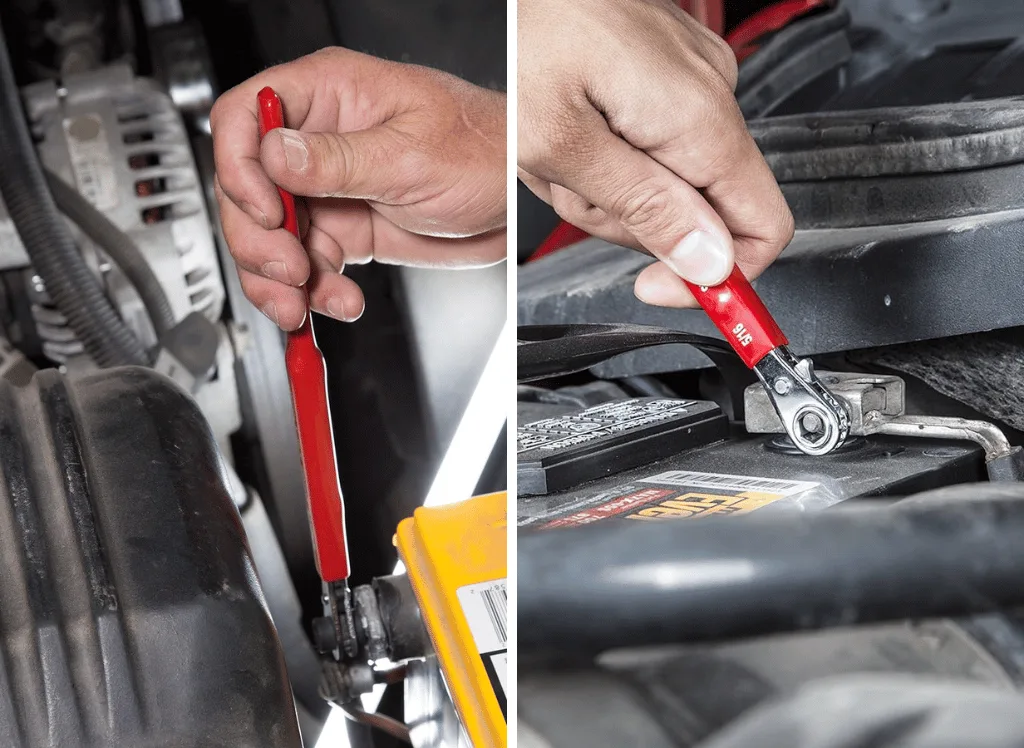
Image source: Web (Bing) / mechanicaddicts.com (Web image (fair-use with source credit))
Step 1: Preparation and Safety (2 minutes)
Park on level ground and shut the engine off. Put on safety glasses and gloves. Locate your battery and identify the negative terminal, marked with a minus sign (-) and usually a black cap.
Confirm you have the right tools within reach.
Step 2: Disconnect the Negative Terminal First (2 to 3 minutes)
Loosen the negative terminal bolt with your wrench. Twist the clamp gently to break it free, then lift it off the post. Tuck it away from the battery so it can’t accidentally touch the positive terminal.
The reason for this order is simple: if your wrench touches a grounded metal part while on the negative side, nothing happens because there’s no complete circuit. Doing it the other way means sparks, potential tool damage, and a risk of igniting hydrogen gas.
Step 3: Remove the Positive Terminal (1 to 2 minutes)
Same process, but on the positive side. Lift it clear and inspect both clamps for corrosion. White or blue crusty buildup means you’ll need to clean these before installing the new battery.
Step 4: Release the Hold-Down Clamp (3 to 5 minutes)
Look for the J-hook or top bar holding the battery in place. Remove the nut or bolt with your socket set. Pull the clamp free and set it aside.
If it’s seized, spray penetrating oil and give it a few minutes to work.
Step 5: Lift Out the Old Battery (2 minutes)
Grab the battery by its carry handle or from the base edges. Lift straight up and out. Batteries are heavy, typically 30 to 40 pounds for a standard flooded unit and up to 50 pounds for an AGM.
Use your legs, not your back.
Step 6: Clean and Prepare the Tray (3 to 4 minutes)
Scrape away any corrosion from the tray with a wire brush. Check for rust and treat it if needed. Clean the terminal clamps with your brush until they’re shiny.
Apply a thin layer of dielectric grease to the inside of both clamps.
Step 7: Install the New Battery (3 to 5 minutes)
Lower the new battery into place, making sure it sits level. Confirm the positive terminal aligns with the positive post (marked +). Reinstall the hold-down clamp and tighten it to spec.
Most manufacturers call for 8 to 12 ft-lbs, but check your owner’s manual.
Connect the positive terminal first, then the negative. Tighten both clamps snugly, but don’t over-torque. A stripped terminal block is a costly mistake that keeps you under the hood much longer.
Step 8: Test and Reinitialize (2 to 3 minutes)
Start the car and let it idle. Confirm the dash lights go out and the charging system reads normal voltage. If needed, reset the radio presets, power windows, and clock.
In our research, the full sequence for a simple car takes 15 to 20 minutes for a first-timer and under 10 for someone who has done it before. This step-by-step procedure assumes zero complications, which rarely holds true for older cars with years of corrosion.
For a deeper walkthrough that covers tricky terminal designs and coding requirements, take a look at installing a car battery correctly.
Three Real-World Scenarios That Change the Estimate
Real life rarely matches the ideal. Here are three actual scenarios with their real timelines.
Scenario A: Honda Civic or Toyota Corolla
Battery location: Engine bay, front right. Terminals: Top-post. Hold-down: Single J-hook. Registration: Not required.
This is the fastest possible swap. Total time: 10 to 15 minutes. The battery sits out in the open with plenty of access. A 10mm wrench handles the terminals, and the hold-down clamp releases with a single 12mm nut.
No coding, no special tools, no surprises.
If the battery has been in place for five years or more, add 5 minutes for corrosion cleaning and possibly replacing a seized terminal bolt.
Scenario B: Ford F-150 or Chevy Silverado
Battery location: Engine bay, driver side, partially hidden by the fuse box on some trims. Terminals: Top-post. Hold-down: Top bar with two bolts. Registration: Some trims require BMS reset.
Expect 25 to 45 minutes. The extra time comes from working around the fuse box and making sure the BMS reset is performed through the dash menu. The battery itself is heavier, pushing 40 to 50 pounds, so lifting it out carefully takes a bit more patience.
Scenario C: BMW 3 Series or Mercedes C-Class
Battery location: Trunk. Terminals: European pinch-bolt. Hold-down: Side bracket. Registration: Required using a scan tool.
Budget 75 to 90 minutes. You’re removing trunk trim, disconnecting a vent tube, lifting the battery over the lip, and then firing up a scan tool to register the new unit. The registration step alone takes 5 to 10 minutes, and without it, your car’s alternator will overcharge the new battery and shorten its life.
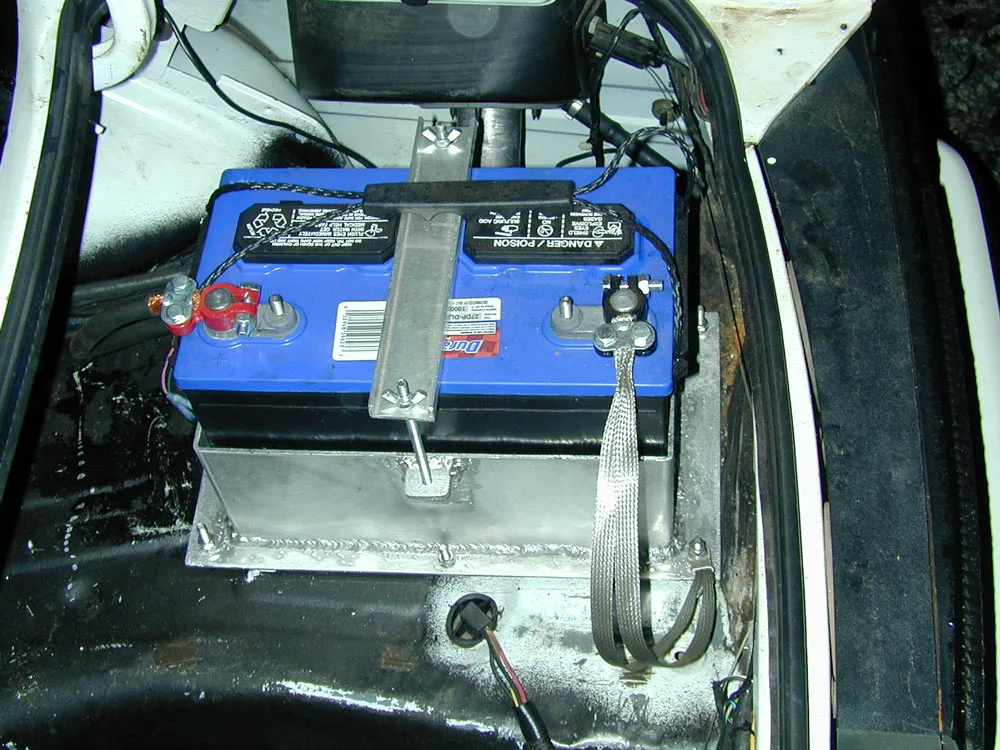
Image source: Web (Bing) / storage.googleapis.com (Web image (fair-use with source credit))
This scenario shows why knowing your car matters. A BMW owner who blindly follows a generic YouTube guide to swap a battery can easily add an hour of troubleshooting later when the battery light stays on.
Do It Yourself vs. Paying a Pro: Time and Money Trade-Offs
The decision to DIY or hire help comes down to your risk tolerance and your car’s complexity. Let’s break down the options honestly.
DIY Replacement
Best for: Anyone with a basic socket set, a car with top-post terminals and engine bay access, and no registration requirement.
| Factor | DIY | Professional |
|---|---|---|
| Time | 15 to 45 minutes | 30 to 60 minutes |
| Cost | Battery only ($100 to $250) | Battery plus $40 to $100 labor |
| Risk | Moderate (radio codes, terminal damage) | Low (they handle everything) |
| Registration | Requires buying a scan tool | Included in labor |
The main DIY risk is the same one that bites everyone eventually: losing your radio presets and possibly needing an anti-theft code. Most basic cars store presets in memory that survives a brief power loss. European cars and some high-end Japanese models need a code you may have to dig through your owner’s manual or dealership records to find.
Auto Parts Store Installation
Many chain stores like AutoZone or O’Reilly will install a battery you buy from them, often for free. The catch is that this service only applies to batteries in the engine bay with standard terminal designs. Trunk-mounted batteries, side-post terminals, and vehicles requiring registration or BMS reset usually get turned away or charged extra.
If your car qualifies, this is the fastest option: 20 to 30 minutes total, including the paperwork. The technician handles the lift, the disposal of your old battery, and the core charge refund. You lose nothing in time savings and skip the mess of handling a heavy, acid-filled component yourself.
The trade-off is scheduling. Weekends are busy, and you might wait 20 minutes at the counter before the technician even starts.
Mobile Battery Service
AAA and similar roadside services offer battery testing and replacement at your location. The appointment window is usually 1 to 2 hours, and the technician arrives in a van carrying several battery types.
This is the most convenient option for anyone who’s stuck with a dead battery in a parking lot or at home with no tools. Expect to pay a premium of $30 to $80 over the battery’s retail price for the convenience.
Dealership Service
The most expensive route, but the only one that guarantees proper registration for modern European vehicles. Typical dealership labor rates ran between $150 and $220 per hour as of 2026, and battery replacement appointments usually take 45 to 60 minutes. You’re paying a premium for the scan tool, OEM-specific battery, and the technician who has done this exact job a hundred times.
If you own a BMW and don’t already own a scan tool, the dealership route is often worth the extra $50 just to avoid the headache of a misregistered battery.
Which Should You Choose?
Use this quick filter:
- Simple car, basic tools: DIY. Save the labor cost.
- Simple car, no tools, in a rush: Parts store installation.
- European car, no scan tool: Dealership or a trusted independent shop.
- Dead battery, stranded: Mobile service.
Before you decide, know your car’s quirks. Reading through a guide on jump starting a car with a dead battery can help you understand whether your car will even hold a charge long enough to get you to a shop.
We’re just getting to the interesting parts. Up next, we’ll cover the tools that matter, the real cost breakdown, and the safety rules that keep you out of the emergency room.

Leave a Reply