
Short answer: For most cars, yes. Installing your own car stereo is one of the most satisfying — and money-saving — DIY projects you can take on. The real question is whether your specific car is set up for an aftermarket head unit, and whether you are prepared to work carefully around wiring and dashboard trim. This guide will help you decide, then walk you through every step of a clean installation.
Before You Decide: Is Your Car a Good DIY Candidate?
Start by checking whether the aftermarket actually supports your car. Search for three things using your exact year, make, and trim level:
- A dash kit that adapts the factory opening to a new head unit
- A wiring harness adapter that connects the car’s factory plug to the new stereo
- An antenna adapter that lets the new unit pick up radio signals
If all three exist, installation is usually manageable at home. If none exist for a late-model car with a giant factory touchscreen, you may be dealing with a car that was never designed for an aftermarket radio. That is not a DIY failure — it is a sign to consider professional help. For more on this, see our guide on how to install car stereo capacitor.
| Install Factor | Easier DIY | Professional Territory |
|---|---|---|
| Radio opening | Standard single-DIN or double-DIN slot | Integrated factory screen with custom shape |
| Factory audio | Six plain speaker wires | Factory amplifier, DSP, or fiber-optic audio |
| Harness adapter | Available for your model | Unavailable or requires programming |
| Dashboard access | Simple clip trim | Airbag module or sensitive electronics behind dash |
| Time needed | 1–3 hours | Half a day or more |
In practice, cars from the 2000s and early 2010s are the easiest DIY candidates. Newer cars with advanced audio integration can still be done, but they usually need extra modules, more patience, and a bigger budget.
What You Will Need: Tools and Parts
Installation is mostly preparation. You do not need a professional workshop, but you do need the right tools.
Essential Tools
- Phillips and flathead screwdrivers
- Plastic trim removal tool set
- Wire strippers and cutters
- Crimping tool or soldering iron
- Butt connectors, heat-shrink tubing, or quality electrical tape
- Digital multimeter for verifying power and ground wires
- Socket wrench set for bolts
- Small flashlight
- Zip ties and cloth tape for wire management
- Phone or camera to take reference photos
A budget trim tool set makes a huge difference. Metal screwdrivers should stay away from your dashboard.
Before you buy a separate cleaner for the interior, test with a regular household vacuum. If it is too bulky to reach the dashboard crevices, focus on picking the right vacuum for car interiors. For more on this, see our guide on how to install car stereo with backup camera.
Also, check the power requirements of your new stereo. Most aftermarket units only need battery power, ignition power, and ground. Some need an amplifier turn-on wire or vehicle-speed signal.
Choosing a Head Unit That Fits
Not all car stereos fit all cars. The two standard sizes are:
- Single-DIN: about 2 inches tall and 7 inches wide
- Double-DIN: about 4 inches tall and 7 inches wide
Some modern head units use floating touchscreens that still mount into a single-DIN or double-DIN opening. Other vehicles, especially newer models with custom-shaped factory screens, cannot accept a standard head unit without major modification. For more on this, see our guide on how to install a car seat.
| Stereo Feature | Entry-Level | Mid-Range / Advanced |
|---|---|---|
| Bluetooth hands-free | Yes | Yes |
| Wireless Apple CarPlay / Android Auto | Some | Yes |
| Touchscreen | No | Yes |
| USB ports | 1 | 2 or more |
| Built-in navigation | No | Some models |
| Audio tuning controls | Basic EQ | Graphic EQ, crossover, time alignment |
Before ordering, confirm:
- Dash opening size — measure your current radio slot.
- Factory features you want to keep — steering wheel controls, backup camera, USB port.
- Factory amplifier — if your car has an amplified system, you may need a line output converter or an integration module.
- Speaker wiring — verify the impedance and number of speakers.
The most practical move is to enter your car’s exact model into a vehicle-specific fitment guide. Good vendor guides will tell you which dash kit, harness, antenna adapter, and steering wheel module you need. They also flag the surprises before you order.
Step-by-Step Car Stereo Installation
Once your parts arrive, give yourself a clear workspace and follow this sequence.
Step 1: Disconnect the Battery and Wait
Open the hood and disconnect the negative battery terminal. Tuck the cable aside so it cannot accidentally touch the terminal. Then wait at least 15 minutes before working around the dashboard. For more on this, see our guide on can you rent a car seat with a.
That waiting period is not about the radio — it is about airbag systems. Some airbag modules hold backup power for a short time after the battery is disconnected. If you are new to working around airbags, review vehicle safety resources from the National Highway Traffic Safety Administration before you start.
Step 2: Remove the Dashboard Trim and Factory Radio
Most dashboards use a combination of screws and plastic clips.
- Use a plastic trim tool to pry gently around the edges of the radio trim.
- Work slowly and release clips one at a time.
- Look for hidden screws under small cover caps or behind the trim.
- Once the trim is free, unscrew the brackets holding the factory radio.
- Slide the radio out just far enough to access the connectors.
If the factory radio has no visible screws, it may need stereo removal keys. These thin metal tools slide into the slots on the sides of the unit to release spring clips. They are inexpensive and much safer than prying with a screwdriver. For more on this, see our guide on can i use a regular vacuum cleaner for.
Take photos of the factory wiring before unplugging anything. That photo will save you later if a wire color does not match.

Use plastic trim tools instead of metal screwdrivers to avoid marring the dashboard.
Credit: www.reddit.com
Step 3: Connect the Wiring Harness Adapter
The best way to connect a new stereo is to use a vehicle-specific wiring harness adapter. This small plastic piece plugs directly into your car’s factory connector. You then splice the adapter’s wires to the new stereo’s pigtail, usually with color-matched wires.
Never cut the factory harness unless you have no other option. A harness adapter lets you return the car to stock later, and it avoids damaging factory wiring.
Common wire functions:
- Yellow: constant 12V battery power
- Red: switched 12V ignition power
- Black: ground
- Blue or blue/white: power antenna or amplifier turn-on
- Orange or orange/white: illumination
- Four pairs of colored wires: front and rear speakers
Use a multimeter to verify constant and switched power wires before connecting. Do not trust colors alone — some manufacturers use nonstandard colors.
Make solid connections. Strip about half an inch of wire, twist or crimp, then protect with heat shrink or electrical tape. Give each connection a gentle tug before moving on. A loose or shorted connection is the number one cause of a stereo that works once, then dies on a bump.
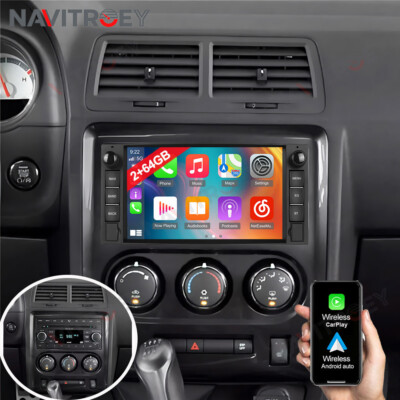
A vehicle-specific harness adapter lets you connect without cutting factory wires.
Credit: www.ebay.com
Step 4: Install the Dash Kit, Antenna Adapter, and Optional Modules
If your car needs a dash kit, install the new trim around the radio opening before the final mount. The kit usually includes a metal sleeve and plastic trim that makes the aftermarket head unit look factory-fitted.
Also connect an antenna adapter if the factory antenna plug does not match the new stereo. This is common on European cars and many GM models.
If you want to keep factory features, now is the time to connect:
- Steering wheel control interface
- Factory amplifier integration module
- Backup camera input
- Microphone for hands-free calling
Tuck all extra wiring behind the dash so it does not press against the back of the new unit.
Step 5: Mount the New Stereo
Slide the new stereo into the metal sleeve or dash kit until it locks into place.
This step sounds easy, but it is where many installs fail. Wires that are not tucked properly can push the radio back out, prevent it from sliding fully, or cause a short against the metal chassis.
- Push as much wire as possible into the dash cavity.
- Use zip ties to bundle the harnesses.
- Make sure no bare wire is touching the stereo’s metal case.
- Slide the unit in slowly, checking that the wiring does not bunch up behind it.
Secure the unit with the screws that came with the dash kit.
Step 6: Reconnect the Battery and Test Everything
Reconnect the negative battery terminal. Before snapping the dashboard trim back into place, test every function:
- Radio and FM/AM reception
- Bluetooth pairing and phone calls
- USB and phone projection
- All four speakers and the subwoofer, if fitted
- Balance and fader controls
- Steering wheel buttons
- Backup camera input
- Clock and display behavior
If the stereo powers on but there is no sound, check the mute setting and the fader first. If the display is in the wrong language, do not panic — you can adjust the language menu right from the unit’s settings.
Step 7: Reassemble the Dashboard and Clean Up
Once everything works, push the dashboard trim back into place. Press firmly but gently until the clips click. Reinstall any screws you removed.
Then clean up the evidence of your work. Dust and debris from pulling the dash loose often lands on seats and carpets. Spend a few minutes cleaning under the seats before closing the doors.
If you do not already have a good car cleaner, this is the time to buy one. Compact mini vacuums are enough for tight spaces, and a dedicated unit will make future cleanups much faster.
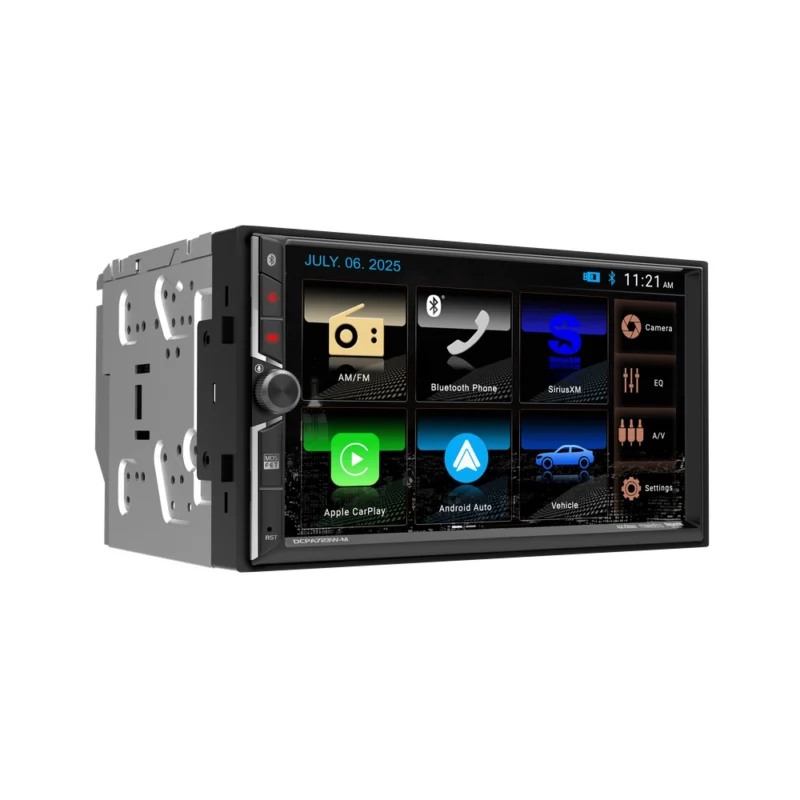
Check the head unit’s size rating against your dash opening before ordering.
Credit: www.dualav.com
Common Problems and How to Fix Them
| Problem | Likely Cause | Fix |
|---|---|---|
| No power at all | No constant or switched power, blown fuse | Check fuses, verify yellow and red wires, test with a multimeter |
| Stereo turns on but no sound | Mute, fader set wrong, or speaker wire short | Check audio settings, then test speaker wires |
| Static or weak radio reception | Antenna adapter missing or power antenna wire not connected | Connect the blue antenna wire and use the correct adapter |
| Alternator whine or engine noise | Ground loop or poor grounds | Use quality ground, keep signal wires away from power wires |
| Steering wheel controls do nothing | Missing interface module or programming needed | Install a steering wheel control adapter and follow its setup steps |
| Backup camera shows black screen | Camera trigger wire or video input not selected | Verify reverse trigger wire and set head unit source to camera |
Most problems come from wiring connections, not the stereo itself. Work through one variable at a time.
When Should You Hire a Professional?
DIY installation is possible for most people, but there are honest limits. Consider hiring a professional if your car has:
- A fiber-optic MOST bus audio system — common in some European luxury cars
- A fully integrated factory display with vehicle settings, HVAC controls, or security tied into the screen
- No available wiring harness adapter
- Factory amplifiers or DSP systems that require proprietary interfaces
- Airbag modules or other safety electronics located directly behind the radio opening
Even then, a good shop may still use a standard aftermarket head unit, but they will use expensive integration modules and programming tools. That is not a beginner job.
Professional Installation vs. DIY
| Factor | DIY | Professional |
|---|---|---|
| Labor cost | $0 | Usually $75–$200+ depending on the car |
| Parts and adapters | You pay the same either way | Often included or marked up |
| Time | 1–4 hours for most cars | 1–2 hours with specialized tools |
| Skill required | Basic to moderate | Expert |
| Warranty | Part warranties only | Usually covers labor |
| Risk | Errors if you rush | Low risk, but expensive |
The main benefit of DIY is not just saving money. You learn how your car is wired, how to remove trim safely, and how to troubleshoot audio systems. That knowledge carries over to future upgrades.
Mistakes That Cost Beginners Time
A few mistakes are incredibly common, even for people who read the manual.
- Skipping the battery disconnect. Modern cars have sensitive electronics. Disconnecting the battery is not optional.
- Cutting the factory harness. Use an adapter. Cutting original wires reduces resale value and makes future repairs harder.
- Forgetting to test before reassembly. Once the dashboard is clipped back together, fixing a loose wire takes twice as long.
- Mixing up constant and switched power. Your stereo may drain the battery or fail to save settings.
- Trapping wires behind the radio. This causes intermittent sound and, in some cases, blown fuses.
- Overtightening screws. Dashboard plastics crack easily. Snug is enough.
Take photos, label wires, and work in good light. If you get stuck, stop and search for a video specific to your car model.
Frequently Asked Questions
How much money can I save by installing my own car stereo?
You will typically save the labor portion, which often falls between $75 and $200. You may still spend money on a dash kit, wiring harness adapter, and antenna adapter, but those are usually $20 to $100 total.
Is it hard to install a car stereo in a modern car?
It depends on the car. Modern cars with standard double-DIN openings and available harness adapters are still very doable. Cars with factory touchscreens, amplifier modules, or fiber-optic audio need extra parts and more technical skill.
What if I make a wiring mistake?
Most wiring mistakes are fixable. If you reverse constant and switched power, correct the wires and replace any blown fuses. If you damage the factory wiring harness, you may need to repair it or have a professional do the repair. That is why a harness adapter is worth buying.
Can I keep my steering wheel controls after upgrading?
Yes, in most cases. You will need a steering wheel control interface module, which connects between the head unit and the car’s steering wheel buttons. Many models also let you retain the factory backup camera.
How long does a DIY car stereo installation take?
For a straightforward car with a standard dash opening, expect about 1 to 3 hours. More complex vehicles can take a full afternoon, especially if you are installing steering wheel modules or factory amplifier interfaces.
Final Verdict: Can You Install a Car Stereo Yourself?
For most people, the answer is yes. If your car has a standard radio opening, an available wiring harness adapter, and a factory system that uses simple speaker wires, this is a realistic weekend project. The money you save is a bonus; the real payoff is knowing exactly how your car’s audio system is put together.
If you want to see more hands-on automotive projects, browse more of our installation guides and build your confidence step by step.
Before you order parts, the best next step is simple: pull up your owner’s manual, confirm your car’s factory audio setup, and order the wiring harness adapter before you touch a single screw. That small bit of preparation is the difference between a smooth install and a frustrating one.

Leave a Reply