
There’s no feeling quite like firing up a brand‑new aftermarket stereo and hearing clean, punchy sound fill the cabin for the first time. But before that moment, you’re staring at a tangle of colored cables poking out of the dash, wondering which one goes where. The good news is that car stereo wiring follows a fairly predictable color code, and with the right tools and a methodical approach, you can complete the job in a single afternoon — even if you’ve never touched a multimeter before.
This guide walks you through every stage: understanding what each wire does, preparing your workspace and tools, making solid connections, testing your work, and troubleshooting any problems that show up. You’ll also learn where to call in a pro and how to avoid the mistakes that trip up most first‑timers. For more on this, see our guide on how to connect phone to car stereo.
Before you dive in, know that this project pairs well with other simple car upgrades. If you’re new to working on your own vehicle, browse the rest of our car care library for more hands‑on projects that build confidence.
Before You Start: Safety First
Connecting stereo wires isn’t dangerous if you follow one golden rule: disconnect the negative battery terminal before touching any wiring. The negative terminal (marked with a minus sign) is the one to loosen with a wrench or socket. Tuck the cable away from the battery post so it can’t accidentally touch and re‑connect. For more on this, see our guide on how to connect iphone to car stereo.
Why does this matter? If the yellow constant‑power wire touches ground while the battery is live, you’ll blow fuses at best — and at worst, damage the stereo’s internal circuitry. A common mistake is to skip this step because you’re “just unplugging a factory harness.” That’s exactly when a stray 12‑volt wire finds its way to a grounded bracket.
Also give the car a few minutes after disconnecting before working. If you’re installing in a modern vehicle with lots of electronics, leaving the battery disconnected for 5–10 minutes lets the various modules power down and avoids error codes on the next start. For more on this, see our guide on how to connect bluetooth to car stereo.
Understanding Car Stereo Wire Colors and Functions
Most aftermarket stereos and factory harnesses use a consistent color code. While no two cars are identical, the table below covers the wires you’ll see in the vast majority of vehicles.
| Wire Color | Function | What It Does |
|---|---|---|
| Yellow | Constant 12V | Keeps the clock and memory presets alive when the key is off |
| Red | Switched 12V | Powers the stereo only when the ignition is on |
| Black | Ground | Completes the circuit; must be bolted to clean metal |
| Blue / Blue‑white | Amp remote / power antenna | Turns on external amplifiers or motorized antennas |
| White / White‑black | Front left speaker (+/−) | Carries audio to the front left speaker |
| Gray / Gray‑black | Front right speaker (+/−) | Carries audio to the front right speaker |
| Green / Green‑black | Rear left speaker (+/−) | Carries audio to the rear left speaker |
| Purple / Purple‑black | Rear right speaker (+/−) | Carries audio to the rear right speaker |
| Orange / Orange‑white | Illumination / dimmer | Adjusts display brightness with the dash lights |
The key distinction is constant power versus switched power. Yellow keeps your saved radio stations and clock stored; red is what actually turns the unit on when you turn the key. If you reverse those two, your stereo might drain the battery overnight or lose its memory every time you park.
One honest caveat: color codes are a guideline, not a guarantee. Some manufacturers (especially European and Japanese models) use different conventions, and newer cars with CAN‑bus data systems may not even supply a traditional switched wire — they send a data signal to a factory amplifier instead. Always verify against a vehicle‑specific wiring diagram before committing:
Vehicle‑specific wiring diagrams are published by reputable car audio retailers like Crutchfield, whose guides show the exact wire colors and positions for your model year.
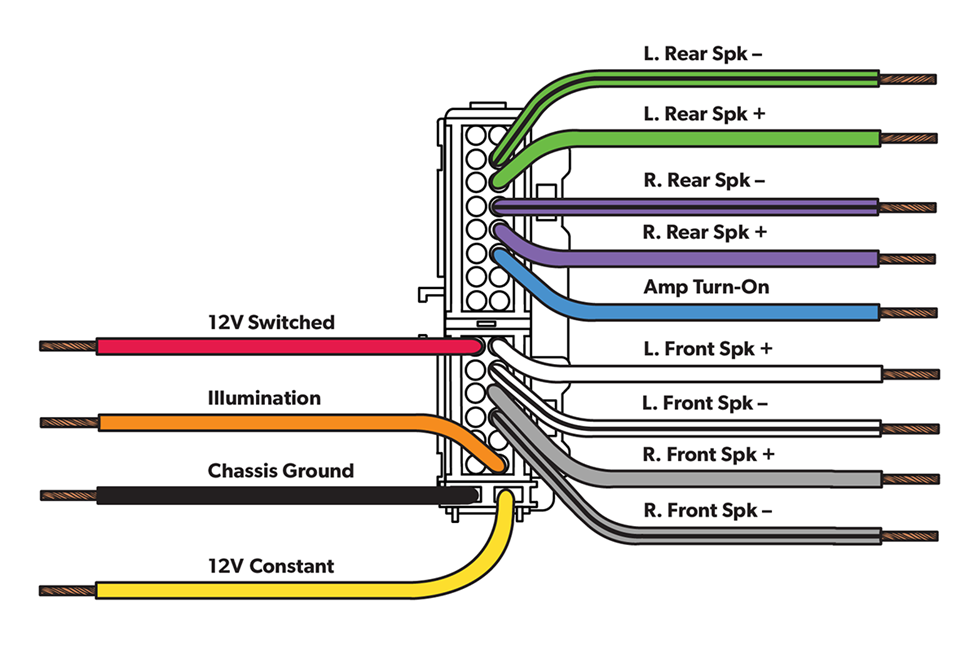
Most aftermarket stereos follow the same color code, but always verify against the vehicle’s wiring diagram.
Credit: www.crutchfield.com
Factory Harness vs. Aftermarket Adapter
Your car almost certainly has a factory wiring harness — a plug that bundles all the stereo wires into a single connector. When you buy an aftermarket stereo, you have two ways to interface with that harness:
| Approach | Pros | Cons |
|---|---|---|
| Factory harness + adapter | Plug‑and‑play, no cutting, reversible | Costs $15–$40 for the adapter |
| Direct wiring | No adapter cost | Risk of mistakes, harder to undo, can void factory warranty |
A wiring harness adapter matches the car’s factory plug on one side and the stereo’s wires on the other. You connect the adapter to the stereo first, then plug the whole assembly into the car. No cutting into factory wiring means you can return the car to stock in ten minutes if you ever sell it. For most people, the adapter is the smart choice — it turns a potentially messy job into a clean, reversible one.
Tools and Supplies You’ll Need
You don’t need a professional workshop to wire a stereo. Here’s the complete list:
- Wire strippers – Remove insulation cleanly without nicking the copper.
- Crimping tool – Secures butt connectors reliably.
- Butt connectors or heat‑shrink connectors – Join wires with a waterproof seal.
- Electrical tape – Backup insulation for wrapping odd‑shaped joints.
- Heat gun or lighter – Shrinks heat‑shrink tubing for a tidy finish.
- Multimeter – The single most valuable tool for verifying power and ground.
- Screwdriver set – Removes trim panels and the old stereo’s mounting screws.
- Panel removal tool – Prevents scratches on plastic trim (a flathead wrapped in tape works in a pinch).
- Wiring harness adapter – Matches your car’s factory plug; confirm fitment before buying.
Expect to spend about $25–$50 on tools and connectors if you don’t already own them. That’s far cheaper than a single shop visit, and you’ll use the multimeter and crimper again for other car projects.
Choosing Between Single‑DIN and Double‑DIN
Before you start wiring, know exactly what you’re installing. Single‑DIN units are the shorter, rectangular style common in older cars. Double‑DIN units are twice as tall and usually feature large touchscreens. Your car’s dash opening determines which fits, and the physical size affects how much wiring space you’ll have behind the unit.
You’ll also want a dash kit that bridges the gap between the new stereo and the factory opening, plus an antenna adapter if your car’s antenna plug differs from the stereo’s input. These parts are cheap (~$15–$30) and make the final install look factory‑installed rather than hacked together.
Step-by-Step: Connecting the Wires
Now that everything’s prepared, the actual wiring follows seven clear steps. Take your time with each one — rushing is where most installs go wrong.
1. Disconnect the Battery
Loosen the nut on the negative battery terminal and remove the cable. Push it aside so it can’t touch the post. With the battery disconnected, you can work safely without the risk of shorts or electrical damage.
2. Remove the Old Stereo
Use a panel removal tool to gently pry off any trim bezel surrounding the stereo. Most factory units are held in by four screws, but some are clipped in and require a set of DIN removal keys — those U‑shaped metal tools that slide into the faceplate’s holes. Keep every screw and metal bracket you remove; you’ll likely reuse them to mount the new unit.
3. Identify and Verify the Car’s Wiring
With the factory harness exposed, compare each wire to the vehicle’s color chart. If the colors don’t match your diagram, don’t guess — use your multimeter to verify:
- Constant power (yellow): Set the multimeter to DC volts, touch the black probe to a known ground, and check for ~12V with the key off and removed.
- Switched power (red): Confirm ~12V appears only when the ignition is in the ON or ACC position.
- Ground (black): Set the meter to continuity / resistance and verify near‑zero ohms to a metal chassis point.
This verification takes five minutes and prevents the most common install errors.
4. Prepare the Stereo Wires
If you’re using a harness adapter, connect the adapter’s wires to the stereo’s wires with butt connectors. Strip about ¼ inch (6 mm) of insulation from each wire end, slide a heat‑shrink butt connector over one side, insert both stripped ends until they meet, and squeeze with your crimping tool. Shrink the tubing with a heat gun or lighter to form a watertight seal.
If you’re wiring directly to the car’s cut wires, the process is the same — just match color‑to‑color and function‑to‑function based on your diagram.
5. Connect the Wires: Crimping vs. Soldering
You have three options for joining wires, and each has honest trade‑offs:
| Method | Strength | Skill Required | Best For |
|---|---|---|---|
| Crimping | Good | Beginner | Most DIY installs |
| Soldering | Excellent | Intermediate | Permanent, high‑vibration installs |
| Twist + tape | Poor | None | Temporary testing only |
For 90% of installations, crimping with heat‑shrink connectors is the right call. It’s fast, secure, and the heat‑shrink seal protects against moisture and vibration. Soldering gives a more durable connection but takes practice — a cold solder joint (where the solder doesn’t flow properly) is actually worse than a good crimp.
Whatever method you choose, insulate every connection. Bare copper touching a metal bracket will short the circuit and blow fuses.
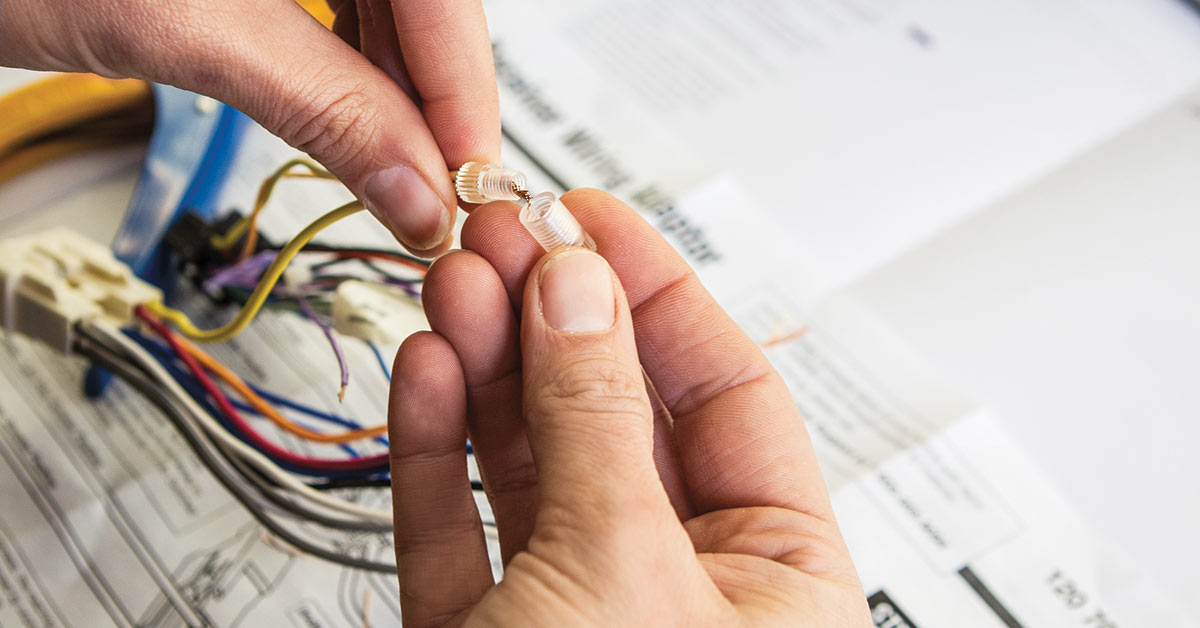
Match the adapter harness to the factory plug before connecting anything to the stereo.
Credit: www.crutchfield.com
6. Test Every Connection
Before you slide the stereo into the dash, reconnect the negative battery terminal and power everything on. Check that:
- The stereo powers on and off with the ignition (switched power is correct).
- Memory presets and the clock hold when you turn the key off (constant power is correct).
- Each speaker produces sound, and the balance/fade controls work independently.
- No static or buzzing appears when the headlights are turned on (the dimmer wire may be reversed).
If anything is off, turn the car off, disconnect the battery, and re‑check that specific connection. A multimeter still probes the wires from the previous step make this quick.
7. Mount the Stereo and Reassemble
Once everything tests correctly, push the prep‑wired harness firmly into the factory plug, then slide the stereo into the dash. Use the mounting screws or metal brackets from the old unit, and tuck any excess wire neatly behind the stereo — but don’t force the unit in if it won’t sit flush. Pinched or stretched wires are a leading cause of intermittent cutouts months later.
Reattach the trim bezel, secure everything, and give the stereo one final test with the dash fully assembled.
Handling Extra Wires and Modern Features
Modern stereos come with more than just power and speaker wires. Common extras include:
- Steering wheel control wire (SWC): Usually labeled “SWC” or “AUX.” Most vehicles need a special adapter (like the iDatalink Maestro or PAC SWI series) to translate the factory controls. Don’t try to wire this directly unless you know what you’re doing.
- Backup camera trigger wire: Often pink or green. It receives a signal when the car is in reverse. Some vehicles need this tied to the reverse light circuit; check the stereo’s manual.
- Amplifier remote wire (blue): Turns on an external amp when the stereo powers up. If you don’t run an amp, cap this wire — don’t let it touch ground.
- Parking brake wire (green): Required for certain video features to work while driving. Wire it to the parking brake switch per the stereo’s instructions. Bypassing this can be illegal in some jurisdictions.
For any wire you don’t use, cap it with a small butt connector or tape, and label it with a piece of tape. You’ll thank yourself later if you ever add an amp or a backup camera.
Troubleshooting Common Wiring Problems
Even careful installers hit snags. This table covers the most common issues and their fixes:
| Symptom | Likely Cause | Solution |
|---|---|---|
| Stereo has no power at all | Blown fuse, poor ground, or reversed power wires | Check stereo and car fuses; verify ground continuity |
| Stereo works but loses memory | Constant power (yellow) not connected correctly | Confirm 12V on yellow with key off |
| One speaker silent | Reversed polarity or loose connection on that channel | Re‑pinch or resolder, verify each wire pair |
| Static / alternator whine | Poor ground or unshielded connections | Check ground; re‑insulate and avoid running wires near power cables |
| Stereo turns on but no sound | Factory amp not triggered | Confirm blue remote wire is connected to the amp turn‑on |
| Display dims or stays bright | Orange illumination wire wired to constant power | Tie orange to the dash light dimmer instead |
When diagnosing, always test with the car running as well as off — some wiring faults only appear once the alternator is spinning.
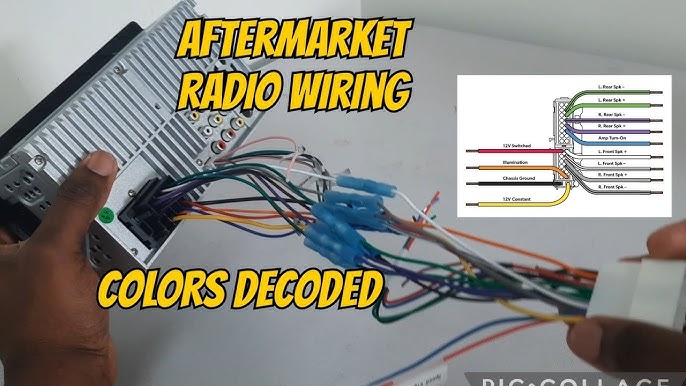
A multimeter is the fastest way to confirm which wire is constant power, switched power, and ground.
Credit: www.youtube.com
Should You Call a Professional?
DIY is rewarding, but there are honest limits. Call an installer if:
- Your car uses CAN‑bus or MOST data systems (many newer European and luxury vehicles). These need interfaces and software flashing that a color‑to‑color connection can’t handle.
- You’re installing additional features like an amplifier, subwoofer, or backup camera. The wiring runs are more involved and worth a pro’s time.
- The factory system includes premium audio (Bose, Harmon Kardon, etc.) with a factory amplifier. Bypassing it requires careful planning.
Also stop immediately if you see smoke, smell burning, or hear sparks. Remove power and reassess. Most installs go fine, but knowing your limits protects your wallet — and your car.
Frequently Asked Questions
How do I know which wire is which if the colors don’t match?
Use a multimeter to verify voltage and continuity against a wiring diagram for your exact make, model, and year. Never rely on color alone — some manufacturers use non‑standard codes. A quick search or a service manual is worth the ten minutes.
Can I install a stereo without a harness adapter?
Yes, but it means cutting into the factory harness and making every connection manually. That’s riskier, harder to troubleshoot, and nearly impossible to reverse cleanly. An adapter costs around $20 and eliminates most of that risk, making it one of the best investments in the whole project.
What happens if I reverse the speaker wires?
Reversed polarity causes “out‑of‑phase” audio — the bass sounds thin and weak, and the stereo may appear to have no low end at all. Always match positive to positive (color to color, striped to striped) for each speaker pair.
Is soldering really better than crimping?
Soldering makes the strongest, most vibration‑resistant joint, but only when done correctly. A cold or brittle solder joint is worse than a good crimp. For beginners, a quality crimp tool and heat‑shrink connectors deliver reliable results with a much shorter learning curve.
Conclusion
Connecting car stereo wires is genuinely within reach for most do‑it‑yourselfers. The process comes down to five things: disconnect the battery, identify each wire against a verified diagram, use a harness adapter to keep things reversible, make solid insulated connections, and test thoroughly before reassembling the dash. Take that approach and you’ll avoid 95% of the problems that frustrate first‑time installers.
Your next step is simple: once the stereo fires up, take the time to configure it properly — start by adjusting its language settings and set a few favorite stations before you hit the road. Then give your cabin the same attention as the dash, and finish the job by cleaning the footwells and vacuuming under the seats so the whole car feels as upgraded as your new audio system.

Leave a Reply