
Your car won’t start. You turn the key and hear a rapid clicking noise, or maybe nothing at all. The dash lights flicker like they’re about to give up.
If you’re wondering how to know if my car battery is dead, the short answer is to check the voltage and listen for specific sounds. But there’s more to it than that, because sometimes a dead-sounding car isn’t the battery’s fault at all.
In our research, a healthy 12-volt battery should rest at around 12.6 volts. Anything below 12.4 volts means it’s partially discharged, and under 12.0 volts it’s essentially flat. Per SAE International testing standards, these voltage thresholds are the industry baseline for diagnosis.
The tricky part is that a bad alternator or a worn starter can mimic a dead battery perfectly. Let’s break down how to tell the difference and get you back on the road without wasting money.
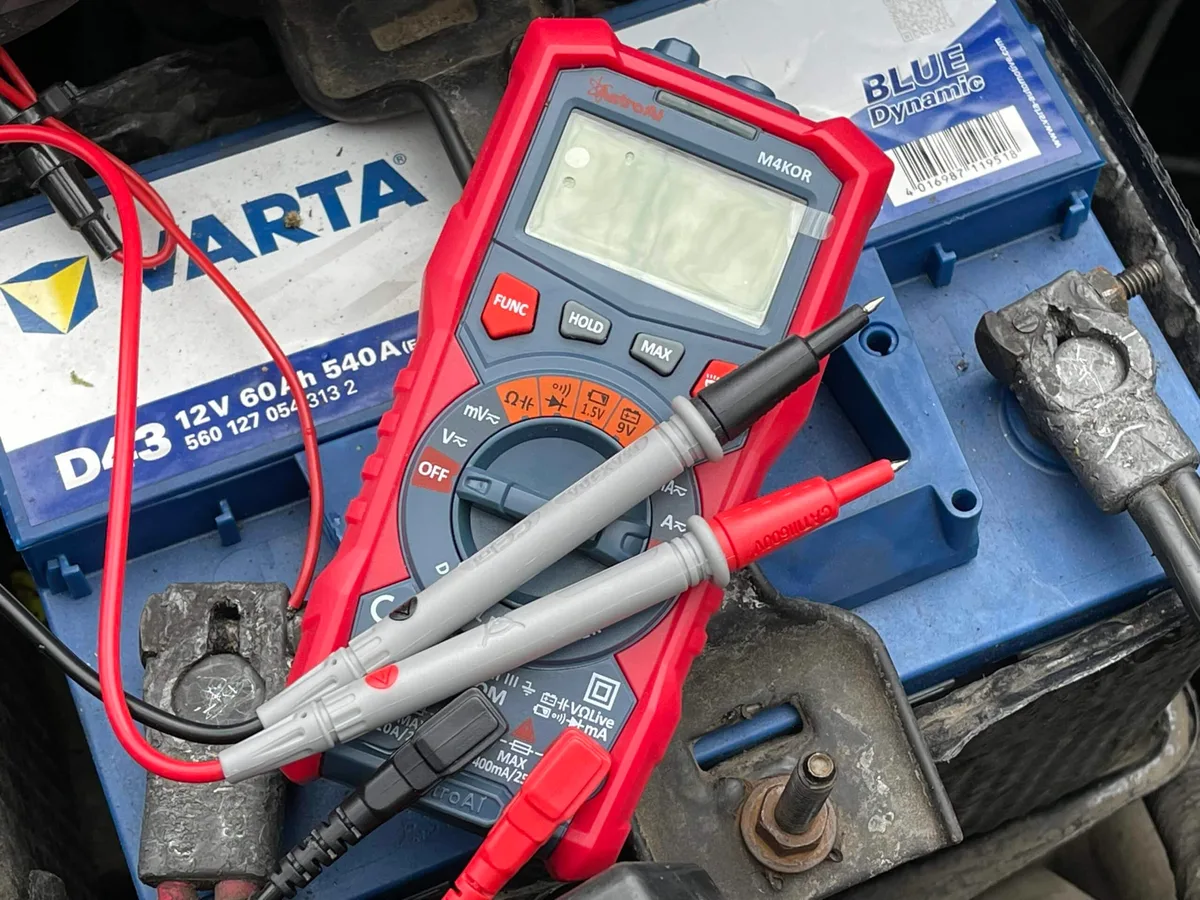
Image source: Web (Bing) / storage.googleapis.com (Web image (fair-use with source credit))
Quick Answer
Check the voltage with a multimeter. A reading under 12.4V means low charge. Below 12.0V means the battery is dead.
Listen for a rapid clicking when you turn the key. That clicking means the battery lacks enough power to crank the engine.
The Difference Between a Dead Battery, a Bad Alternator, and a Worn Starter
Before you start testing anything, you need to understand what you’re actually dealing with. These three components fail differently, and each has its own set of symptoms.
The battery stores electrical energy. It provides the burst of power needed to crank the engine and keeps your electronics running when the alternator isn’t spinning fast enough. A dead battery simply doesn’t have the stored energy to do its job.
The alternator charges the battery while the engine runs. It should produce between 13.8 and 14.4 volts when the car is idling. If the alternator fails, your car runs on battery power alone until the battery drains completely.
The starter motor uses battery power to turn the engine over. It draws a massive amount of current, often 150 to 250 amps. When the starter wears out, it draws too much current or spins too slowly, which can make a fully charged battery seem weak.
Here’s the key distinction: a dead battery won’t hold a charge even after a jump. A bad alternator leaves you stranded shortly after a successful jump because the battery never gets recharged. A worn starter clicks but doesn’t crank, even with a fully charged battery.
We covered the voltage behavior of each component in our guide on battery voltage while running, which explains what to expect from a healthy charging system.
Reading the Signs: What Your Car Is Trying to Tell You
Your car gives you clues before it completely leaves you stranded. Learning to read them saves you time and money. Here’s what each sound and symptom actually means.
The “Click-Click-Click” Signal
This is the most common dead-battery indicator. You turn the key and hear a rapid series of clicks from under the hood. That sound is the starter solenoid engaging and disengaging rapidly because it doesn’t have enough current to hold the contacts closed.
If you hear this, the battery likely has enough voltage to power the relay but not enough to spin the starter. This almost always points to a battery that’s too weak, or terminals that are too corroded to conduct electricity properly.
The Silent Dash (No Sound at All)
No matter how many times you turn the key, nothing happens. No clicking, no crank, no noise. This usually means the battery is completely flat, below 11.5 volts or so.
The dashboard lights might still come on briefly, but they dim quickly when you try to start.
Sometimes a completely dead battery gives you one single loud click, then silence. That’s the solenoid engaging once before losing power.
The Slow, Dying Crank
The engine turns over slowly, like it’s moving through molasses. It might catch after a few seconds, or it might just keep dragging slower and slower until it stops. A slow crank means the battery has some charge but not enough cold cranking amps, or CCA, to do the job properly.
This is especially common in cold weather because battery capacity drops significantly at low temperatures. A battery that works fine in summer can struggle in winter. We detailed the weight and specs of different battery types in our guide on what car batteries actually weigh, which helps when you’re comparing replacements.
Dim Lights and Electrical Weirdness
If the headlights look dimmer than usual, or the interior lights flicker when you turn the key, the battery is struggling. A healthy battery powers these accessories easily. When voltage drops, they get less power and visibly dim.
You might also notice the radio resetting, the clock losing time, or the power windows moving slowly. These are all signs that the battery is no longer delivering consistent voltage.
The Rotten-Egg Smell and Swollen Case
This is the “please fix me immediately” warning. A sulfur smell like rotten eggs means the battery is venting hydrogen sulfide gas. That happens during overcharging or internal failure.
A swollen or bulging battery case indicates excessive heat or overcharging, which can lead to a dangerous rupture.
If you see either of these signs, do not attempt a jump-start. The battery could leak acid or, in rare cases, explode. Replace it safely and properly.
Step-by-Step Diagnosis: From Symptoms to Certainty
Now we get into the actual diagnosis. You can do all of this at home with basic tools, and it takes about ten minutes. Here’s the logical sequence, step by step.
Step 1: Visual inspection. Look at the battery case for cracks, swelling, or leaks. Check the terminals for white or bluish-green corrosion. Check the cable clamps for tightness.
Loose or corroded connections are the number one cause of false “dead battery” diagnoses.
Step 2: Check the date sticker. Most batteries have a sticker with a date or a letter-number code. A letter A through L indicates the month, and a number indicates the year. For example, “H23” means August 2023.
If the battery is older than four years, its capacity is likely reduced.
Step 3: Measure resting voltage. Use a multimeter set to DC volts. Attach the red probe to the positive terminal and the black probe to the negative terminal. The engine must be off and the car should sit for at least an hour before testing.
Step 4: Perform the cranking voltage test. This takes two people. One person turns the key to start the engine while the other watches the multimeter. The voltage should not drop below 9.6 volts while cranking.
If it does, the battery can’t deliver enough current.
Step 5: Test charging voltage. With the engine running, check the voltage again. It should read between 13.8 and 14.4 volts. If it’s lower, the alternator isn’t charging properly.
If it’s higher, the alternator is overcharging and could be cooking the battery.
Step 6: Confirm with a load test. This is the definitive test. A load tester applies a simulated load equal to half the battery’s CCA rating for 15 seconds. If the voltage drops below 9.6 volts under load, the battery fails.
Most auto parts stores do this test for free if you bring the battery in.
For the full process of testing voltage at home, our step-by-step guide to using a multimeter on a car battery walks through each reading and what it means.
Checking Corrosion and Loose Terminals (The Free Fix)
Before you buy a new battery, check the connections. Corroded terminals are the most common reason a healthy battery fails to start a car. The corrosion acts as an insulator, blocking current flow even though the battery has plenty of charge.
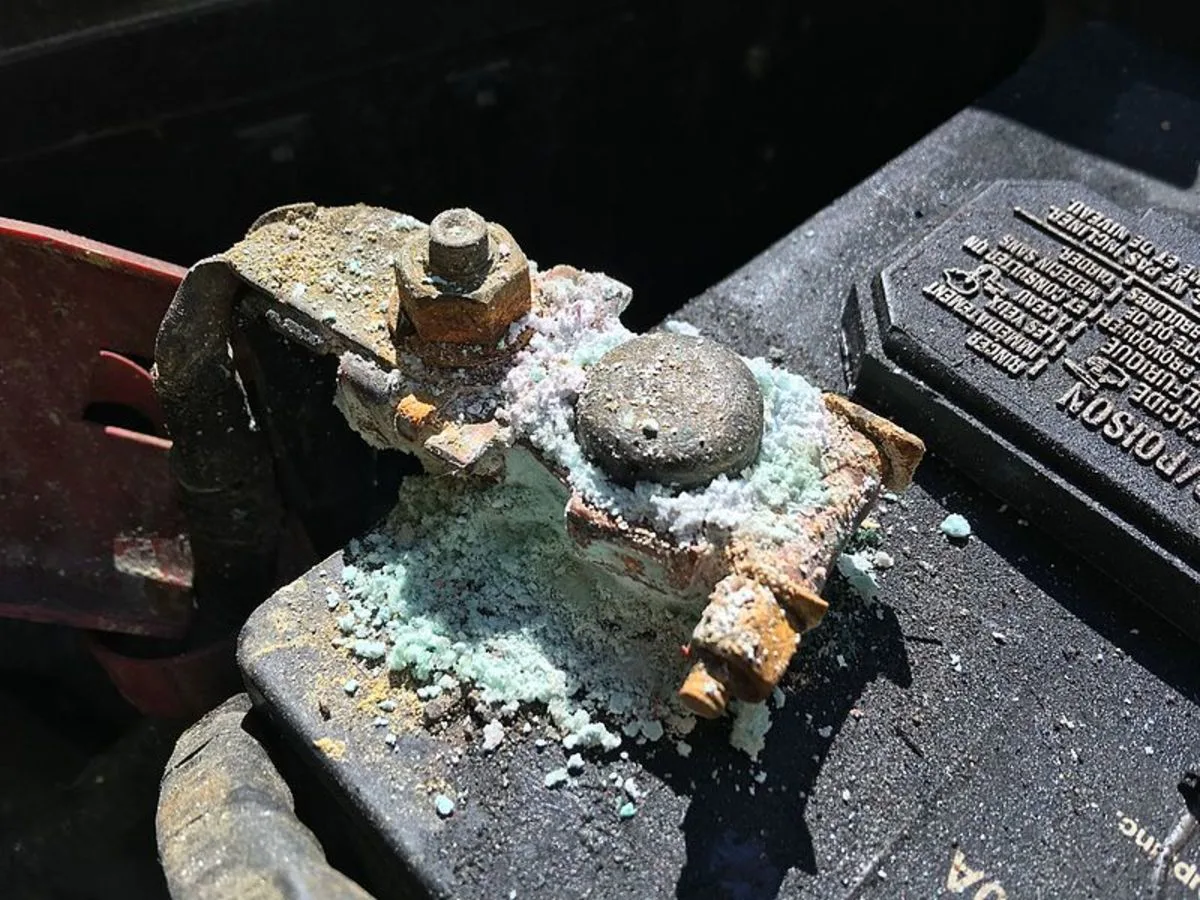
Image source: Web (Bing) / welfareburn20.pythonanywhere.com (Web image (fair-use with source credit))
Corrosion looks like white, blue, or green crusty deposits around the battery posts. It forms when battery acid fumes react with the metal terminals. It’s messy, but it’s usually fixable in twenty minutes with household supplies.
What you need:
- Baking soda
- Water
- A stiff brush (an old toothbrush works fine)
- A wire brush or battery terminal cleaner
- Petroleum jelly or dielectric grease
- Safety gloves and eye protection
The cleaning process:
Mix a tablespoon of baking soda into a cup of water. This neutralizes the acid corrosion. Disconnect the negative terminal first, then the positive.
Always work in that order to avoid accidental short circuits.
Dip the brush in the baking soda solution and scrub the terminals and cable clamps until they’re clean and shiny. The solution will fizz as it neutralizes the acid. Rinse with clean water and dry thoroughly.
Tighten the cable clamps back onto the terminals. They should be snug but not over-tightened. A loose connection causes voltage drops and poor starting.
A tight connection that wiggles by hand isn’t tight enough.
Finally, apply a thin layer of petroleum jelly or dielectric grease to the terminals. This prevents future corrosion and keeps the connection clean.
If the battery terminals are seriously damaged or the cables are frayed, replace them. The battery itself might be perfectly fine, but a bad cable connection makes it useless. This is the cheapest fix in the entire car-maintenance playbook, and it’s worth doing before you spend money on a new battery.
If you need to remove the battery to clean it properly, our guide on installing a car battery correctly covers the safe removal and replacement process in detail.

Leave a Reply