
Replacing your car stereo is one of the most satisfying upgrades you can make to a vehicle. A modern head unit brings wireless phone mirroring, hands-free calling, crisper audio, and a dashboard that finally looks current instead of dated. But the moment you see the wiring tucked behind your factory radio, it’s easy to second-guess yourself. Is this really a weekend DIY job?
Yes — for most vehicles, it is. With the right parts, a clear process, and a patient hour or two, even a first-time installer can swap a factory stereo for a new one without breaking anything. This guide walks you through the entire job, from choosing a compatible head unit to testing your work, with the pitfalls that commonly trip people up called out along the way.
Is Replacing a Car Stereo a Realistic DIY Project?
Many drivers assume stereo installation is strictly professional territory, but the truth is that most aftermarket head units are designed to be user-installed. The job requires basic hand tools, careful attention, and the right interface parts — not a deep background in car electronics.
What you’ll need to bring to the project:
- Patience: Rushing is what causes broken trim clips and crossed wires.
- Some dexterity: You’ll be working in a tight dash cavity, often at awkward angles.
- Basic troubleshooting logic: Most installation problems trace back to a single loose connection.
Most first-time installs take one to three hours. If your vehicle is newer and uses complex CAN-bus electronics, you might need an extra interface module — but the installation itself stays identical. The return on that time is real: better sound, modern connectivity, and a dashboard that feels like an upgrade every time you get behind the wheel.
Step 1: Choose the Right Stereo for Your Car
The biggest mistake beginners make is buying a stereo they like before checking whether it fits their car. Before you spend a dollar, confirm the two hard requirements: size and electrical compatibility.
Single-DIN vs. Double-DIN
Your dash opening dictates which physical size you can use.
| Type | Dimensions | Typical Features | Common Fitment |
|---|---|---|---|
| Single-DIN | 2″ tall × 7″ wide | Basic display, fewer controls, lower price | 1990s–early 2000s vehicles, some trucks |
| Double-DIN | 4″ tall × 7″ wide | Touchscreen, navigation, CarPlay, Android Auto | 2000s–present vehicles |
A double-DIN unit won’t fit a single-DIN cavity without a special mounting kit, and fitting a single-DIN into a double-DIN open slot leaves an unsightly gap that needs a pocket filler. Check your owner’s manual or use a car-radio fitment tool like the one on Crutchfield’s learning center to confirm your dash size before ordering.
Features That Matter in 2026
Today’s priciest head units compete with tablets on capability. Decide which features you’ll actually use:
- Wireless Apple CarPlay / Android Auto: The single most requested feature — gives you maps, calls, texts, and music without a cable. A wired-only version saves money if you don’t mind plugging in.
- Bluetooth: Standard on nearly every new unit; essential for hands-free calls.
- Backup camera input: Extremely useful if your car predates factory cameras. Buying a head unit with a camera input is far cheaper than adding a full OEM-style system.
- HD Radio / SiriusXM readiness: Nice if you listen to terrestrial or satellite radio often.
- Built-in amplifier output tuning: Worth prioritizing if you plan to add aftermarket speakers later.
Avoid paying for features you’ll never touch. A head unit with a glowing rear-view-camera button won’t help you if your car doesn’t need one.
Check Compatibility Before You Buy
Beyond size, three parts determine whether your new stereo works:
- Wiring harness adapter: Plugs into your vehicle’s factory connectors, then wires to the stereo. You typically can’t skip this.
- Mounting kit: Fills the gap between your dash and an aftermarket unit, accommodating the size difference.
- Antenna adapter: Converts your car’s factory antenna connector to the one on your new radio. Most modern vehicles need this for radio reception.
For newer vehicles with amplified sound systems or steering-wheel controls, you may also need a data interface module from brands like Maestro or PAC. These preserve factory features like volume-on-dash and warning chimes. If your car is from the mid-2010s or newer, research this before committing to a head unit.
Step 2: Gather Your Tools and Materials
Lay out everything before you start so you’re not hunting for a screwdriver mid-installation with the dash half-apart.
| Item | Why You Need It |
|---|---|
| Phillips and flathead screwdrivers | Most dash screws are Phillips; panel clips often pry with flathead |
| Plastic panel removal tool | Pops trim without scratching paint or plastic |
| Wire strippers and crimpers | Prep and secure wire connections |
| Butt connectors or heat-shrink connectors | Join wires reliably; heat-shrink is more weather-resistant |
| Electrical tape | Backup protection for finished connections |
| Wiring harness adapter | Matches your car’s harness to your new stereo |
| Antenna adapter | Required for radio reception in most cars |
| Mounting kit | Holds the stereo in your dash flush and secure |
| Digital multimeter (optional) | Confirms which wire is switched power vs. constant |
Radio removal keys are required for some European and newer vehicles; they’re inexpensive and worth having on hand to avoid damaging the factory unit’s release clips.
Step 3: Prepare Your Workspace and Disconnect the Battery
Proper preparation prevents nearly every expensive mistake.
- Disconnect the negative battery cable. This is non-negotiable. Working on live electrical wiring risks blowing fuses in your new head unit — or worse, shorting the vehicle’s CAN-bus system.
- Clear the area around your dash. Remove floor mats and anything near the center console; you’ll need room to lean in.
- Read both manuals. Skim the head unit’s install guide and your car’s stereo removal page in the owner’s manual. Every vehicle is a little different.
- Take photos before you remove anything. Photograph the dashboard, the wiring harness, and the stereo’s rear connections. This simple step solves countless reconnection headaches later.
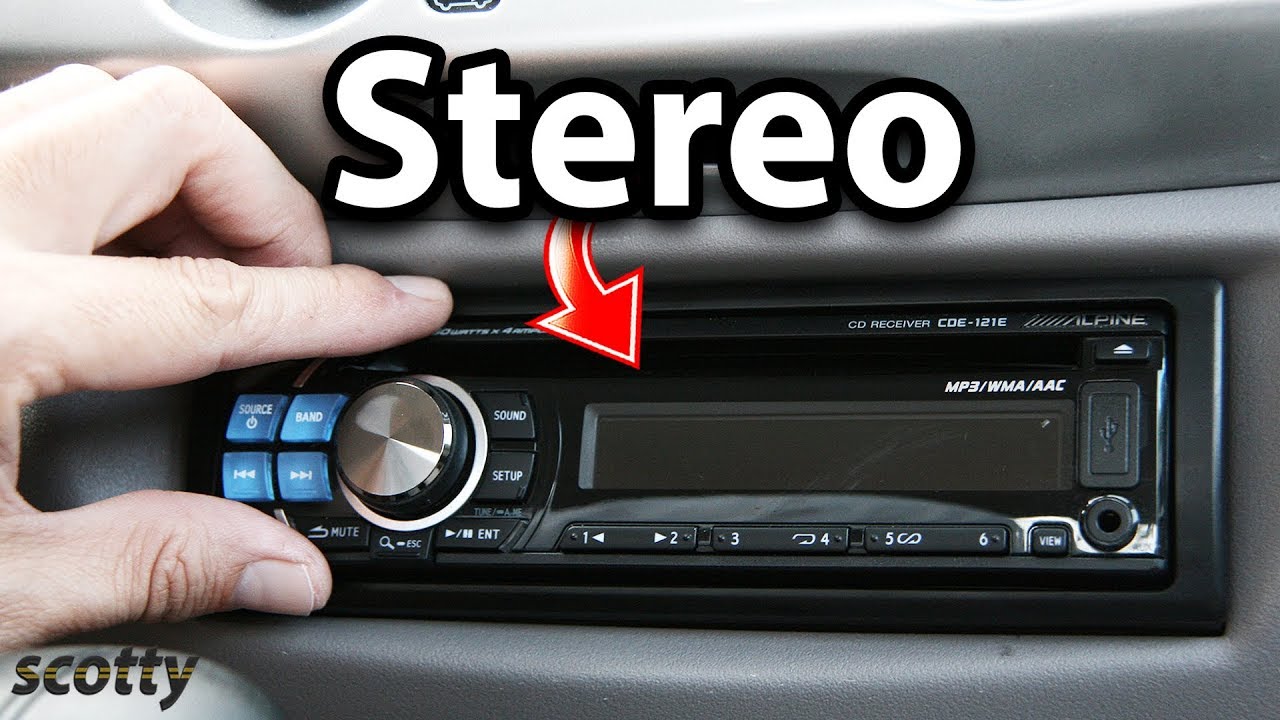
The cavity behind the factory stereo. Photographing this before disconnect saves you from guessing which cable goes where.
Credit: www.youtube.com
Step 4: Remove the Old Radio
The removal process varies by vehicle, but the sequence is nearly always the same.
- Pry off the trim panels around the stereo with a plastic removal tool. Start at the edges and work inward; most panels pop off with clips, but some vehicles use hidden screws behind trim pieces.
- Find and remove the stereo mounting screws. Typically two to four screws hold the unit in the dash. After the trim is off, they’re usually visible on the sides of the radio.
- Slide the stereo forward slowly. It should come toward you easily. If it catches, stop — there’s likely a hidden screw or clip you missed.
- Disconnect the wiring harness and antenna. Press the release tabs on the connectors before pulling. Many modern connectors have locking clips that require a firm squeeze to release.
Common Mistakes During Removal
- Skipping the battery disconnect — a single wire short can trigger airbag fault codes that cost hundreds to clear.
- Forcing trim panels — broken plastic clips are cheap but annoying to replace. Use a plastic tool and work slowly.
- Yanking the stereo out — the antenna cable and harness have limited slack; pulling hard risks tearing wires.
- Missing hidden screws — pockets, cup holders, and lower dash trim often hide fasteners. If the unit won’t budge, reassess, don’t pull.
Step 5: Wire the New Head Unit
This step separates smooth installs from frustrating ones. The stereo’s wiring harness adapter plugs into your vehicle’s factory connectors on one side and wires to the new head unit’s harness on the other. It’s designed to match your car’s electrical signals to the stereo’s inputs.
Understanding the Color Code
Manufacturers follow a consistent color convention (though always verify against the diagrams in your new stereo’s manual):
| Wire Color | Function | Notes |
|---|---|---|
| Yellow | Constant power | Keeps memory and clock alive |
| Red | Switched power | Only live with ignition on |
| Black | Ground | Must be securely connected |
| Blue | Power antenna / amp trigger | Activates external amplifiers |
| White / White-black | Front-left speaker | Striped wire is typically negative |
| Gray / Gray-black | Front-right speaker | Striped wire is typically negative |
| Green / Green-black | Rear-left speaker | Striped wire is typically negative |
| Purple / Purple-black | Rear-right speaker | Striped wire is typically negative |
Connecting the Wires
- Strip about a half-inch of insulation from each wire end.
- Twist the matching wires together — harness adapter wire to stereo wire of the same color.
- Crimp a butt connector over each joint, or use heat-shrink connectors and apply heat.
- Wrap each connection with electrical tape if you didn’t use heat-shrink.
- Gently tug each connection to confirm it’s mechanically solid before moving on.
Matching the stereo harness to the factory adapter wires by color. Each connection should be crimped and protected.
Credit: www.crutchfield.com
A wiring harness adapter plus time spent verifying the color code prevents most issues, but one common gotcha remains: vehicles with factory amplifiers. If your car has a premium audio option with an external amp, the signal between the factory head unit and the speakers runs differently. Some aftermarket head units won’t drive those amplified speakers properly without an interface module. If you install everything, power it on, and get silence or distorted audio, this is the likely culprit.
Step 6: Install the New Stereo and Test
With the wiring complete, physical installation is straightforward.
- Plug the wiring harness adapter into your vehicle’s factory connector.
- Attach the antenna adapter to your new stereo’s antenna port. This connection is often loose — push it in until it clicks.
- Slide the stereo into the mounting kit installed in your dash opening.
- Secure with the screws that came with the mounting kit or stereo.
- Snap the dash panels back into place, making sure not to pinch any exposed wires.
Test Everything Before Reassembly
Reconnect the negative battery cable, then work through a checklist:
- Power on the stereo with the ignition.
- Confirm the clock and memory settings persist after shutting off the car.
- Test AM, FM, and any satellite radio.
- Pair your phone over Bluetooth and make a test call.
- Play audio through each speaker independently (use the fading control) to confirm all four are wired.
- If equipped, test the backup camera and steering-wheel controls.

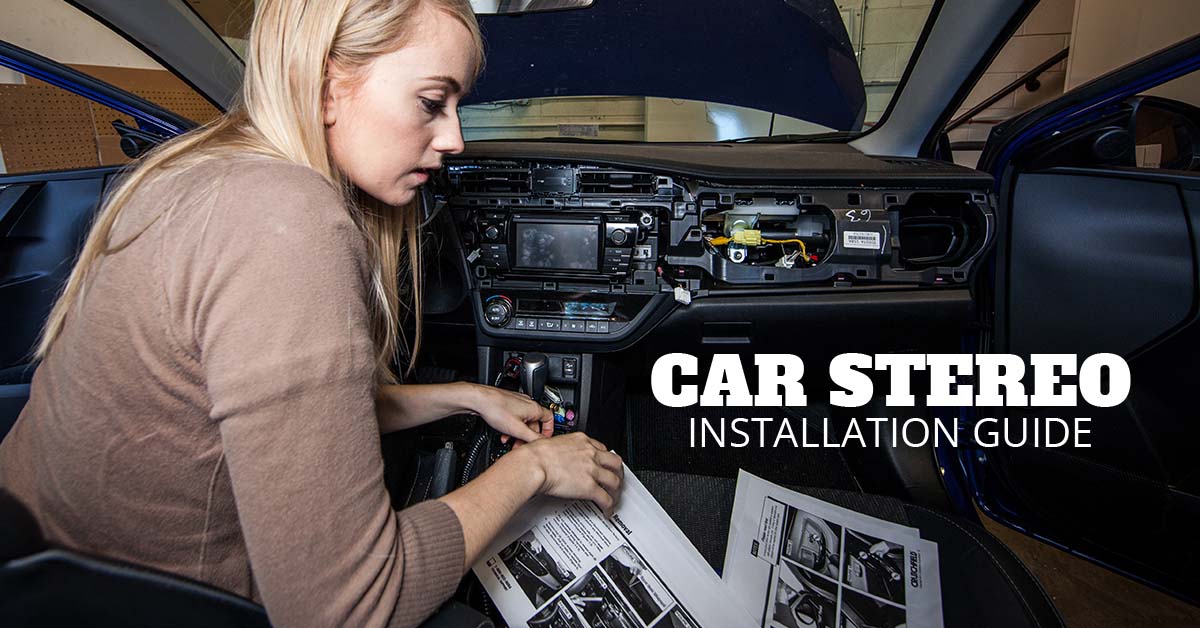
Final connections into a new head unit. Test everything before snapping the trim back on.
Credit: www.lifewire.com
Step 7: Customize and Upgrade Your Sound
Once the stereo runs, it’s time to make it yours. Most head units offer a surprising amount of setup:
- Bluetooth: Pair your primary phone for hands-free calling and music streaming.
- Sound tuning: Set bass, treble, balance, and fader. Many units include preset equalizers for rock, pop, and speech.
- Wireless CarPlay / Android Auto: Follow the on-screen pairing prompts once to access maps, messages, and podcasts.
- Backup camera: If your head unit has a camera input, routing a small license-plate camera is a weekend upgrade with major safety payoff.
- External amplifier: If your sound is still weak, adding a compact amplifier and wiring it before the stereo goes fully in place makes the job far easier than running wires later.
One subtle but valuable post-install task is making sure all on-screen text is readable — some units ship in a different language by default. If you need help navigating the menus, the process for adjusting the language options is actually simpler than most people expect.
Troubleshooting Common Problems
Even careful installers hit issues. Here’s what usually goes wrong and how to fix it.
Stereo Won’t Turn On
- Recheck the red (switched) and yellow (constant) wires — a mix-up here is the most common cause.
- Confirm the ground wire (black) is firmly connected.
- Check the inline fuse on the back of the stereo and the corresponding fuse in your car’s fuse box.
No Sound From Speakers
- Verify each speaker wire is on the right harness pin — left/right and front/rear cross-wiring is easy to miss.
- If the stereo powers on but some speakers are silent, test with the fader control to isolate which channel is dead.
- If all speakers are silent, suspect a factory amplifier bypass issue.
Poor Radio Reception
- Make sure the antenna adapter is firmly seated; a partially pushed-in connector produces weak, static-filled reception.
- Inspect the antenna cable for bends or damage near the dash opening.
Dashboard Trim Doesn’t Sit Flush
- Check your mounting kit. The stereo may be sitting proud of the kit’s tabs.
- Ensure trim panels are seated over the kit, not pressing against the radio’s face.
Steering-Wheel Controls Don’t Work
- Most modern vehicles require a dedicated steering-wheel-control interface module. If you didn’t install one, that’s why the buttons do nothing — your head unit may support them, but the car’s CAN-bus signals aren’t compatible without the adapter.
Safety and Legal Considerations
Installing a stereo is safe when you follow basic electrical and structural rules:
- Always disconnect the battery before wiring. This protects both you and the vehicle’s sensitive electronics.
- Don’t block airbags. If your airbag is located in the dash or A-pillar, verify no wiring or mounting kit parts interfere with its deployment path.
- Mind local display laws. Several states regulate how large in-dash screens can be and where they’re positioned, particularly if they play video. Check the National Highway Traffic Safety Administration guidance on in-vehicle electronics and state-specific restrictions before installing a large touchscreen.
You’re also responsible for using the stereo safely while driving — pairing your phone and setting up your music before you leave the driveway is the right habit.
DIY vs. Professional Installation
The decision often comes down to your vehicle and your comfort level.
| Factor | DIY | Professional |
|---|---|---|
| Cost | $0–$50 (adapter/basic tools) | $100–$250 labor |
| Time | 1–3 hours (sometimes more) | 30–60 minutes |
| Skill required | Basic wiring, patience | None |
| Warranty | Manufacturer parts only | Shop labor warranty |
| Risk | Minor — electrical mistakes possible | Very low |
DIY makes clear sense for most older vehicles and simple harness setups. If your car has extensive factory amplification, integrated climate controls in the radio, or complex CAN-bus modules, professional installation is often the safer and ultimately cheaper route — a single fried module can easily exceed the labor cost.
Keeping Your New Stereo in Top Condition
A head unit should last years, but small habits extend its life:
- Clean the screen gently with a dry microfiber cloth. Water or alcohol-based cleaners can damage touchscreen coatings.
- Check connections if audio glitches — loose wires sometimes loosen further with temperature changes.
- Update firmware when available. Many modern head units receive performance and stability patches.
- Protect against extreme heat — the dashboard is one of the hottest spots in any car. A windshield sunshade helps more than you’d think.
Of course, the interior around your new stereo is part of the enjoyment. Keep it looking its best by cleaning beneath the front seats on a regular basis, and make sure you’re choosing a vacuum that fits your needs — not every household unit reaches those tight gaps. If you’re still on the fence about your current one, it helps to know whether a household vacuum is up to the job. Our full collection of automotive how-tos covers these and other regular maintenance topics.
Frequently Asked Questions
How long does a car stereo replacement take?
Plan for 1–3 hours for a first-time install. Vehicles that need panel removal beyond the stereo bezel, or that use CAN-bus interface modules, add time — up to 4 hours in some cases.
Will a new stereo keep my steering-wheel controls working?
Only if you install a steering-wheel-control adapter (or a head unit with built-in support). The adapter translates your factory buttons to the new stereo’s commands. Without it, those buttons stop functioning entirely.
Does changing the stereo void my car warranty?
No — the Magnuson-Moss Warranty Act protects consumers from voiding a warranty simply for using aftermarket parts. If an installation mistake damages related electrical components, however, repair costs fall on you. Proper installation keeps this risk virtually nonexistent.
Do I need special tools for my specific car?
Some vehicles — commonly European and late-model domestic models — require radio removal keys or proprietary panel tools. These are inexpensive and worth checking for in advance. Using the right tool prevents scratched trim and broken clips.
What if my new stereo won’t power on?
Check the battery connection first, then verify the red and yellow wires are correct. Confirm the ground wire is solid. Check the stereo’s inline fuse and the relevant fuse in your vehicle’s fuse box. If everything checks out, the issue could be a defective unit — test it with a 12V bench supply if possible.
Conclusion
Replacing your car stereo is genuinely one of the most achievable DIY upgrades you can do. Choose a compatible head unit, gather the right adapters and tools, disconnect the battery first, take photos before disconnecting anything, and spend the extra minutes verifying each wire connection. Follow those steps and you’ll end the project with a modern, great-sounding audio system — and the confidence that comes from installing it yourself.
Before you start, bookmark this guide for your install day. When your trim panels are off and the wiring is in front of you, having each step laid out in order makes the difference between a smooth 90-minute job and an afternoon of frustration.

Leave a Reply