
You're staring at your kid in the bucket seat, and they look like a tiny sardine. Their knees are pressed against the back, their feet are touching the seat, and you're wondering if it's finally time to figure out when to transition to convertible car seat.
Here's the thing most parents get wrong: that cramped look isn't the signal you think it is. The real trigger is a measurement you've probably never even checked. In our research, we found that most children outgrow their infant carrier by height between 12 and 18 months, and the actual indicator is head clearance against the plastic shell, not their bent legs.
Getting this right matters because it directly affects crash safety, so let's walk through exactly what to look for.
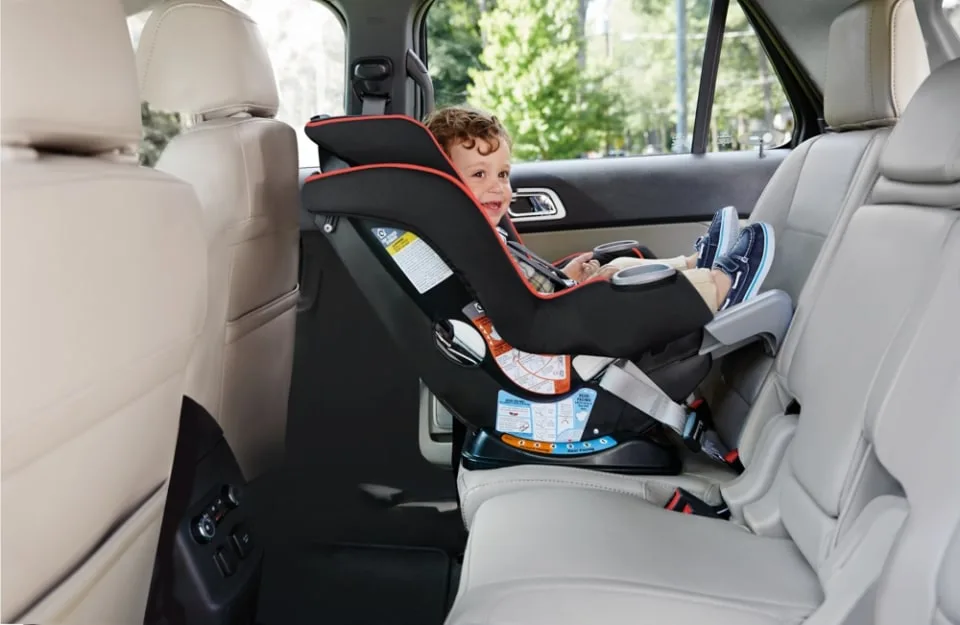
Image source: Bing (Web (fair-use with source credit))
The Real Reason Everyone Asks This Question (And Why It Matters)
The confusion starts because there are two different sets of rules. The infant carrier has its own limits. The convertible seat has completely different ones.
And nobody tells you that the transition point isn't always obvious.
The core problem is this: you're used to the convenience of the bucket seat. It clicks out of the car, clips into the stroller, and makes life easy. The convertible is bulkier, stays in the car, and doesn't come out without a fight.
So you're not just switching seats, you're switching your entire routine.
But safety has to trump convenience. The infant carrier is designed for newborns and small infants. The convertible is designed to support a child's spine and neck in a crash for much longer.
The question isn't "when do I want to stop carrying the bucket seat?" It's "when does the bucket seat physically stop being safe?"
Manufacturer specifications, which we reviewed across the major brands like Graco, Britax, and Chicco, all follow the same logic. The seat is outgrown when the child hits either the height limit or the weight limit, whichever arrives first. And here's the kicker: the height limit is almost always the one that gets hit first, and it's the one most parents miss.
That's why this transition confuses so many people. They're looking at weight and age, when they should be looking at a measuring tape and the back of the plastic shell.
Quick Answer
You transition when your child outgrows the infant seat. That happens by height or weight, whichever comes first. Check the 1-inch head clearance rule.
Then check the weight limit on the side sticker. Do not wait for leg cramps to decide.
The 1-Inch Rule Explained (Your New Best Friend)
This is the single most important concept in this entire article. The 1-inch rule is the difference between a safe ride and a dangerous one.
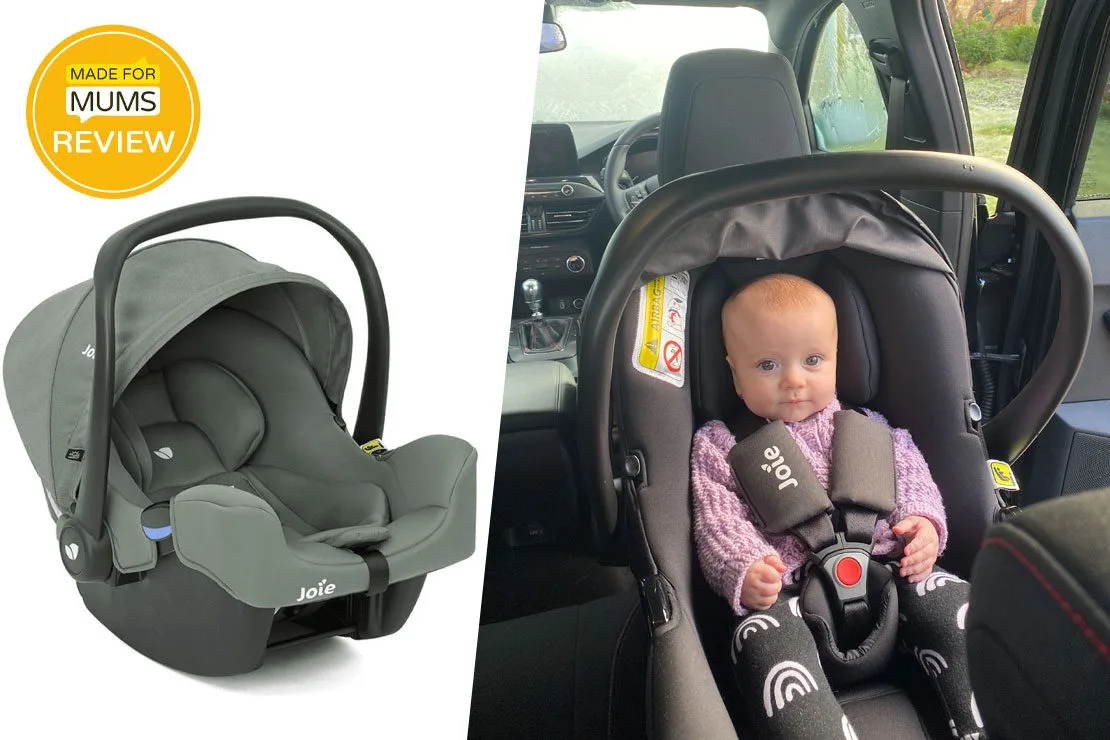
The rule is simple: if the top of your child's head is less than one inch from the top of the plastic shell, the seat is outgrown. Period.
Here's why it matters. In a forward crash, the child's body moves forward, and their head moves up slightly. If there's less than an inch of space, their head can slam into the hard plastic shell.
That can cause serious head and neck injuries, even in a moderate crash.
How to Measure It Correctly
You need to check this with the seat installed and the child sitting in it normally.
- Place your hand flat on top of your child's head.
- Slide your hand back until it touches the top edge of the plastic shell.
- If your hand fits comfortably between the head and the shell, you have more than an inch. You're fine.
- If your hand is tight or won't fit, you're at or below one inch. It's time to transition.
Why the Shell Height Matters More Than Age
The shell height is determined by the seat's design. It doesn't change based on your child's age or weight. A tall, skinny 10-month-old can outgrow the shell before a shorter 15-month-old does.
The manufacturer sets this limit because the shell is the structural protection for the head and neck. Once the head rises above that shell edge, the seat can no longer do its job properly.
Per FMVSS 213, the federal safety standard for car seats, the manufacturer must test the seat with the head inside the protective shell area. That's why the rule exists. It's not a guideline.
It's a hard limit.
Internal linking opportunity: if you're still unsure about how the whole seat installs, check out the full installation process for a ground-up guide on getting it right.
The Leg Myth: When Cramped Legs Are Actually Fine
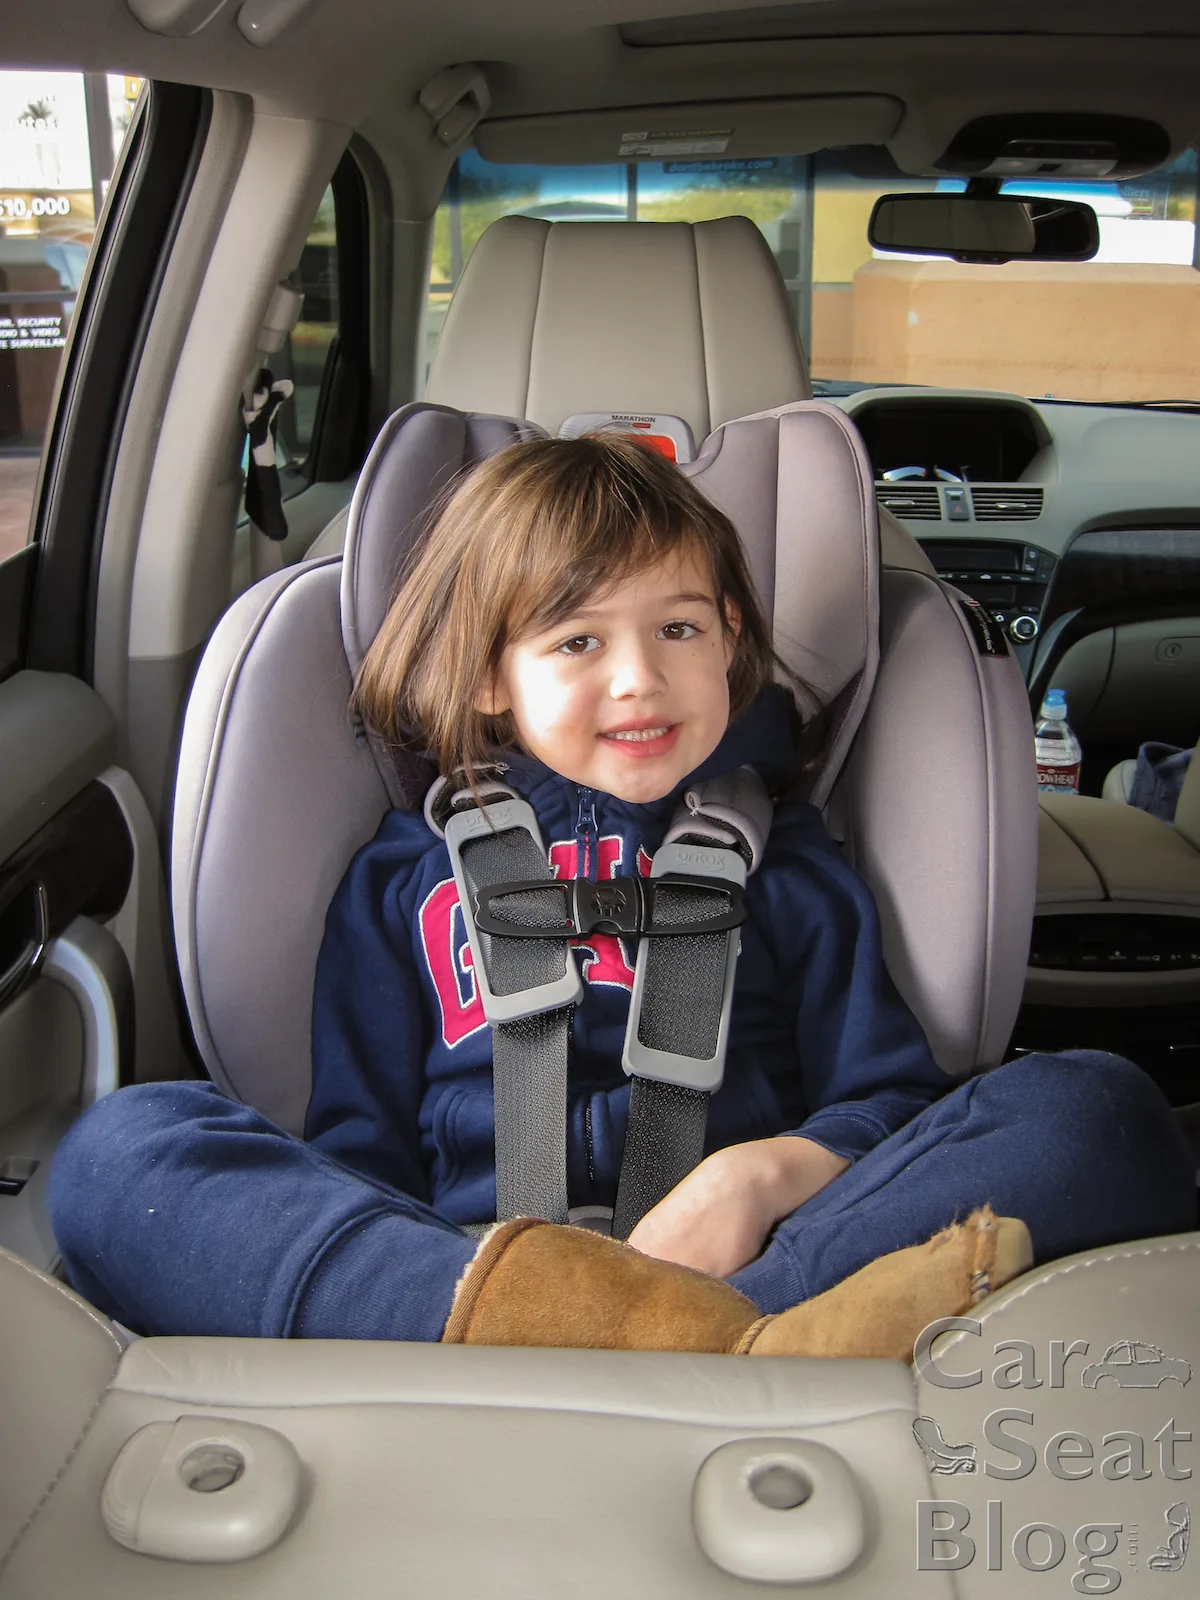
Let's clear this up right now. Bent knees are not a sign that your child has outgrown the seat. In fact, a curled position is safer.
Why? Physics. When a rear-facing child is in a crash, the force acts on their whole body at once. The seat back absorbs most of it, and the child is pushed into the seat cushion.
If their legs are straight, that force travels up the leg bones and into the spine. If their legs are bent, the force is distributed differently, and the spine stays in a better position.
What the Research Actually Says
Crash data from the National Highway Traffic Safety Administration consistently shows that rear-facing children are safer, regardless of leg position. The AAP (American Academy of Pediatrics) recommends keeping children rear-facing until they reach the maximum height or weight limit of the convertible seat. That's often age 2, 3, or even 4.
Leg fractures and soft tissue injuries are possible in a crash, but they're far less dangerous than spinal and head injuries. A broken leg heals quickly. Spinal cord damage doesn't.
When Legs Actually Become a Real Issue
There are two legitimate reasons to consider transitioning based on legs:
- The feet are hitting the seat so hard that the child is uncomfortable every single ride, and it's causing real distress.
- The legs are so compressed that the child can't sit still without kicking the vehicle seat continuously, which is a distraction.
But even then, the decision shouldn't be based on comfort alone. It should be based on the 1-inch rule and the weight limit. If those are fine, the child can stay rear-facing.
The discomfort is a problem, but the solution isn't necessarily a convertible seat, it might be a different recline angle or a rolled towel under the seat base for better positioning.
The Weight Limit: The Less Common Turning Point
The height limit gets most of the attention because it's what most kids hit first. But the weight limit is just as important, and it's the one that catches parents off guard.
Every infant carrier has a printed weight limit. You'll find it on the sticker on the side of the seat. Most models max out between 30 and 35 pounds. Some newer models go up to 40.
If your child hits that number before they hit the 1-inch head rule, they've outgrown the seat by weight, even if they still look small. Here's why that matters:
The harness, the shell, and the base are all tested to a specific weight. Going over that limit means the seat may not perform as designed in a crash.
The 2-Pound Buffer Rule
Here's a practical tip that we've seen save parents from a last-minute scramble. When your child is within about 2 pounds of the limit, start your research now.
- Check the seat's weight capacity against your child's recent weigh-ins.
- Look at harness strap room and headroom to get a complete picture.
- Start shopping for a convertible before you're stuck in a hurry.
If they hit the weight limit but still have headroom, it's time to move. No exceptions. The seat label is the final authority.
What About the "Max Weight" for Rear-Facing?
Convertible seats also have rear-facing weight limits, usually between 40 and 50 pounds. That's a different number than the infant carrier's limit.
When you switch to a convertible, you're not automatically allowed to move your child forward-facing. The convertible has its own rear-facing limits, and you should keep your child rear-facing until they max out those numbers. Don't rush it.
The AAP recommends rear-facing for as long as possible, up to the seat's limits. As of 2026, most convertibles on the market support rear-facing well past age 3, which is a huge upgrade over the old bucket seat days.
No exceptions. The seat label is the final authority. Keep them rear-facing in the convertible until they hit that seat's limits, not the old carrier's limits.
Risk Factors: Signs You May Have Already Passed the Window
Sometimes parents don't catch the signs early enough. Maybe you've been meaning to check, or maybe your child hit a growth spurt you didn't anticipate. Let's look at the red flags that scream "this seat is too small right now."
The chest clip is sitting at the stomach. The chest clip belongs at armpit level, right over the sternum. If your child's shoulders are so far above the lowest harness slots that the chest clip slides down toward the belly, the seat is done. The harness can't restrain them properly in that position.
The harness straps are below the shoulders. For rear-facing, straps should be at or below the shoulders. If they're ending up at the underarm area because the child has grown taller, the harness path is wrong. This can compress the spine in a crash and is a clear sign of an outgrown seat.
The head is visibly pressing against the canopy. You might not think to measure the 1-inch gap. But if you notice the head is touching or denting the soft material of the carrier canopy, that's a sturdy visual cue that the shell limit is close or already passed.
Let's be straight about behavioral clues too. Your child can't tell you in words that the seat is too small, but they can tell you in actions.
- Increased fussiness on rides: They're uncomfortable because the carrier is tight.
- Kicking the vehicle seat constantly: They're trying to stretch out and can't.
- Refusing to sit in the carrier at all: This is a huge sign the seat has become a source of distress.
A quick test: sit your child in the carrier on the floor. Look at the harness slot height relative to their shoulders. Look at the head position relative to the shell.
If either is off, you've got your answer. The seat needs to go.
If you're noticing these signs but aren't certain whether it's a newborn insert situation or a full seat replacement, check out when to remove the newborn insert for clarity on that separate decision.
Safe Transition Practices (Non-Negotiable)
Once you've confirmed it's time, the transition itself needs to happen methodically. This isn't a "grab the first seat you see" situation. It's a safety-critical purchase that must fit both your child and your vehicle perfectly.
Rule 1: Buy the convertible before you need it. Don't wait until your child's head is touching the shell. That's a guaranteed path to a rushed decision and a poor fit. Give yourself two to three weeks to research, measure, and test.
Rule 2: Read the new manual cover to cover. The convertible's manual is the law for that seat. It specifies harness slot positions, recline angles, and installation paths that are entirely different from the infant carrier.
What the Manual Tells You
The manual contains critical numbers you won't find anywhere else:
- The exact rear-facing height and weight limits for that model.
- The recline angle range for proper installation.
- The harness slot positions for rear-facing versus forward-facing.
Per federal testing standards, those limits are the maximums the seat was crash-tested for. Going beyond them isn't a gray area. It's a hard stop.
The Aftermarket Accessories Trap
Here's something that trips up a lot of parents. You've just bought a shiny new convertible seat, and you want to make it more comfortable. You're eyeing strap covers, head supports, and bunting bags.
Stop. Don't do it. Aftermarket accessories that didn't come in the box with the seat haven't been crash-tested with that seat. In a crash, an untested strap cover can compress and create slop in the harness, allowing the child to move forward more than they should.
The only accessories you should use are the ones the manufacturer includes in the box. If you want extra comfort, adjust the harness and recline angle properly.
The No-Coat Rule
This deserves its own callout because it's so often ignored. Do not buckle your child into the convertible while they're wearing a bulky winter coat. The coat creates space between the harness and the body, and in a crash, that space closes.
The harness ends up too loose to protect them.
The test: buckle the harness, then try to pinch the strap at the collarbone. If you can pinch any fabric, it's too loose. Your child should wear a thin layer in the car, and you can layer blankets over the harness, never under it.
Wondering whether your seat's fabric covers are safe to swap or remove? We've broken down whether car seat covers damage leather seats if your vehicle has that specific concern.
Step-by-Step: How to Make the Switch
You've got the new seat. The box is open. Now what?
Here's the process we recommend, step by step, to get it right the first time.
Step 1: Weigh and measure your child. You need accurate numbers. Weigh the child, then measure their head position against the carrier's shell. Write down their current weight and height.
These numbers will determine which harness slots and recline angle to use.
Step 2: Trial fit in your vehicle. Put the convertible in the car before you commit to an install. Set it in the middle seat if possible. Check the front passenger seat clearance.
If the front seat has to move so far forward that it's unusable, you may need a different seat or a different position.
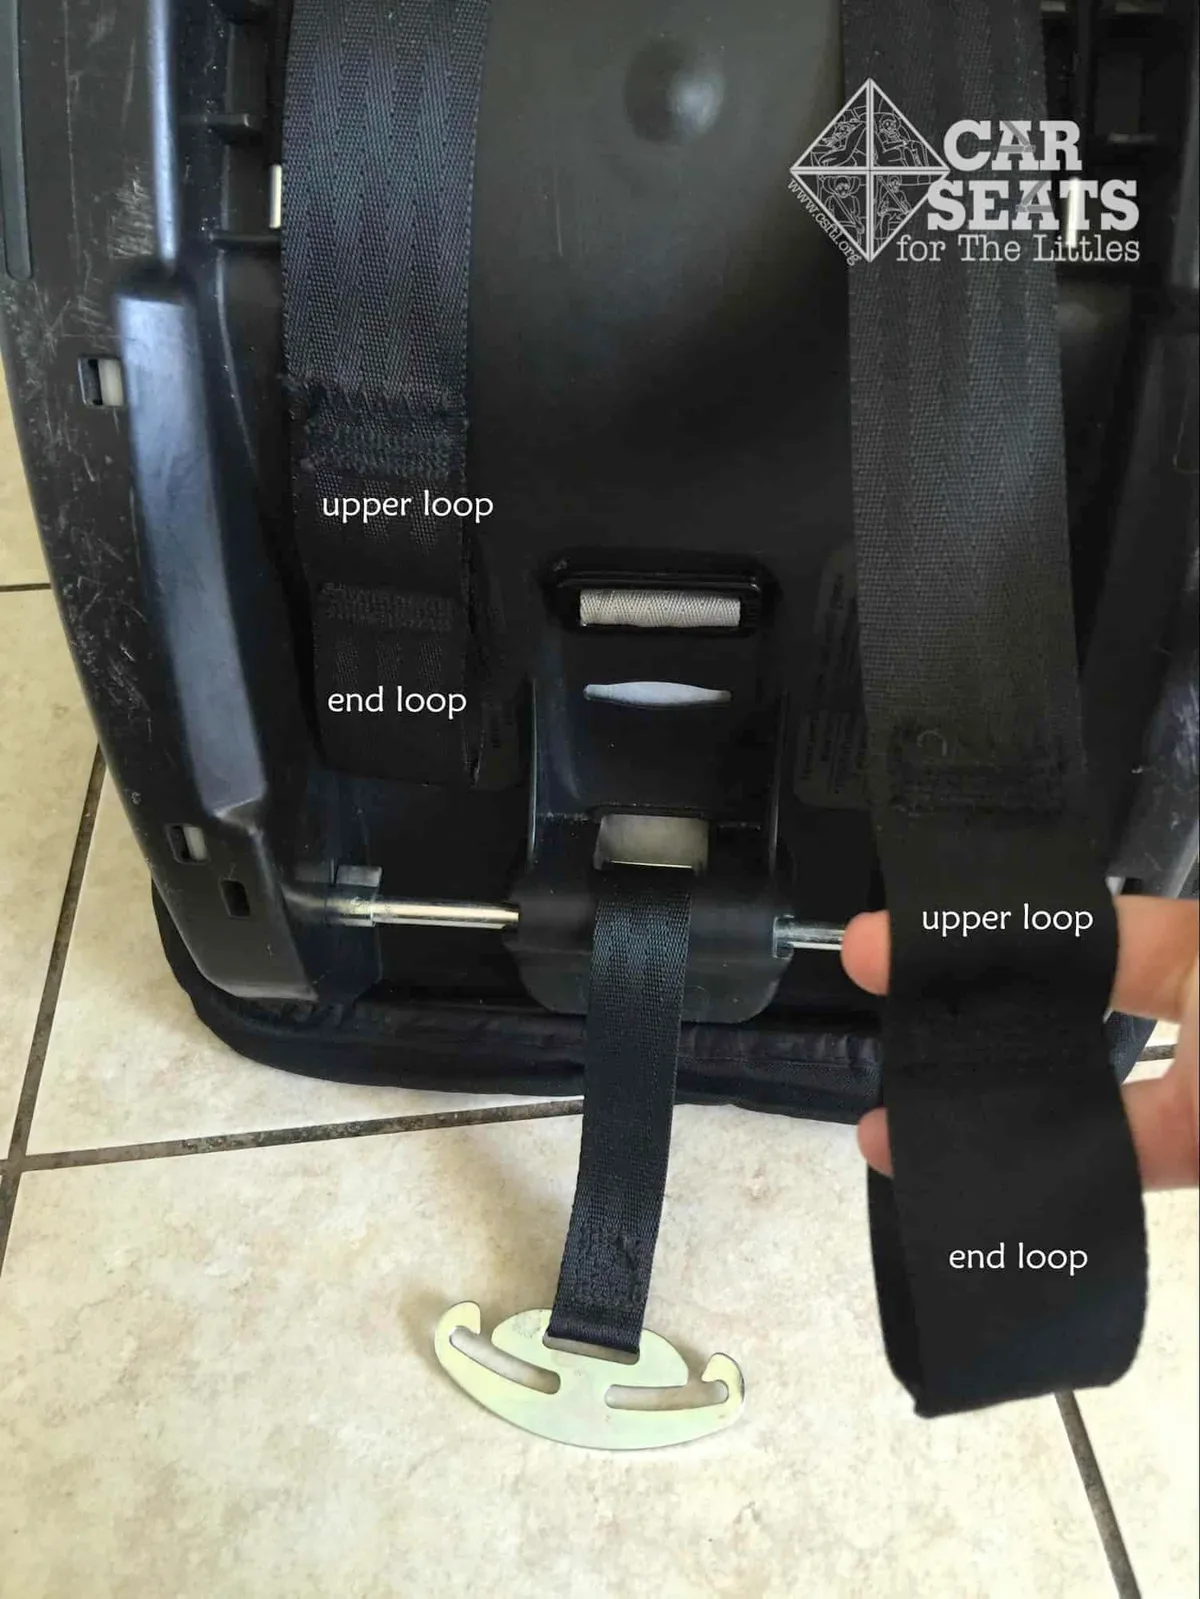
Step 3: Install with the lower anchors or seat belt. There are two accepted installation methods: LATCH (lower anchors and tethers for children) or a locked seat belt. Both are safe when you use them correctly. The manual tells you which one the seat supports first.
Step 4: Adjust the harness slots for rear-facing. This is the step that separates a safe install from a dangerous one. The harness straps need to be at or below the child's shoulders for rear-facing. Most convertibles have an adjustable headrest and harness that move together.
Step 5: Verify the recline angle. Most convertible seats have a bubble level or a recline indicator. For an infant who can't yet sit up unassisted, the seat needs to be at the most reclined position. For an older child who can sit up, you can use a more upright angle.
Step 6: Tighten the harness properly. The harness should be snug enough that you can't pinch a sideways fold at the collarbone. The chest clip should be at armpit level. Bulky coats are a no-go.
Step 7: Get a CPST inspection. This is the professional safety check. A Child Passenger Safety Technician is a certified installer who will look at your setup, correct any errors, and show you how to do it yourself. You can find one at a fire station, hospital, or police department, often for free.
If you want to double-check the whole installation process against a detailed guide, our complete step-by-step installation resource walks through every mistake-prone detail.
Common Mistakes Parents Make During Transition
Even with the best intentions, parents make predictable errors during this switch. We've seen the same patterns show up repeatedly in aggregate reviews and CPST reports. Here's what goes wrong most often, so you can avoid it.
Mistake 1: Flipping forward-facing too early. The moment the convertible is installed, some parents think the forward-facing harness is an option. It's not. The convertible supports rear-facing well past age 2, often to age 4 or beyond.
The indicator is never age alone. It's the height and weight limits of the seat.
Mistake 2: Tightening the harness over bulky coats. We covered this, but it's so common it deserves a second mention. A puffy coat in a crash compresses down to nothing. That leaves you with a loose harness and a child who can slide forward inches.
Use thin layers under the harness and blankets over it.
Mistake 3: Using the top tether for rear-facing when not allowed. Some newer vehicles have tether anchors positioned for rear-facing use. Many convertibles support a rear-facing tether. But not all seats and not all vehicles permit it.
If the manual doesn't explicitly say you can use the tether rear-facing, don't. That's a rule set by crash testing, not a suggestion.
Mistake 4: Ignoring the expiration date. Every car seat has an expiration date, usually stamped on the bottom or the back of the shell. Convertibles typically last 7 to 10 years. If you've bought a used seat or a display model, check that date.
Expired seats haven't passed current safety testing, and their plastic can degrade.
Mistake 5: Installing without locking the seat belt. If you're not using LATCH, the seat belt must be locked. A locked seat belt stays tight during a crash. One that's not locked will spool out and allow the seat to move.
Check the manual for the correct locking method for your vehicle's belt system.
Mistake 6: Skipping the CPST check. Nobody's born knowing how to install a convertible seat perfectly. The CPST check is free, takes about 15 minutes, and corrects errors you didn't know you were making. It's the single best way to confirm your install is right.
Vehicle Fitment: The Part Nobody Warns You About
You can buy the safest, highest-rated convertible seat on the market, but if it doesn't fit your car, it's useless. Vehicle fit is a massive, under-discussed factor in the transition decision.
The 20% overhang rule. The seat base should not overhang the front or rear edges of the vehicle seat by more than 20 percent. That's the amount where the seat can still perform correctly in a crash. If the base hangs way off the seat cushion, the seat can tip or shift in high-impact scenarios.
Front passenger seat clearance. Convertibles are tall, and when rear-facing, they extend back toward the front seats. In a compact car or coupe, you might have to push the front passenger seat so far forward that it's uncomfortable or unsafe for an adult. That's a no-go.
Center position vs. window position. The center of the back seat is statistically the safest spot because it's the farthest from any potential side impact. However, some convertibles are too wide for narrow center seats. You might have to settle for a window position.
Just know that you're losing a bit of side-crash protection.
Test before you buy. Here's the honest advice we give every parent: bring your car seat into the store, take it out of the box, and try it in your vehicle. Many big-box retailers let you do exactly that. The manual might say "fits cars wider than 54 inches between the anchors," but the real test is in your actual back seat.
If you're renting a car for an upcoming trip, don't assume the convertible will fit well in the rental. Check out whether you can rent a car seat with a rental car before you make assumptions about which seat to bring.
The Numbers You Should Actually Know
You don't need to memorize every spec, but a few key numbers will help you navigate the transition with confidence. Here's a quick reference table for the most common metrics.
| Metric | Typical Range | Notes |
|---|---|---|
| Infant carrier weight limit | 30–40 lbs | Check the side sticker on your specific model |
| Infant carrier shell height limit | 28–32 inches of child height | Use the 1-inch rule to measure |
| Average transition age | 12–18 months | Driven by height, not age |
| Convertible rear-facing weight limit | 40–50 lbs | Much higher than the infant carrier |
| Convertible rear-facing height limit | Usually 40–49 inches | Varies by brand and model |
| Convertible seat lifespan | 7–10 years from manufacture date | Check the expiration sticker |
The key takeaway here: your child will outgrow the infant seat long before they outgrow the convertible seat rear-facing limits. The transition is a step, not a final destination.
Weight per manufacturer specs. Always check the sticker that's actually on your seat. The numbers printed on the plastic are the legal limits that seat was crash-tested for. If the sticker says 35 pounds, that's the absolute ceiling, not a suggestion.
The "max out" philosophy. The AAP's stance is clear: keep your child rear-facing until they max out the height or weight limit of the convertible seat. For most kids, that means rear-facing until age 3 or 4. That's a big jump from the infant carrier era.
Expiration dates in practice. If you're transitioning to a hand-me-down convertible, the clock is already ticking. A seat that's been in the family for 5 years has 2, 5 years of life left, depending on the model. Make sure that timeline extends past the child's rear-facing period, or you'll have to buy again sooner than you'd like.
Legal and Safety Standards You Should Know
The car seat industry isn't governed by vibes. It's regulated by federal safety standards that every seat must meet before it hits the market. Here's what you need to know about the legal side of this transition.
FMVSS 213. In the United States, this is the Federal Motor Vehicle Safety Standard 213. It sets the minimum performance requirements for child restraint systems. Every child seat sold in the U.S. must pass FMVSS 213 crash testing.
If a seat doesn't meet these standards, it can't legally be sold.
CMVSS 213. In Canada, the equivalent is Canadian Motor Vehicle Safety Standard 213. The testing is similar but not identical to the U.S. version. Seats sold in Canada must meet CMVSS 213.
The manufacturer's manual is a legal document. The manual that comes with your convertible seat isn't just a set of instructions, it's the official statement of how the seat is designed to be used. Using the seat against the manual's directions voids the warranty and, more importantly, means you're using the seat in a way it wasn't crash-tested for.
State laws vs. AAP recommendations. This is a crucial distinction. State laws set the minimum legal requirement, which is usually rear-facing until age 2.
The AAP recommends rear-facing until the seat's height and weight limits, which is safer. As of 2026, no state requires forward-facing at age 2, but many parents assume the law is the safety standard. It's not.
Registration card. When you buy a new convertible seat, fill out the registration card or the online form. This ensures you'll be notified in the event of a recall. Recalls happen more often than you think, and being registered is the only way to get notified.
No aftermarket accessories. We've said it before, but it ties into the legal standards. Any product that isn't original manufacturer equipment but goes between the child and the harness hasn't been tested under FMVSS 213. Use only what comes in the box.
If you're uncertain about whether certain products are safe in your seat, our guide on whether car seat covers are safe with airbags covers a related corner of this question.
Final Decision Guide: Your transition Checklist
By now, you know the rules. Let's put it all together into a single checklist you can run through in under a minute.
The two-question test:
- Is the top of my child's head less than one inch from the top of the plastic shell? If yes, transition now.
- Is my child at or above the seat's weight limit? If yes, transition now.
If you answered yes to either, you have your answer. If you answered no to both, your child still fits the infant carrier, regardless of how cramped their legs look.
Think about the timing:
- Buy the convertible at least two weeks before you need it.
- Install it before your child hits the limit, not after.
- Schedule a CPST check for the weekend after the install.
A final note on rear-facing longevity. The convertible is not a "forward-facing now" seat. It's an "extended rear-facing" seat. Don't flip it as soon as you install it.
Keep your child rear-facing until they reach the convertible's rear-facing limits, which is usually age 3 or 4. The femur and spinal benefits are documented in IIHS research, and the statistics on rear-facing safety are clear: it's the safest way for children to ride.
If you're still unsure about your child's readiness for an eventual forward-facing transition, the answer is simple: wait. There's no award for early transition. Every additional month rear-facing is a month of better-protected spine and neck.
The seat will tell you when it's time, not your child's complaints about bent knees.
One last piece of encouragement. This transition feels big because you're losing the convenience of the carrier. But you're gaining something more important: a seat that protects your child for years to come. Do the 1-inch check, read the manual, and get the CPST inspection.
Then rest easy knowing your child is riding in the safest possible setup for their size.
Frequently Asked Questions
Can I move my child forward-facing as soon as I switch to a convertible?
No. The convertible seat has its own rear-facing height and weight limits, typically 40, 50 pounds and 40, 49 inches. Keep your child rear-facing until they hit those limits, not just because you bought a new seat.
The AAP recommends rear-facing for as long as possible within the seat's limits.
My child's feet touch the back seat. Is that a problem?
No. It is completely safe and normal. Bent legs and feet touching the vehicle seat are not signs of outgrowing the carrier.
The child's legs can compress in a crash without causing significant injury, while their spine and head are far more protected in the rear-facing position.
What is the most common reason parents transition too early?
Parents most often confuse a cramped appearance with a safety issue. They look at bent knees and assume the seat is too small. The real determining factors are the 1-inch head clearance rule and the seat's printed weight limit.
Leg position isn't a valid reason to switch.
How do I find a free car seat inspection near me?
Use the National Highway Traffic Safety Administration's (NHTSA) search tool to locate certified Child Passenger Safety Technicians in your area. Fire stations, hospitals, and police departments frequently host installation check events. These inspections are free and take about 15, 20 minutes.
It's the best way to confirm your installation is correct.
What should I do with the infant carrier once I transition?
You can sell it, give it to a friend, or store it for a future child. Before you do, remove the harness and cut any visible labels or stickers that indicate the seat's manufacturing date. This prevents anyone from using the seat after it's expired or involved in a crash.
If you're handing it down, the first step is to verify the expiration date hasn't passed.
When should I start shopping for the convertible seat?
Begin your research when your child is within 2 pounds of the infant carrier's weight limit or when you notice about 1.5 inches of headroom remaining. This gives you time to trial-fit seats in your vehicle and make a deliberate choice, rather than a rushed purchase at the last minute.
What if my child is between sizes and doesn't quite fit the carrier but is too small for the convertible?
This "in-between" phase is less common than you'd think. Most convertibles have rear-facing weight limits starting around 5 pounds, which overlaps with infant carrier ranges. If your child is close to the carrier's height limit but under the convertible's minimum, the safest move is to switch to the convertible anyway.
The backwards-facing harness will still be snug and safe.
How do I know if the convertible seat fits my car before I buy it?
Trial-fit is the only way to know for sure. Take the seat out of the box and set it in your vehicle's back seat. Check that the front passenger seat can still move back far enough for an adult to sit comfortably.
Verify the seat base doesn't overhang the vehicle seat edges by more than 20 percent. If it fits, great. If not, look for a narrower model.
Is it okay to use a secondhand convertible seat?
Yes, but only under strict conditions. Check that the expiration date hasn't passed, the seat has never been in a crash, and it still has the original manual and no visible damage. If the seat is missing any of those elements, don't use it.
The harness and plastic shell degrade over time, even if the seat looks fine. A new seat is a $200 investment, while a failed used seat is a risk you can't price.
What if my child hates the convertible seat after the switch?
Give it time. The convertible is more upright and has a different recline angle than the carrier. Many children need a few rides to adjust.
Ensure the harness is snug but not too tight. Check the recline angle is appropriate for your child's age. If the seat is properly installed and the harness is right, most kids settle in within a week.
Fussiness isn't a sign the seat is unsafe, it's a sign they're adjusting to a new position.
What if my child is between sizes and doesn't quite fit the carrier but is too small for the convertible?
This "in-between" phase is less common than you'd think. Most convertibles have rear-facing weight limits starting around 5 pounds, which overlaps with infant carrier ranges. If your child is close to the carrier's height limit but under the convertible's minimum, the safest move is to switch to the convertible anyway.
The rear-facing harness will still be snug and safe.
How do I know if the convertible seat fits my car before I buy it?
Trial-fit is the only way to know for sure. Take the seat out of the box and set it in your vehicle's back seat. Check that the front passenger seat can still move back far enough for an adult to sit comfortably.
Verify the seat base doesn't overhang the vehicle seat edges by more than 20 percent. If it fits, great. If not, look for a narrower model.
Is it okay to use a secondhand convertible seat?
Yes, but only under strict conditions. Check that the expiration date hasn't passed, the seat has never been in a crash, and it still has the original manual and no visible damage. If the seat is missing any of those elements, don't use it.
The harness and plastic shell degrade over time, even if the seat looks fine. A new seat is a $200 investment, while a failed used seat is a risk you can't price.
What if my child hates the convertible seat after the switch?
Give it time. The convertible is more upright and has a different recline angle than the carrier. Many children need a few rides to adjust.
Ensure the harness is snug but not too tight. Check the recline angle is appropriate for your child's age. If the seat is properly installed and the harness is right, most kids settle in within a week.
Fussiness isn't a sign the seat is unsafe, it's a sign they're adjusting to a new position.
Keep the Carrier Around a While Longer
Here's a practical tip that softens the transition. You don't have to retire the infant carrier the moment the convertible arrives. Keep the carrier in the car for a few weeks as a backup.
This is especially handy for short trips where the child falls asleep in the carrier and you don't want to wake them. The convertible is the primary seat, but the carrier remains useful for stroller clips and quick errands.
Just don't let the carrier become the default out of comfort. The convertible is now the safe, correct seat for your child's size. Use the carrier sparingly, and only when the child still fits its limits.
A Few Last Housekeeping Checks
Before you close this chapter, run through these final checks.
- Register the new convertible seat with the manufacturer for recall notifications.
- Record the manufacture date and expiration date somewhere you'll find them easily.
- Tighten the harness every ride. Convertible harnesses can loosen slightly over time.
- Check the recline angle monthly in hot weather, since seat foam can compress.
These small habits keep the convertible performing at its best for years.
Should You Keep Rear-Facing Longer?
The short answer? Yes. Every additional month rear-facing provides measurable safety benefits.
The American Academy of Pediatrics and the National Highway Traffic Safety Administration both recommend keeping children rear-facing until they reach the convertible's maximum height or weight limit. That's often age 3 or 4.
Children have relatively heavy heads compared to their bodies. In a forward-facing crash, that disproportionate weight pulls the neck forward, stressing the spinal cord. Rear-facing spreads that force across the entire back and head, which is significantly safer.
One Last Thing
You've got this. The transition to a convertible seat isn't a race, and it isn't a test of how early you can get there. It's a simple, methodical process of checking clearances, reading the manual, and getting a professional look if you're unsure.
Do the 1-inch check. Check the weight sticker. Buy the convertible before you need it.
Get the CPST inspection. Then rest easy knowing your child is riding in the safest possible setup for their size.
Final Decision Guide: Your Transition Checklist
You've got the knowledge. Now here's the condensed version for when you're standing in the garage with a measuring tape and a squirmy toddler.
- Measure head clearance. If less than 1 inch, transition now.
- Check the weight sticker. If within 2 pounds of the limit, start shopping.
- Buy the convertible before you need it. Give yourself two weeks.
- Install it rear-facing. Harness at or below shoulders. Recline angle correct.
- Get the CPST inspection. Free, fast, and worth it.
If you answered yes to either test, you're done thinking. It's time to move.
Frequently Asked Questions
Can I keep using the infant carrier for short trips after switching?
Only if the child still fits the carrier's limits. If they've outgrown it, don't use it. The convertible is now the safe option for every ride.
A short trip still needs proper protection.
What about an all-in-one seat that grows with my child?
All-in-one seats are a fine choice. They convert from rear-facing to forward-facing to booster. The trade-off is weight and bulk.
Some parents find them heavy for moving between cars, but they're a solid place to start your search.
Do I need to buy a new convertible seat for a second child?
Yes if the first child caused any crash damage or the expiration date is near. Otherwise, a secondhand seat within the family can work. Just verify the manual, the harness condition, and the expiration sticker.
How tight should the harness feel in the convertible?
Snug enough that you can't pinch a fold at the collarbone. The chest clip sits at armpit level. The harness shouldn't shift.
If you can slide two fingers under the strap easily, it's too loose.
Where should I put the convertible in my vehicle?
The middle of the back seat is statistically the safest, when it fits. If the seat is too wide for the middle, use a window position. Never put a rear-facing seat in the front row with an active passenger airbag.

Leave a Reply