
Pulling a car stereo out of the dash for the first time can feel nerve-wracking. One wrong move with a trim tool and you’re staring at a cracked dashboard. But here’s the reality: most factory and aftermarket stereos are designed to come out in a specific, repeatable way. Once you understand how they’re mounted, the job becomes straightforward.
This guide walks you through every step—from gathering the right tools to disconnecting the wiring harness—so you can remove your stereo safely and confidently. You’ll also learn the common beginner mistakes to avoid, how to handle tricky integrated systems, and when it’s genuinely worth calling a professional. For more on this, see our guide on how to remove a cd from a car.
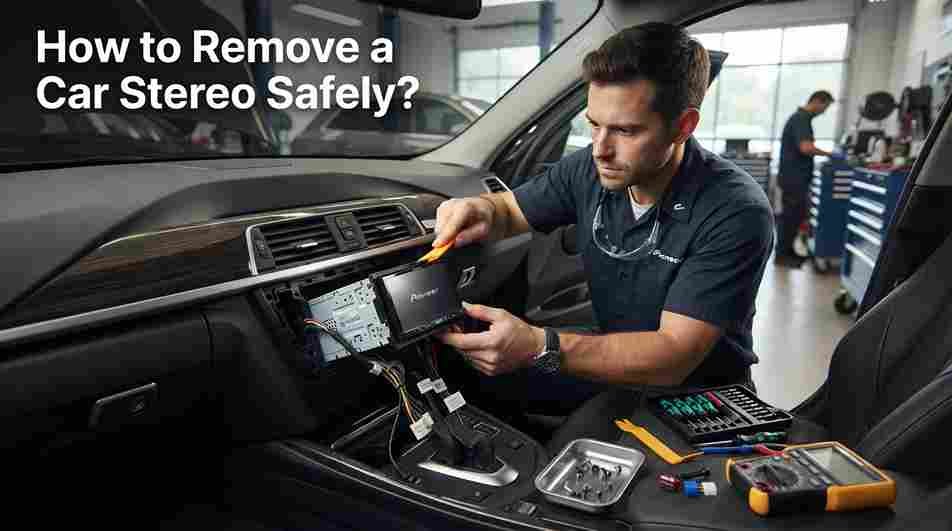
What You Should Know Before Touching Anything
Car stereos aren’t universal. Before you start prying at trim panels, you need to identify what kind of unit you’re dealing with.
The most common types are single DIN and double DIN:
- Single DIN – 2 inches tall, 7 inches wide. Most common in older vehicles and basic trim levels.
- Double DIN – 4 inches tall, 7 inches wide. Standard in most modern cars, often with touchscreens.
- Integrated/Factory-Mounted – A stereo that’s built into a larger panel, often sharing space with climate controls or a vehicle display. These are the trickiest to remove.
Your mounting method matters just as much as the size. Some stereos are held by visible screws, others use spring clips, and many newer cars use special release keys that slide into slots on the front face. For more on this, see our guide on when to remove newborn insert from car seat.
If you don’t have your owner’s manual, search “[your car make and model] stereo removal” online. You’ll usually find forum posts or videos from owners who’ve already done the job. This research alone can save you from a broken clip or a scratched trim piece.
Tools You’ll Need
Most people skip this step and pay for it later. Here’s a practical checklist to gather before heading to the garage:
- Screwdriver set – Phillips and flathead, in small and medium sizes
- Panel removal tool – Plastic trim tools, not metal, to avoid scratching the dash
- Stereo removal keys – Metal or plastic U-shaped tools required for many Ford, VW, and GM models
- Needle-nose pliers – For gripping stubborn connectors
- Socket wrench set – For bolts holding brackets or DIN cages
- Flashlight or headlamp – You will need this. Dash cavities are dark.
- Magnetic pickup tool – For fishing out dropped screws
- Small container with a lid – For storing screws and clips
- Electrical tape – To wrap loose wires and prevent short circuits
Special removal keys are cheap—usually under $10 at auto parts stores—and they can save you from damaging the face of your stereo. If you’re unsure which keys fit your vehicle, check a compatibility guide before buying. For more on this, see our guide on how to remove pet hair from car seats.

The right tools make the job faster and keep your dashboard damage-free.
Safety First: Prepping Your Car
Disconnecting the battery is non-negotiable. Not just “a good idea”—it’s the first thing you do.
Here’s the correct order:
- Disconnect the negative battery terminal first. Use a 10mm wrench, tuck the cable away from the terminal, and cover it with a rag. This prevents any accidental short circuit.
- Set the parking brake to keep the vehicle stable.
- Clear the workspace. Remove items from the seats and floor so you’re not working around clutter.
- Check for airbag locations. If your dash has an airbag near the stereo area, be extra careful. Accidentally deploying an airbag is dangerous and expensive.
One important note for 2026: many newer vehicles—especially hybrids and EVs—have battery management systems that prefer you not disconnect the 12V battery without following specific procedures. In these cars, check the owner’s manual first. Some models require you to wait a certain time after disconnecting before power is fully drained.
If your car has anti-theft features or a coded radio, expect to enter a code before the new unit works. Write down your serial number if you plan to reinstall the same stereo. For more on this, see our guide on how to change language on car stereo.
Removing the Dashboard Panels
This is where beginners usually get into trouble. Dashboard trim panels are held by clips and screws, and they don’t respond well to force.
The golden rule: if it won’t budge, you’ve missed a screw.
Start by inspecting the trim pieces around the stereo. Look for:
- Visible screw covers or caps
- Hidden screws under a rubber mat or storage bin
- Clips along the outer edges
- Screws tucked behind the climate control knobs
Use a plastic panel tool to gently pry from the outer edge, working your way around. Apply steady, even pressure. Metal tools will scratch the dash, so avoid them unless you’re comfortable with the risk. For more on this, see our guide on how to fix car stereo touch screen.
Some panels simply pop straight off. Others need to be pulled toward you after the clips release. If you hit resistance, stop, and check again for a missed screw or clip.
| Panel Location | Typical Attachment | Removal Tip |
|---|---|---|
| Around the stereo | Clips and screws | Start from the corners; use a plastic tool |
| Lower dash | Screws | Check the footwell area |
| Climate controls | Clips | Pull gently; wiring is attached behind |

Plastic trim tools are safer than screwdrivers for releasing dash clips.
Removing the Stereo Unit
Once the panels are out of the way, you can see how the stereo is actually mounted. Here’s how to handle each type.
Screw-Mounted Stereos
These are the most straightforward. Remove the visible screws on the sides or top of the unit, and store them in your container right away. After the screws are out, the stereo should slide toward you. If it doesn’t, there’s likely a screw you missed or a bracket holding the back of the unit.
Stereo Removal Keys
Many Ford, VW, Mazda, and GM vehicles use special removal keys. Insert the keys into the small slots on the front of the stereo—usually four holes at the corners. Push until you hear a click, then pull the keys outward. The stereo should slide free with them.
If it feels stuck, don’t force it. Check that all four keys are properly seated, and try wiggling gently. Forcing unevenly can bend the release tabs.
Integrated or Hidden-Mount Stereos
In modern cars, the stereo is often part of a larger assembly that includes climate controls or a central display. You may need to remove the entire panel before you can access the stereo itself.
Work systematically. Take photos as you go, and label every connector you disconnect. These systems have more wiring than basic stereos, and it’s easy to forget which plug goes where.
Disconnecting the Wiring Harness
Now you’re at the point where most damage happens. The wiring is connected by plastic clips and release tabs—not by brute force.
You’ll typically find:
- Main power connector – The largest plug, usually 10–20 pins
- Speaker wires – Often bundled into one or two connectors
- Antenna cable – A thin coaxial cable, sometimes with a locking ring
- Aux/steering wheel control connectors – Less common, found in newer cars
- Ground wire – Often a screw terminal on the chassis
To disconnect, press the release tab and pull firmly but smoothly. Don’t yank on the wires themselves—grab the connector body. If a plug is tight, use needle-nose pliers to grip it, but be careful not to crush the housing.

Label each connector before unplugging it to make reinstallation painless.
Pro tip: Before you disconnect anything, take a clear photo of the wiring with your phone. This reference image is worth more than any wiring diagram you’ll find online.
On modern cars, you might encounter CAN bus connectors or digital amplifier modules. These require extra patience. Never cut wires unless you’re absolutely certain you’re bypassing a non-essential connection.
Common Mistakes and How to Avoid Them
Every car audio installer has stories about jobs gone wrong. Here are the errors we see most often:
- Skipping the battery disconnect – This risks an electrical short, blown fuses, or airbag deployment.
- Forcing trim panels – You’ll crack clips, warp plastic, or snap mounting points. Gentle pressure always wins.
- Losing screws – Keep them in a magnetic tray or a lidded container before you start.
- Not labeling wires – You’ll guess wrong later, and your speakers or stereo may not work correctly.
- Ignoring security features – Coded radios and anti-theft systems can leave you with a bricked unit.
A quick word on dropped screws: if it disappears into the dash, don’t go fishing with a screwdriver. A magnet on a telescopic wand is the fastest way to retrieve it.
Tips for Handling Stubborn or Hidden Panels
Factory trim panels can hide fasteners in unexpected places. Common hiding spots include:
- Behind the ashtray or coin holder
- Under rubber mats in the center console
- Inside the glove box
- Behind the OBD-II port cover
- Under vents near the windshield
If you’ve removed every fastener you can find and the panel still won’t come off, check for push-pin fasteners hidden behind a seam. These require a different removal technique than standard clips—you need to pop the center pin first, then pull the outer ring out. You can gently pry the exterior of the dashboard away to check if this is the issue.
Refer to the NHTSA’s vehicle safety resources if you’re working around airbags—it’s worth understanding the risk areas in your specific car. Conservative, patient removal is always better than speed.
Wiring Adapters and Mounting Kits
If you’re removing the old stereo because you’re installing a new one, you’ll want to gather the right adapters before you start. While the quickest approach is to use a wire harness adapter, you can often save time by learning about your car’s stereo wiring beforehand. Many installers consider harness adapters essential because they let you plug the new stereo into the factory wiring without cutting anything.
Common adapter types include:
- Wiring harness adapter – Connects the new stereo’s wires to your car’s factory plugs
- Antenna adapter – Converts the new stereo’s antenna connection to your car’s cable
- Dash mounting kit – Fills the gap between a new single DIN or double DIN unit and the larger factory opening
- Steering wheel control interface – Keeps your steering wheel buttons functional with an aftermarket radio
These aren’t expensive—a wiring adapter typically runs $15–$30—and they make installation dramatically simpler. Ask for a compatibility check at any auto parts store before you buy.
If you’re also planning to replace interior accessories at the same time, it’s a convenient moment to inspect your dashboard and seats for other maintenance needs—for example, cleaning up crumbs and debris is much easier with the console opened up, and you’ll be right there anyway. While you’re in DIY mode, it’s worth considering other simple interior upgrades—there are plenty of easy wins that make a car feel fresh again.
Reinstalling or Upgrading Your Stereo
After the old unit is out, check your new stereo’s size and connectors against the old one. If they don’t match, you’ll need a mounting kit and wiring adapter.
Here’s a quick overview of upgrade options:
| Upgrade Type | Key Features | Difficulty | Typical Cost (USD) |
|---|---|---|---|
| Basic Single DIN | Radio, CD/MP3 | Easy | $50–$150 |
| Double DIN Touchscreen | Bluetooth, Android Auto/Apple CarPlay | Moderate | $200–$600 |
| High-End Integrated | Navigation, premium sound processing | Hard | $500–$2,000+ |
Before you finalize the installation, make sure the wiring adapter is matched to your car’s harness. This is the step that determines whether the upgrade goes smoothly.
Before reassembling anything, reconnect the battery, power on the new stereo, and confirm all speakers work. Test the volume, Bluetooth, and any steering wheel controls at this stage. You don’t want to bolt everything back together and then discover a channel is dead.
When to Call a Professional
DIY removal is the right move for most cars, but some situations genuinely call for a pro:
- Integrated systems with airbags or climate controls – Fumbling near airbags is risky.
- Luxury or exotic vehicles – They often use proprietary mounting systems and data-bus wiring.
- Vehicles with complex anti-theft setups – You may need special factory tools.
- If you feel genuinely uncomfortable – Professional removal and installation typically costs $75–$150, which is well worth it if it prevents damage.
If you’re working on a newer car with a factory display that handles multiple functions, proceed with extra caution—or consult a professional. Some modern systems require software updates or coding after a stereo removal.
Frequently Asked Questions
How long does it take to remove a car stereo?
Most stereos take 30 to 90 minutes, depending on the vehicle and how many panels need to come off. Integrated units in newer cars can take up to two hours—or more.
Can removing a stereo damage my car?
Damage is rare when you use the right tools and work patiently. Most issues come from forcing panels, skipping the battery disconnect, or using metal tools on plastic trim.
Do I need special tools for my car stereo?
Some vehicles require stereo removal keys or specialized screwdrivers. Check your owner’s manual or search online for your car’s specific requirements.
Is it safe to remove a stereo by myself?
For the vast majority of cars, yes. Disconnect the battery, work slowly, and take reference photos. For complex integrated or luxury systems, consider professional help.
Conclusion
Removing a car stereo is a genuinely achievable DIY job for any careful beginner. The key is preparation: identify your mounting type, gather the right tools, disconnect the battery first, and work methodically when releasing panels and connectors.
The process comes down to a handful of steps—remove the trim, unscrew or release the unit, and carefully unplug the harness. Take photos, label connectors, and store your hardware safely. If anything feels like it’s going to break, stop and reassess.
Your next step is simple: look up the stereo removal instructions for your specific car model, assemble your tools, and tackle the job this weekend. You’ll save the labor cost, learn something about your vehicle, and be ready to install your upgraded sound system without second-guessing yourself.

Leave a Reply