
Pulling a factory radio out of a dashboard feels intimidating the first time. One wrong pry with a metal screwdriver and you can crack a trim panel, snap a clip, or short out a wiring harness. But here's the truth: most car stereos come out in under an hour with a few basic hand tools and a clear sequence of steps. Whether you're upgrading to a touchscreen unit, chasing a bad ground, or just recovering the stereo before selling the car, this guide breaks down the entire removal process from start to finish.
In practice, the difference between a smooth removal and a frustrating one comes down to preparation. Knowing exactly which fasteners hold your stereo, which connectors are behind it, and how to avoid common pitfalls will save you time and money. We'll cover the essential tools, the differences between stereo mounting types, step-by-step instructions, and the most common problems you'll encounter. You can also read our guide on best equalizer setting for car stereo.
Why Remove Your Car Stereo?
People pull their car stereos for a handful of practical reasons:
- Upgrading to a modern unit with Apple CarPlay, Android Auto, or a larger display.
- Repairing a malfunctioning radio with no sound, a dead screen, or intermittent power issues.
- Replacing a unit that's been stolen, which may require removing the damaged cage and wiring.
- Transferring the stereo to a new vehicle before selling or trading in your current car.
- Checking wiring for aftermarket installations that have developed problems.

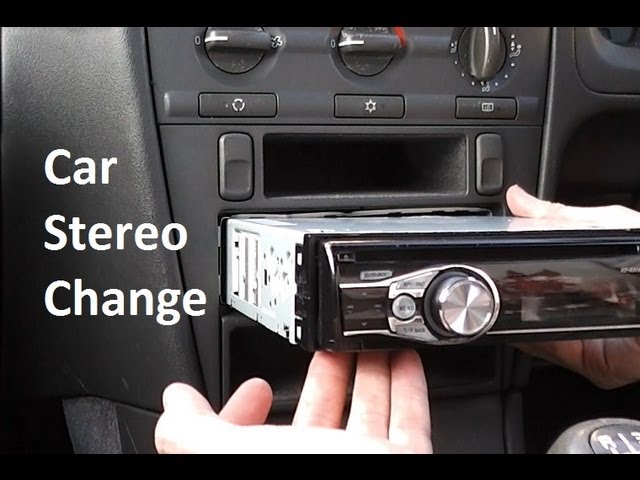
Using a plastic trim tool to carefully pry the dashboard bezel away from the stereo — patience here prevents cracked plastic.
Beyond the obvious benefits, removing a stereo yourself gives you a working knowledge of your car's electrical layout. That understanding pays off when you install the replacement, add an amplifier, or troubleshoot an issue later. You'll also save the labor cost a shop would charge, which typically runs $50–$150 depending on the vehicle.
Tools and Materials You'll Need
Having everything within reach before you start makes the job safer and far less frustrating. Here's the complete list of what you need:
| Tool | Purpose |
|---|---|
| Phillips and flathead screwdrivers | Removing screws that hold trim and mounting brackets |
| Plastic panel removal tool | Prying trim without scratching or cracking plastic |
| Stereo removal keys | Releasing factory locks on Ford, VW, GM, and other brands |
| Socket set (8mm and 10mm) | Removing bolts on metal mounting brackets |
| Flashlight or headlamp | Seeing into dark cavities behind the dash |
| Magnet tool | Retrieving dropped screws from tight spaces |
| Small container | Organizing screws, clips, and brackets |
| Electrical tape | Protecting exposed wire ends during removal |
| Masking tape and marker | Labeling connectors for easy reinstallation |
A common mistake is starting with just a flathead screwdriver and a "let's see what happens" attitude. That approach often ends with marred dashboard plastic and stripped screws. Invest the small amount it costs for a proper trim removal kit — the plastic tools are far gentler on your interior than metal.
If your car requires stereo removal keys, you can buy a universal set at most auto parts stores for around $10. They're also easy to find online for specific makes and models.
Key Differences Between Car Models
Not all stereos mount the same way, and understanding this before you begin saves you from pulling components you don't need to touch. The three main mounting types are:
- Single-DIN: A standard 2-inch tall radio slot, common in older cars and base trims. These are the easiest to remove, usually held by four screws or side-release keys.
- Double-DIN: A 4-inch tall slot used in most newer vehicles. Removal is similar, but the units are heavier and more wiring is tucked behind them.
- Integrated/Factory-Integrated: These stereos are molded into a larger dashboard assembly, often combined with climate controls, navigation, or vehicle settings. They require removing significant trim pieces and sometimes the entire center stack.
Modern vehicles from brands like Tesla, BMW, and Mercedes-Benz often integrate the stereo so deeply into the vehicle's systems that aftermarket replacement isn't practical. In these cases, professional removal is the safer route.
The year of your car matters too. A 2005 Civic has a straightforward double-DIN setup, while a 2020 model may have the radio integrated with the HVAC display and require sequential trim removal starting at the shifter console. Whenever in doubt, check YouTube for your exact year and trim level.
How to Prepare Your Car
Preparation is where most people cut corners, and it's also where the problems begin. Follow this sequence before touching a single screw:
1. Disconnect the Battery
Park on a level surface, turn the engine off, and open the hood. Use the correct socket size to loosen the negative battery terminal — usually 10mm. Pull the cable off the post and tuck it away from the battery so it can't accidentally touch and reconnect.
This single step prevents:
- Short circuits that can blow fuses or damage the stereo's internal circuitry.
- Accidental airbag deployment if you disturb wiring, though this is rare, the risk is real.
- The stereo's theft code triggering if you disconnect power while the unit is still installed.
A common mistake is skipping battery disconnect because the stereo removes easily. In practice, it takes 30 seconds and eliminates the most dangerous failure mode — a live wire grounding against the metal dashboard frame.
2. Clear a Workspace
Remove loose items from the dashboard, center console, and cup holders. Drop something between the seat and center console and you're spending the next ten minutes fishing for it. Lay a microfiber towel or moving blanket over the transmission tunnel and steering column to protect surfaces from tools and screwdriver slips.
3. Document Everything
Before you disconnect anything, take photos with your phone. Capture the full dash, the trim panels, and every angle of the stereo's face. These photos become your reference during reassembly. A picture of the wiring harness configuration alone can save you an hour of confusion later.
Step-by-Step Guide: Removing Your Car Stereo
With your car prepped and tools laid out, here's the exact process for removing your stereo.
1. Remove Trim Panels
Most stereos are hidden behind a plastic bezel that surrounds the radio, climate controls, and vents. Use your plastic panel removal tool to gently pry at the seams.
Start at the bottom edge or a corner, where the clips are easiest to release. Insert the tool at a shallow angle, twist gently to separate the panel, then slide it along the seam to pop the remaining clips. Work slowly and evenly — the plastic gets brittle with age and heat exposure, especially in older cars.

Inserting factory stereo release keys evenly on both sides to unlock the radio from its cage.
Pro tip: If the trim feels stuck, check for hidden screws. They're commonly located in:
- Inside air vents
- Behind the cigarette lighter
- Under rubber mats or storage compartments
- Behind the lower knee panel
Forcing a panel that has hidden screws will crack it. Take an extra minute to search before you pry harder.
2. Unscrew the Stereo Mount
With the trim removed, you'll see the mounting screws or bolts. They're typically 8mm, 10mm, or Phillips head. Remove them all and place each one in your small container.
Some vehicles use metal side brackets that must be removed separately. Look behind the faceplate for additional bolts — these hold the stereo cage in place and must come out before the unit slides free.
3. Release the Stereo Lock
If using stereo removal keys: Insert the keys into the slots on the front face of the stereo until they click. This releases the factory locking clips. Pull the keys outward simultaneously to slide the unit out of its cage.
If using screw mounts: With all screws removed, gently pull the stereo toward you. If it resists, wiggle it side to side slightly — this frees the locking tabs without forcing them.
Non-obvious insight: Some European and Asian cars use a two-stage locking system where the keys must be inserted at an angle, then rotated before the unit releases. Check your vehicle-specific guide if the keys won't seat fully.
The wiring harnesses behind most stereos — labeling these before disconnection makes reinstallation straightforward.
4. Disconnect the Wiring Harnesses
Pull the stereo out just enough to access the back. You'll typically find:
- Main power/speaker harness: The largest connector with multiple colored wires.
- Antenna cable: Thick, round, or rectangular plug carrying radio signal.
- Auxiliary connectors: For steering wheel controls, USB ports, or amplifiers.
Each connector has a release tab that must be pressed or lifted before it detaches. Never yank the wires — press the tab and pull the connector body gently. Label each connector with masking tape as you remove it. This is especially important if you're installing a new stereo and need to match the wiring.
A common mistake is pulling on the wires instead of the connector itself. This can bend pins, fray wires, or break the plastic housing. If you squeeze the connector's release tab and rock it gently, it should come free with minimal effort.
5. Remove the Antenna Cable
The antenna cable is usually thicker than the others and has a distinct plug. Press any locking tab, then wiggle it out gently. On most vehicles, you'll find it on the left or right side at the back of the stereo.
In rare cases, the antenna connection is under a separate metal cover or clip. Do a visual check before forcing the cable — they slide straight out when properly released.
6. Inspect and Store the Stereo
Once free, examine the connectors for bent pins, corrosion, or damage. If you plan to reinstall the same unit, keep it in a safe place wrapped in a soft cloth. If you're selling it, pack it in a box with bubble wrap — a working stereo with a clean faceplate sells for significantly more than one with scratches.
Table: Common Car Stereo Connectors
| Connector Type | Purpose | Notes |
|---|---|---|
| Main Wiring Harness | Power, ground, speaker signals | Largest plug with multi-colored wires |
| Antenna Cable | Radio signal reception | Thick cable with round or rectangular plug |
| Steering Wheel Control Wire | Button functions | Thin, often labeled with a specific color code |
| USB/Aux Ports | Media input | Small connectors, sometimes integrated into the harness |
| Amplifier Lead | Remote power for external amps | Not present in all vehicles |
Understanding these connectors before you start prevents two common mistakes: pulling a connector the wrong way, and accidentally damaging a harness you actually need for the new stereo.
Special Cases and Common Problems
Even with careful preparation, you may hit a snag. Here's how to handle the most common ones.
Integrated Stereos
Modern vehicles like many Chrysler, Ford, and European models integrate the stereo with climate controls and vehicle settings. Removing these requires removing the entire center console assembly.
The process typically involves:
- Removing the lower trim panels near the footwell.
- Unscrewing the center console side panels.
- Disconnecting the shift indicator and accessory switches.
- Lifting the entire stack assembly straight up and out.
This is significantly more labor-intensive. If you're not confident, it's worth getting a quote from a professional before starting.
Security Codes
Many factory stereos, particularly from Honda, BMW, and European brands, require a security code after being disconnected from power. If you reinstall the same unit and it asks for a code, check your owner's manual or the stereo's documentation.
If you can't find the code, the dealer can provide it using your VIN. Some brands charge for this, so it's worth checking before you disconnect.
Stuck or Broken Clips
Plastic clips break frequently on older vehicles because heat cycles make the plastic brittle. If a clip breaks, don't panic. Replacement clips are available at auto parts stores and online for a few dollars.
Pro tip: If a panel has multiple broken clips by the time you get it off, consider replacing the panel entirely — reattaching with zip ties or adhesive never holds as well.
Airbags and Electronics
Pay special attention to any yellow or orange connectors behind the dash. These are airbag system components and must never be disconnected while the battery is connected. Even with the battery disconnected, it's best to leave these connectors untouched entirely.
If removing the stereo requires moving the airbag harness, take additional care or consult a professional.
Table: DIY vs. Professional Removal
| Factor | DIY | Professional |
|---|---|---|
| Cost | Just your tools | $50–$200+ labor |
| Time | 1–2 hours | 30–60 minutes |
| Risk of Damage | Medium if rushing | Low |
| Learning Experience | High | None |
| Warranty Impact | Possible | Usually covered |
Honest assessment: For a simple single-DIN or double-DIN install on a mainstream car, DIY is a no-brainer. You save money and learn your vehicle. For complex integrated systems or vehicles under warranty, a professional's peace of mind is often worth the cost.
Practical Tips for a Smooth Job
These small habits separate a clean removal from a frustrating one:
- Take photos at every step, especially before disconnecting wiring.
- Keep every screw and clip in a labeled container — they're not all the same size.
- Don't force anything. If a panel or connector resists, stop and look for hidden fasteners or tabs.
- Label every connector with masking tape before you remove it.
- Use the correct screwdriver size. A stripped screw in a plastic mount is a nightmare to extract.
Hidden detail: Some cars use anti-theft bolts with specialized heads that require a security socket. These are uncommon but worth checking for before you start. If you find them, auto parts stores sell the matching sockets.
Reinstalling or Upgrading Your Stereo
If you're installing a new stereo, reverse the removal steps. Before you go shopping for a new unit, check compatibility with your car's wiring and mounting system. Most aftermarket stereos come with adapter kits that make the installation straightforward.
One critical step: Reconnect the battery last — only after everything is plugged in and secured. This prevents power surges from damaging your new stereo.
If you're upgrading to a modern unit, check our detailed guide to changing your stereo's language for configuration tips after installation.
Safety Notes
- Disconnect the battery negative terminal first — always reconnect it last.
- Never touch airbag wires or modules — their connectors are yellow or orange for a reason.
- Work in a well-lit garage with the car parked on level ground.
- If you're unsure about any step, stop and get help. The cost of a professional is nothing compared to the cost of a destroyed dashboard.
Frequently Asked Questions
How long does it take to remove a car stereo?
For most mainstream cars, plan on 1–2 hours if it's your first time. Basic single-DIN units in older cars can take as little as 20 minutes. Complex integrated systems can take 3–4 hours or more.
Do I need special tools to remove my stereo?
Some cars require stereo removal keys or security sockets. Most jobs only need basic hand tools: screwdrivers, sockets, and a plastic trim tool. Check your owner's manual or search for your specific car model to confirm before you start.
Will removing the stereo affect my car's warranty?
If your car is under warranty, removing the stereo could impact coverage on the electrical system. The Magnuson-Moss Warranty Act protects consumers from warranty denial due to aftermarket parts, but manufacturers can deny claims if they can prove the modification caused the failure. Check your warranty terms carefully.
What if my car stereo asks for a security code after reinstalling?
Many factory stereos have a security code that reactivates after power loss. Look for the code in your owner's manual, on a card in the glovebox, or request it from a dealer using your VIN.
Can I reuse my old stereo in another car?
It depends on the wiring and mounting compatibility. You may need an adapter kit for the new vehicle's harness. Features like steering wheel controls often require additional modules to work with a stereo from a different car. Removing pet hair from seats isn't the only prep work — the stereo's fitment and wiring are the bigger challenges.
Conclusion
Removing a car stereo is a genuinely accessible DIY project for most vehicles. With the right tools, proper battery disconnection, and a methodical approach to trim removal and wiring, you can complete the job in an afternoon and save $100 or more in labor costs. The keys are patience, correct technique, and good documentation of what you remove.
Your next step: Before you touch the dash, watch a dedicated removal video for your exact year and trim level. Then gather your tools, disconnect the battery, and take your first trim panel photo. If you run into an unexpected issue, check our blog for more hands-on automotive guides.

Leave a Reply