
Wiring a car stereo without a harness sounds intimidating, but it's a job almost anyone can handle with the right preparation. Maybe you bought a used car with the factory plug cut off, or you're upgrading an older stereo and the adapter harness is no longer made. Whatever the reason, bypassing the harness is a straightforward process once you understand what each wire does.
This guide walks you through the entire job—from gathering tools to testing the finished install—so you can get clean, reliable sound without paying a shop for labor. By the end, you'll know exactly how to wire a car stereo without a harness, what mistakes to avoid, and when it's smart to stop and call a professional. For more on this, see our guide on what gauge is car stereo wire.
Why You Might Need to Skip the Harness
A stereo wiring harness is a plastic plug that connects your new head unit to the car's factory wiring. It makes installation plug-and-play: match the wire colors, crimp or solder, and you're done. But harnesses aren't always an option. Here are the most common situations:
- Missing or damaged factory plugs — A previous owner may have cut the harness, or the connector is broken.
- Older or uncommon vehicles — Some cars simply never had a widely available aftermarket harness made for them.
- Custom projects — Classic cars, kit cars, and restorations often have wiring that doesn't match standard connectors.
- Factory amplifier bypasses — Bypassing a factory amp sometimes means wiring directly to the speaker outputs.
Direct wiring takes more time than plugging in a harness, but it gives you complete control over every connection. You can route wires exactly where you want them, troubleshoot each circuit individually, and often finish the job for less money.
Tools and Materials You'll Need
Before you touch a single wire, gather everything below. Running to the store halfway through a wiring job is both frustrating and risky—you may be tempted to rush. For more on this, see our guide on how to fix car stereo touch screen.
| Tool / Material | Why You Need It |
|---|---|
| Wire strippers | Cleanly remove insulation without nicking the copper |
| Crimp connectors or soldering iron | Secure, lasting wire joints |
| Electrical tape or heat-shrink tubing | Insulate and protect connections |
| Multimeter | Verify power, ground, and speaker wires |
| Screwdrivers (Phillips and flathead) | Remove trim panels and the old stereo |
| Panel removal tool | Pop clips without scratching interior plastic |
| Zip ties | Bundle wires away from moving parts |
| Wiring diagrams | For both your vehicle and the new stereo |
| Wire labels or tape + marker | Tag each wire before disconnecting |
The wiring diagram is the most important item on this list. Your stereo's manual includes a color chart for its own wires, and most vehicle manufacturers publish factory wiring diagrams online. Having both in front of you prevents guesswork.
Understanding Car Stereo Wiring Basics
Every car stereo wire has a specific job. Before you start connecting things, memorize this standard color coding:
| Wire Color | Function | Common Label |
|---|---|---|
| Yellow | Constant 12V power (battery) | BATT / MEM |
| Red | Switched power (ignition) | ACC / IGN |
| Black | Ground | GND |
| Blue / Blue-White | Power antenna / amplifier remote | ANT / REM |
| White / White-Black | Front left speaker (+/−) | FL |
| Gray / Gray-Black | Front right speaker (+/−) | FR |
| Green / Green-Black | Rear left speaker (+/−) | RL |
| Purple / Purple-Black | Rear right speaker (+/−) | RR |
Important: These colors are standard for aftermarket stereos, not necessarily for your vehicle. Factory wire colors vary wildly between manufacturers, and even between model years. Always confirm each wire's function using your vehicle's diagram and a multimeter—never trust color alone. For more on this, see our guide on how to connect phone to car stereo.
The two power wires deserve extra attention. The yellow constant wire keeps the stereo's memory alive (presets, clock, settings) and must be connected to a circuit that has power at all times. The red switched wire turns the stereo on with the ignition, so the unit doesn't drain the battery when the car is parked. Swapping these two is one of the most common mistakes—the stereo plays but forgets your presets every time you shut the car off.
Step-by-Step: How to Wire a Stereo Without a Harness
Follow these steps in order. Rushing is the main reason people end up with crackling speakers or a dead head unit.
1. Disconnect the Battery
Always disconnect the negative battery terminal before working on any car electrical system. This protects you from shocks and prevents a short from frying your new stereo—or worse, damaging the vehicle's computer modules. Remove the negative cable and tuck it away so it can't touch the terminal.
2. Remove the Old Stereo
Use panel removal tools to pop off the trim bezel, then unbolt the stereo with the appropriate sockets or screwdrivers. Slide the unit out far enough to access the wiring. If the factory plug is still attached, cut it off—but leave a generous length of wire (6–8 inches) so you have room to work and can reattach a harness later if you change your mind.
3. Identify Every Wire
This is the step that separates good installs from frustrating ones. Using your vehicle's wiring diagram and a multimeter, verify each wire's function:
- Constant 12V — Reads battery voltage at all times.
- Switched 12V — Reads voltage only with the key in the ACC or ON position.
- Ground — Shows continuity to the car's metal chassis.
- Speaker wires — Check for pairs using the diagram; test with a 9V battery (the speaker cone should pop outward on positive).
Label each wire immediately with tape and a marker or numbered tags. Future-you will be grateful.
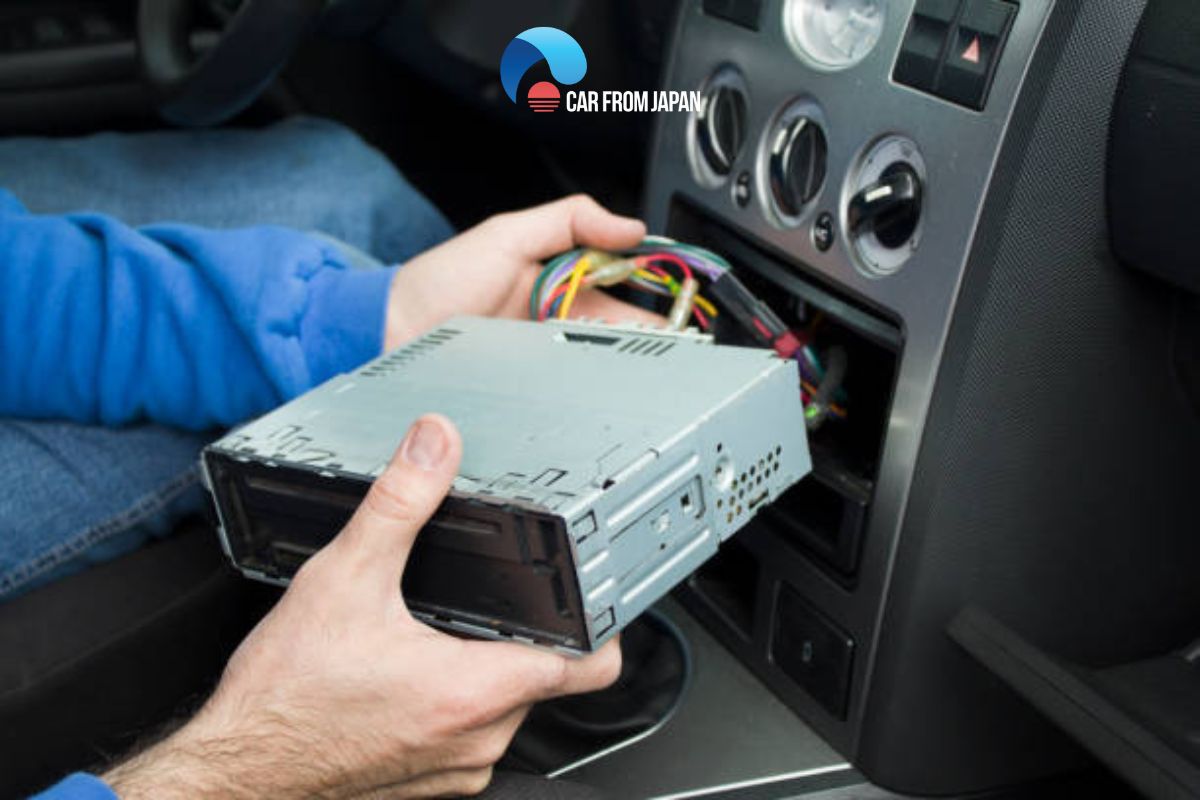
Labeled factory wires laid out before connecting the new head unit—the step most installers skip and later regret.
Credit: carfromjapan.com
4. Prepare the Wires
Strip about 1/2 inch of insulation from each wire. Twist the strands together firmly so they don't fray. Decide between crimp connectors and soldering:
- Crimping is faster, requires no heat, and is perfectly reliable when you use quality connectors and a proper crimping tool. Good for beginners.
- Soldering creates the strongest, most corrosion-resistant joint, but takes practice. A poor solder joint—cold, dull, or lumpy—is worse than a good crimp.
In practice, I recommend crimp connectors with heat-shrink ends for most home installs. They're forgiving, insulated, and take minutes rather than hours.
5. Match Stereo Wires to Car Wires
Connect the wires by function, not by color. Match the stereo's yellow wire to the car's constant power, the stereo's red to the car's switched power, and so on. For speakers, connect positive to positive and negative to negative—reversing polarity on one speaker will make the bass sound thin and weak.
6. Secure Each Connection
Crimp or solder every joint, then cover it with heat-shrink tubing or electrical tape. Pull gently on each connection to make sure it's solid. Inspect for stray strands that could touch adjacent wires and short out. A single loose strand can cause intermittent static or a blown fuse.
7. Organize and Tuck the Wiring
Bundle wires with zip ties and route them away from moving parts—pedals, steering column, and heater ducts. Avoid sharp metal edges that can chafe through insulation over time. Leaving wires dangling is the leading cause of stubborn electrical gremlins months later.
8. Test Before Reinstalling
Reconnect the battery, turn the key to ACC, and test everything before sliding the stereo back in. Check power, all four speakers, balance and fade, and any extras like the antenna or amp remote. If something isn't working, use your multimeter to trace the circuit now—it's far easier with the unit still out of the dash.
9. Reinstall and Recheck
Once everything works, slide the stereo into the dash, replace the mounting screws, and snap the trim back on. Then test one final time—it's not uncommon for a wire to shift or loosen while seating the unit.
Common Mistakes and How to Avoid Them
Even experienced DIYers make these errors. Here's what to watch for:
- Mixing up the two power wires — Swapped constant and switched power means lost presets or a drained battery. Verify both with a multimeter before connecting.
- Reversed speaker polarity — One speaker out of phase causes weak bass. Test polarity with a battery or listen carefully.
- Poor grounds — A bad ground causes buzzing, interference, or no power at all. Connect to bare, clean metal—not painted surfaces or existing bolts with corrosion.
- Ignoring fuse ratings — Your stereo needs a fuse matching its amperage (usually 10–15A). Never install a larger fuse to compensate for a short; that's a fire risk.
- Using the wrong wire gauge — Factory wires are thin and may not handle a high-power amp. For power and ground runs to an amplifier, step up to 8–4 gauge as needed.
Another subtle problem: some vehicles share a single wire for multiple functions, like two speakers sharing a common ground. If you assume every wire has a unique job, you'll miswire the system. Always confirm with the factory diagram.
Harness vs. Direct Wiring: Which Is Better?
| Feature | Using a Harness | Direct Wiring |
|---|---|---|
| Install speed | Fast, plug-and-play | Slower, manual connections |
| Error risk | Low | Higher, but manageable |
| Cost | Higher (adapter purchase) | Lower |
| Customization | Limited by connector | Full control |
| Troubleshooting | Easy to swap out | Must trace individual wires |
| Vehicle compatibility | Not always available | Works on nearly everything |
Direct wiring isn't automatically "better"—but it's the right choice when no harness exists, and it gives you maximum flexibility for custom setups. If you take your time and label everything, the end result is just as clean as any harness install.
Practical Tips for a Professional Finish
A few habits separate a tidy, durable install from a mess behind the dash:
- Photograph the original wiring before cutting anything. Your phone's camera is a free insurance policy.
- Test speaker polarity with a 9V battery — push the cone outward means positive to positive.
- Use heat-shrink tubing instead of tape where possible. It never unravels and looks factory-clean.
- Label wires with tags even if you think you'll remember them. Months later, you won't.
- Check the stereo's language settings after installation — a new head unit often defaults to a language you may want to switch for easier menu navigation.
- Clean up the interior once the dash is back together. A stray screw or trim clip under the seat is a rattle waiting to happen.
A Real-World Example: Wiring a 2005 Toyota Corolla
Imagine you have a 2005 Corolla with a missing harness and a new Sony head unit to install. After removing the old radio, you find eight speaker wires, three power wires, and two unknowns.
Using the Toyota factory diagram and a multimeter, you confirm: the thick yellow wire is constant power, the thin red is switched, and the black with a ring terminal is ground. You label everything, then connect the Sony's wiring function-by-function. The speakers map out correctly—front left, front right, rear left, rear right.
You solder each joint, cover with heat-shrink, and bundle the wires cleanly. Testing reveals one silent speaker. A check of the diagram shows that rear speaker shared a chassis ground with another circuit. You correct the connection, and the sound returns.
The whole job took about two hours. A shop would have charged $100–$200 for the same work.
Safety and Legal Considerations
Your safety—and your car's—matters more than any audio upgrade. Follow these non-negotiables:
- Always disconnect the battery before wiring. Even a momentary short can damage sensitive electronics.
- Route wires away from hot or moving parts. Exhaust components and steering shafts are the usual culprits.
- Never run power wires through the same path as RCA cables — this causes audible alternator whine.
- Respect local regulations around backup cameras and other driver-assistance features. Several jurisdictions require displays to be mounted in specific positions, and distracted-driving laws may restrict certain types of video playback while the car is moving.
- Take extra care with airbags. If you're removing panels near the airbag system, work gently and avoid cutting wires you can't identify.
If your vehicle has a factory amplifier, CAN-bus electrical system, or door-mounted speakers with complex crossovers, direct wiring gets significantly more complicated. That's not a failure—it's the right time to consider help.
When to Call a Professional
Some situations genuinely call for an expert. Get professional help if:
- You don't have a reliable wiring diagram for your vehicle.
- The car has a factory amp, CAN-bus data system, or noise-canceling audio.
- You smell burning plastic or see sparks during testing.
- The stereo won't power up after several careful attempts.
- You're uncomfortable working near airbags or with live power circuits.
A $100–$150 install fee is far cheaper than replacing a damaged stereo or repairing a fried electrical system. There's no shame in knowing your limits.
Where to Find Reliable Wiring Diagrams
Your vehicle's factory service manual is the gold standard. Many are available online through enthusiast forums and repair-database subscriptions. The aftermarket audio community at Crutchfield publishes free vehicle-specific wiring guides that save hours. For older cars, printed manuals like Haynes or Chilton remain excellent resources.
For safety-related questions about your vehicle's electrical system, the National Highway Traffic Safety Administration (NHTSA) maintains recalls and technical information that can flag known wiring issues for your exact model.
Avoid random diagrams from image searches—one wrong wire assignment can damage your stereo or, worse, start a fire. Cross-reference at least two sources before trusting a diagram.
Frequently Asked Questions
What if my car's wire colors don't match the stereo's?
This is completely normal. Use your factory wiring diagram and a multimeter to identify the function of each wire. Color is only a starting point—never a guarantee.
Can I use household electrical wire for my car stereo?
No. Automotive wire is engineered for vibration, temperature extremes, and fuel/oil exposure. Household wire uses solid copper that fatigues and cracks, creating a fire hazard. Always use stranded copper wire rated for automotive use—usually 18 gauge for speaker circuits and 14–16 gauge for power.
How do I fix speaker buzzing after wiring?
Buzzing usually points to a bad ground or a wire routed too close to a power source. Check all grounds are on bare metal, ensure both power and signal wires are properly separated, and verify each speaker connection is tight.
Is soldering better than crimping?
Soldering creates the most reliable electrical joint, but only if done well. A cold solder joint—dull, grainy, or unmelted—is worse than a quality crimp. For beginners, good crimp connectors with heat shrink are the safer choice.
Will direct wiring void my car's warranty?
Modifying the factory electrical system can void warranties on affected components. For example, cutting factory speaker wires may void coverage on the audio system, but not the engine. If you're concerned, check your warranty terms or ask the dealer before starting. Aftermarket stereo installation doesn't automatically void a new-car warranty in most jurisdictions, but it's always wise to confirm.
What wire gauge should I use?
Standard speaker and power connections handle 18–16 gauge fine. For amplifier power runs, use 12–8 gauge depending on length and current draw. When in doubt, go thicker—undersized wire is both a performance bottleneck and a safety risk.
Conclusion
Wiring a car stereo without a harness is entirely doable for a careful DIYer. The keys are simple: gather the right tools, identify every wire with a diagram and multimeter, connect by function rather than color, secure each joint properly, and test before reinstallation. Avoid the common pitfalls—swapped power wires, bad grounds, and loose connections—and you'll enjoy clean, reliable sound for years.
If you get stuck, stop. A professional install costs a fraction of what replacing damaged electronics will. And once your stereo is in and working, the effort is worth it: a system you installed yourself, tailored exactly to your car.
Ready to get started? Set aside an afternoon, print your wiring diagram, and grab your multimeter. For more tips on getting the most from your car's interior, like cleaning up after the job or keeping your cabin in top shape, check out our other maintenance guides—and enjoy the sound of a job well done.

Leave a Reply